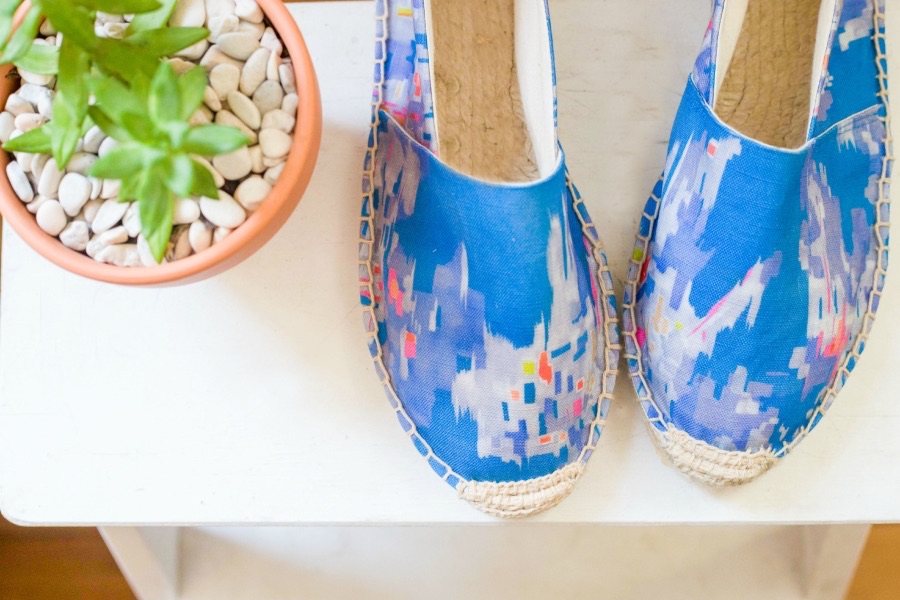
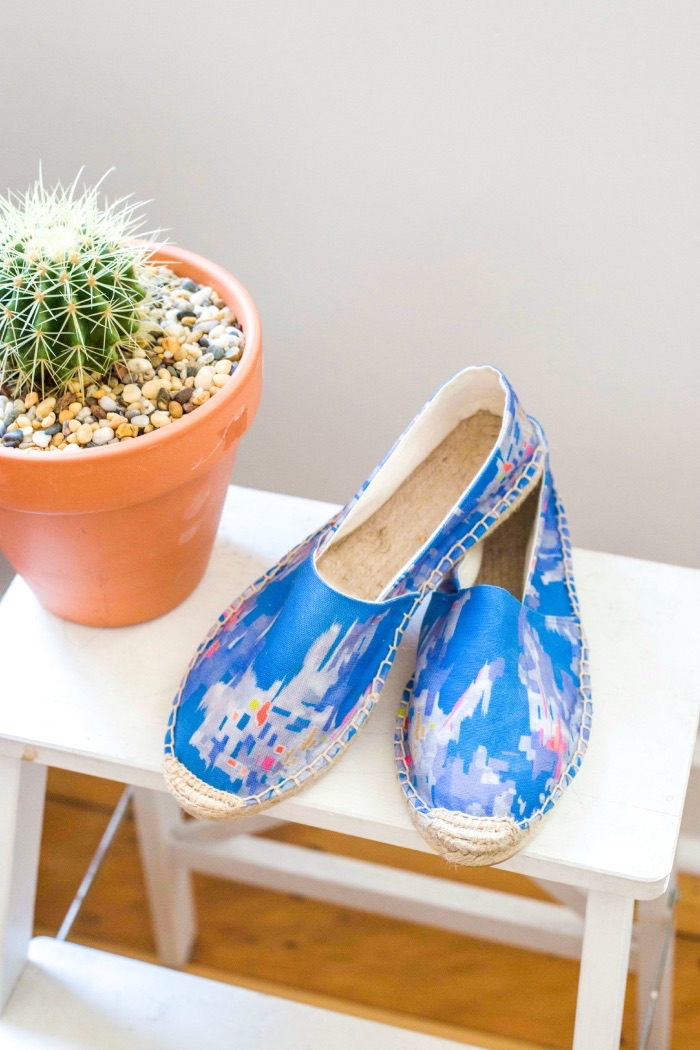
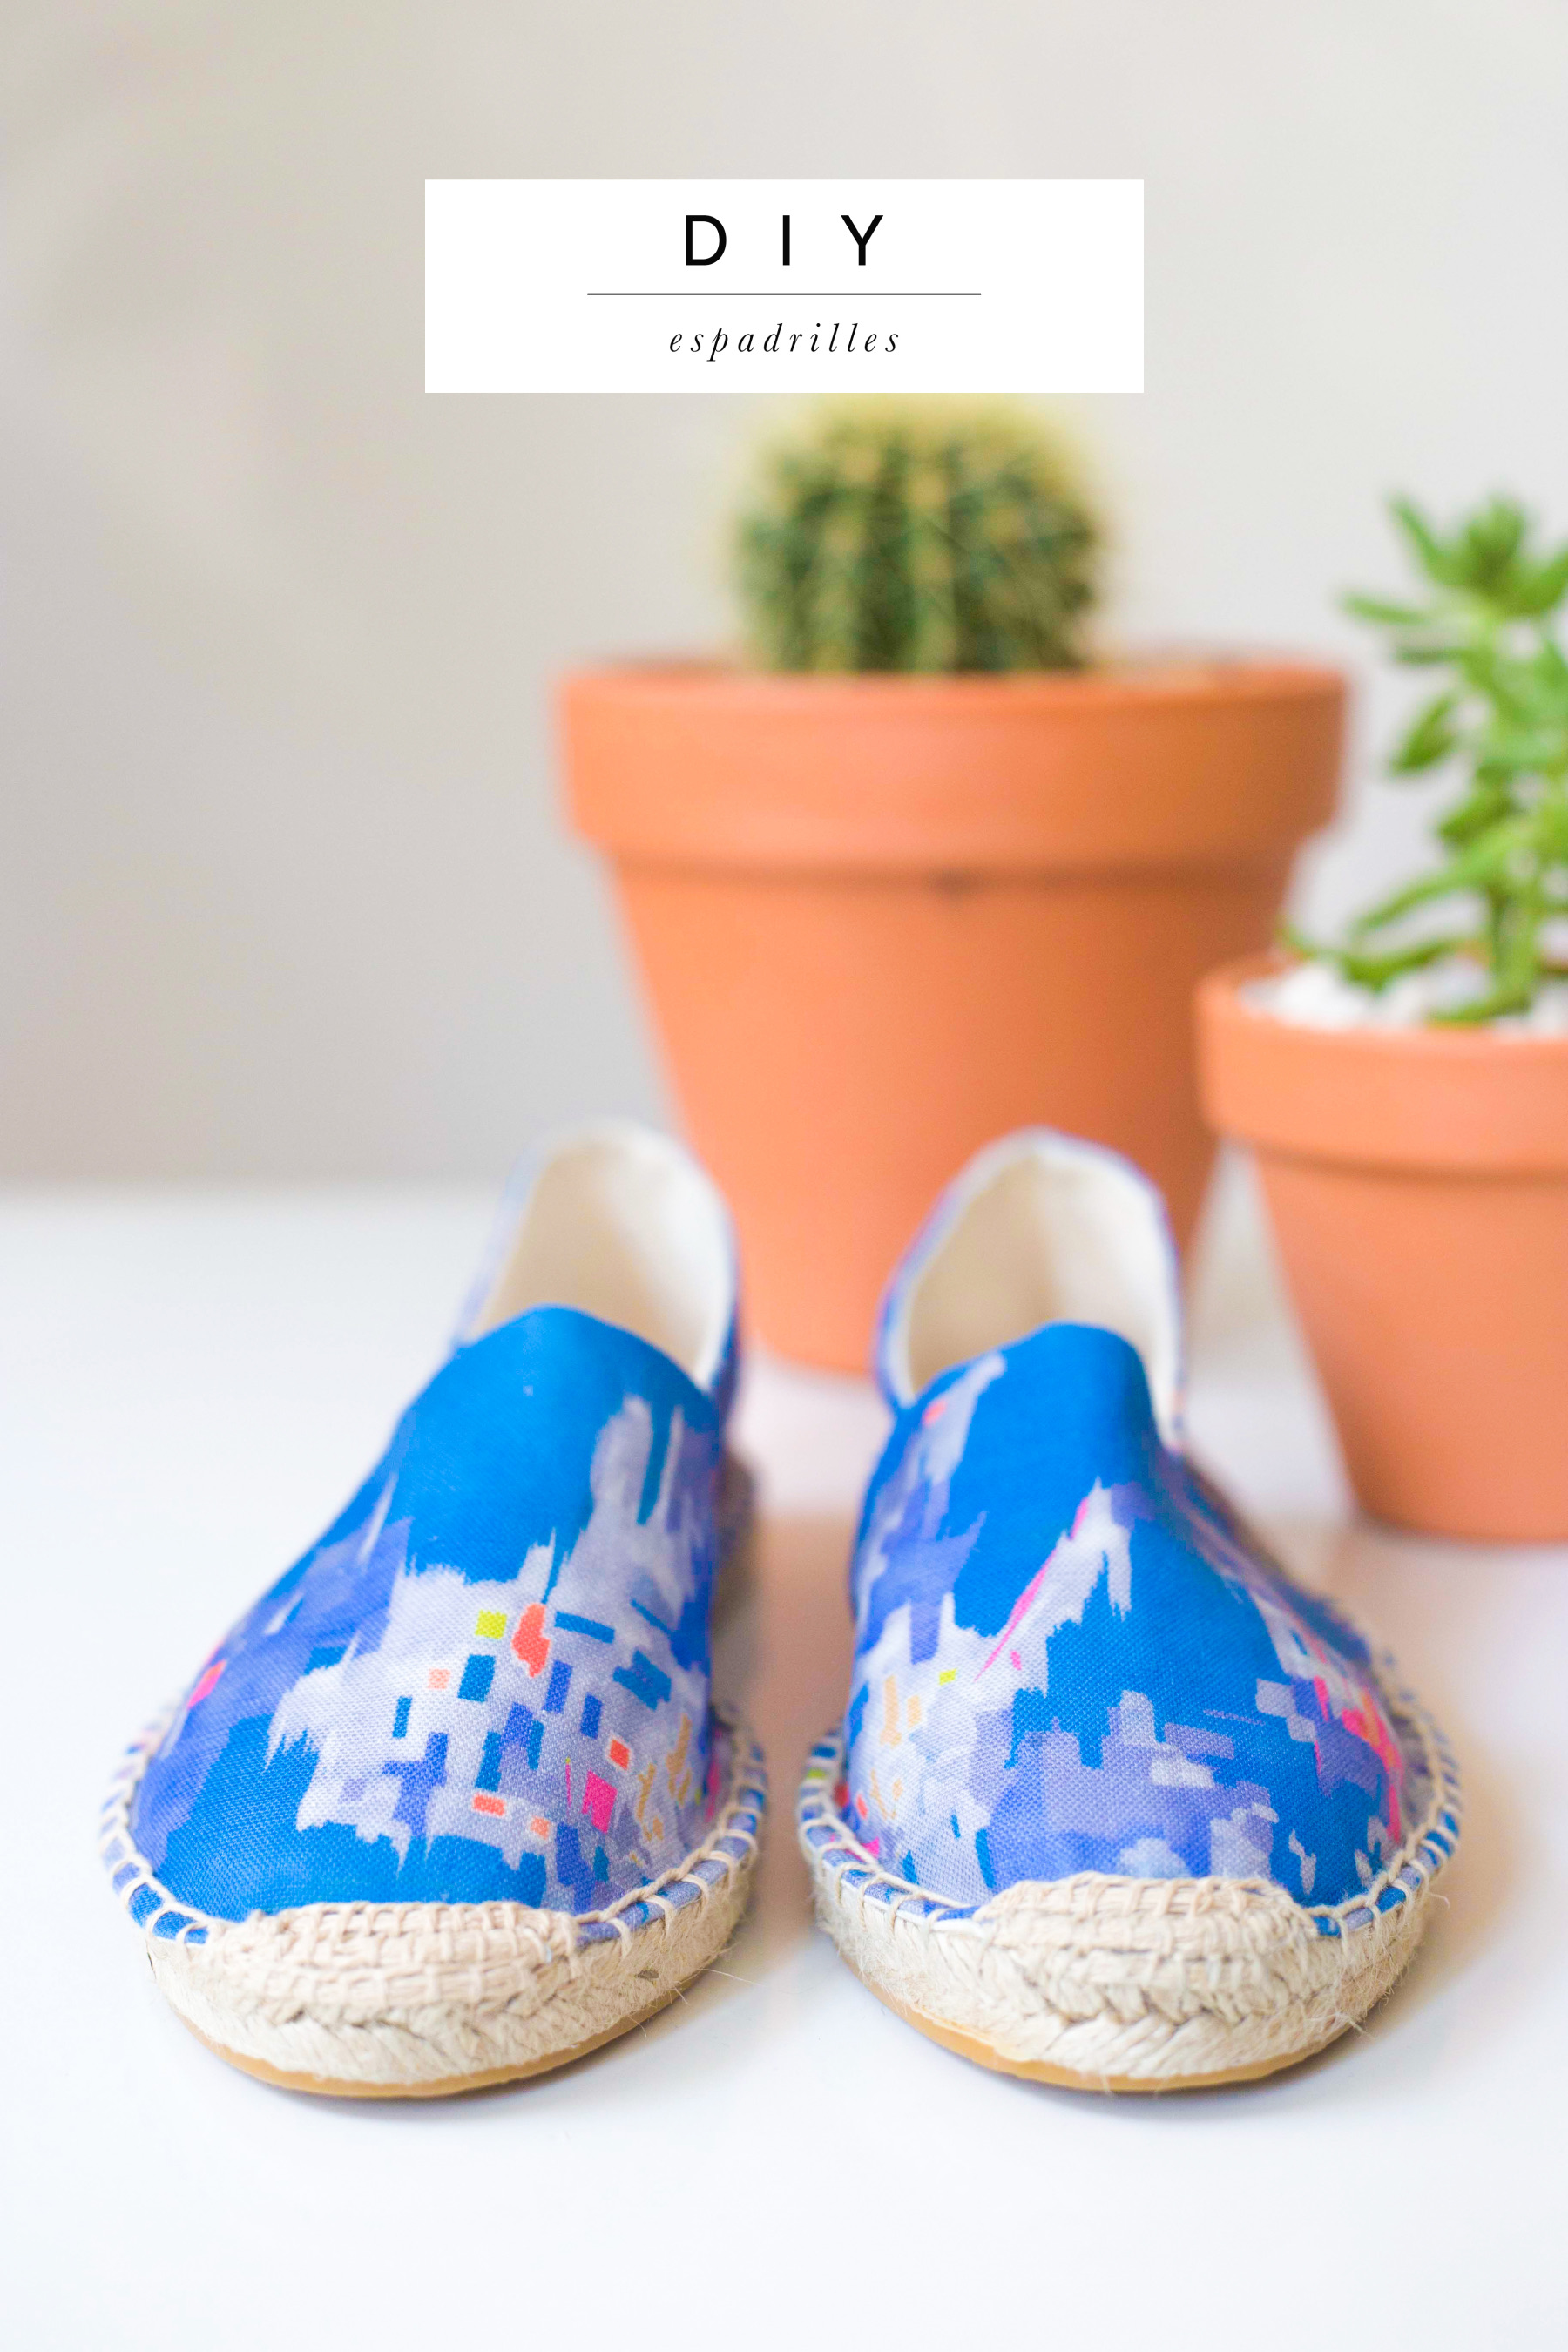
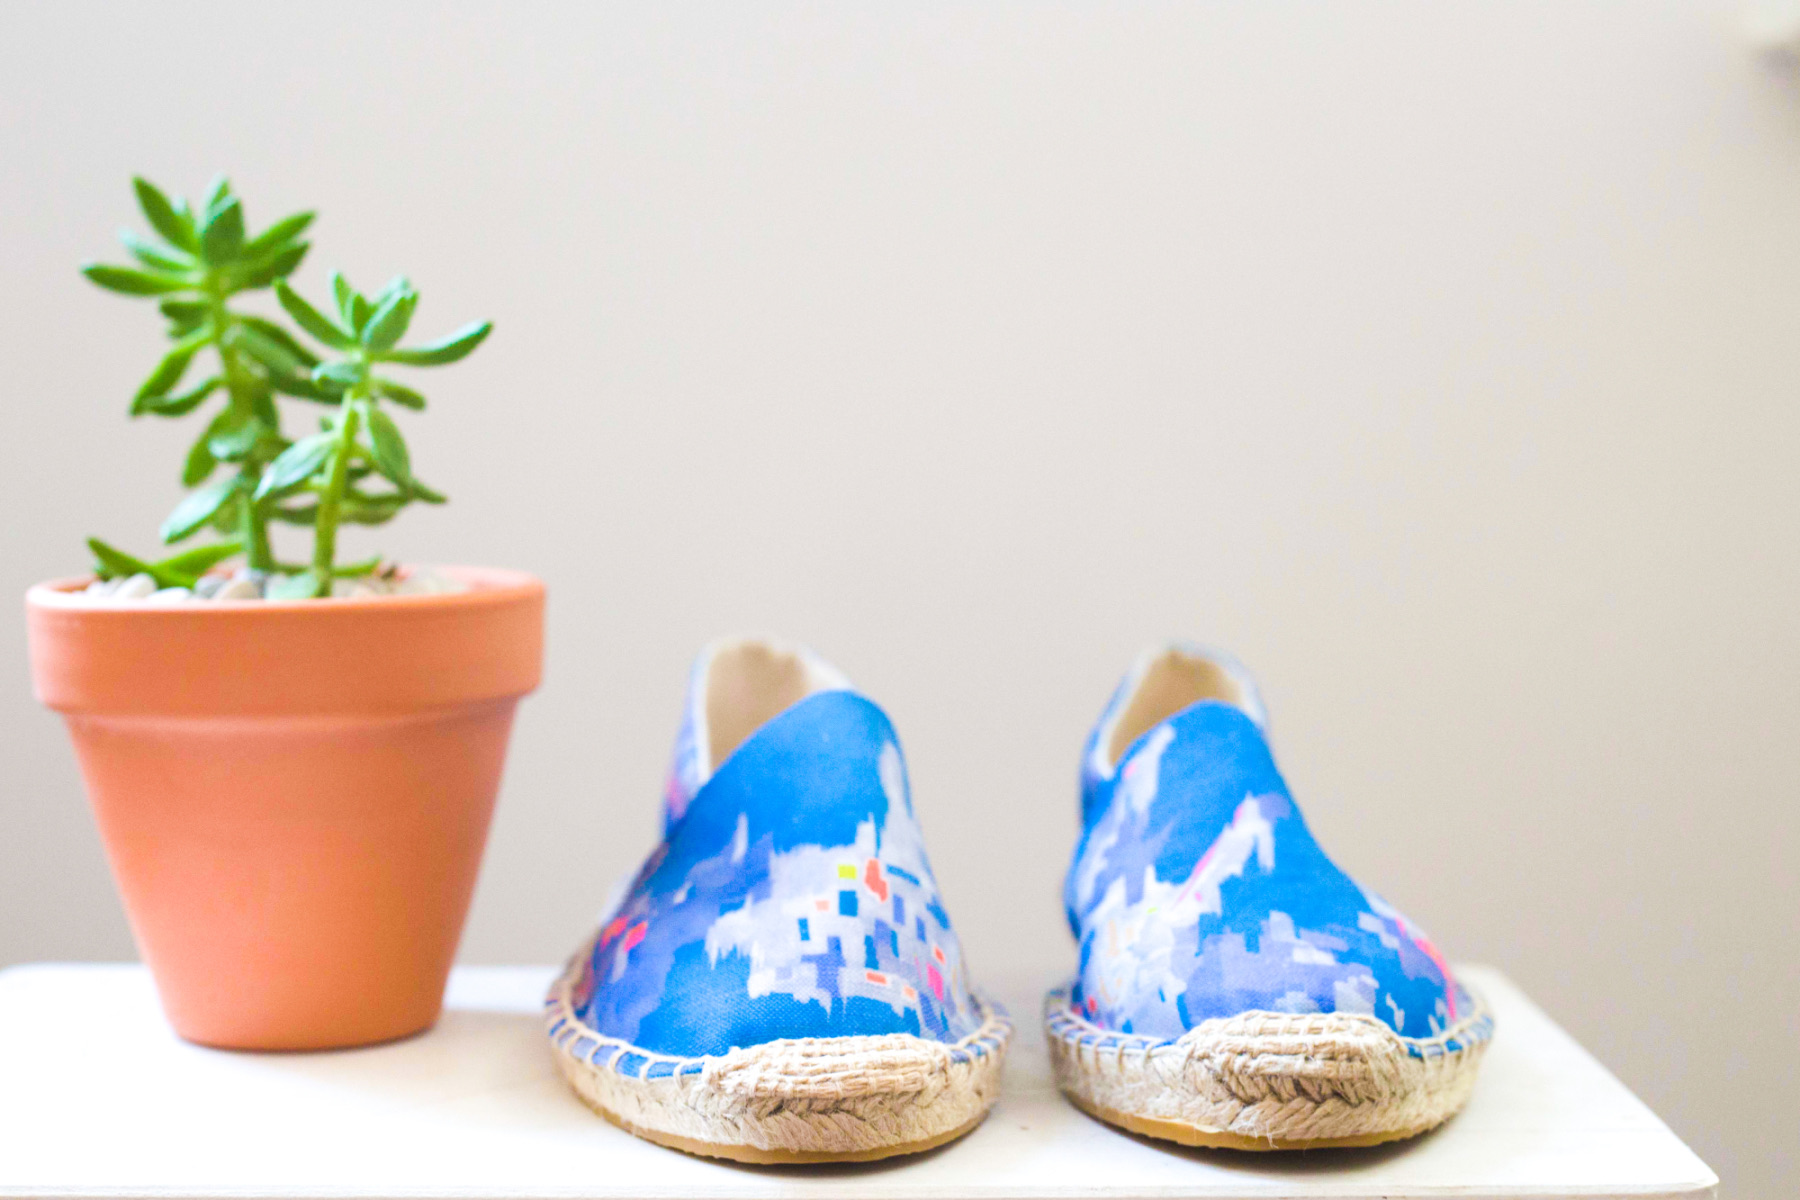
 Hello my loves! Today I have a tutorial for your that is pretty much the best thing since sliced bread: DIY ESPADRILLES! If you’ve been following my Insta feed you would have seen sneak peaks posted along the way. It has taken every shred of will-power not to post the entire tutorial there. I’m going to be straight with you: there is nothing too technical here. They don’t even take that long. But there is some grunt-work. At the end of which you will have DIY’d yourself a freakin pair of shoes! Like, real shoes you can actually wear. Alternatively you may want to display them somewhere high-vis with good traffic flow and bask in their attention for a while. Are you ready?!
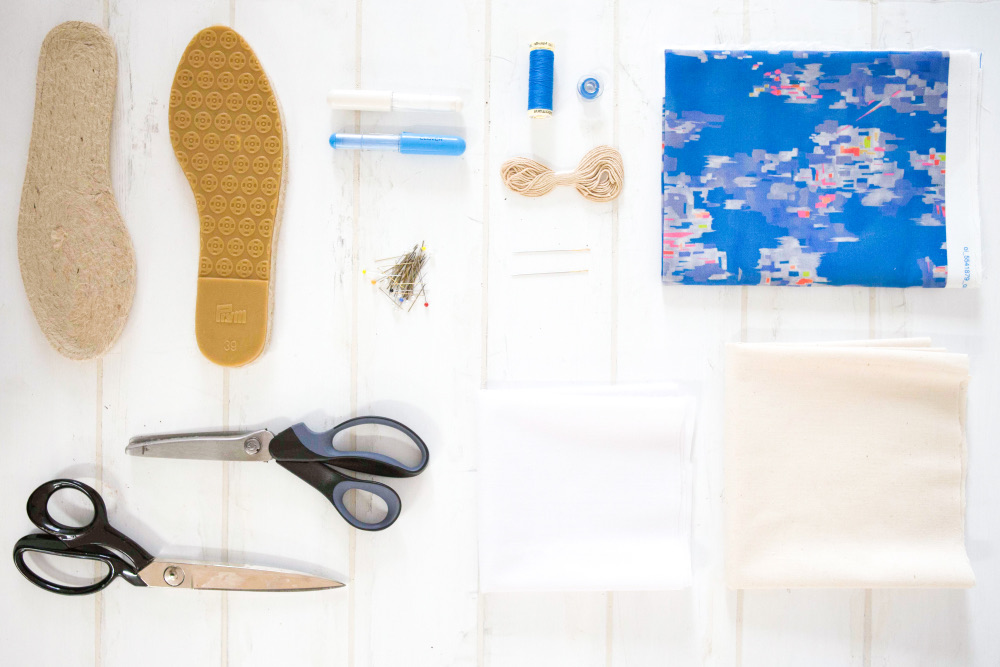
You will need:
Pair espadrille soles | chalk pencil(s) | pins | .5 m main fabric | matching thread (blue here) | espadrille yarn | darning needles | fabric scissors | pinking sheers – optional | fusible interfacing | .5 m lining fabric | tracing paper | hand needles – optional | measuring tape | iron | sewing machine
S o l e s are sold in a kit by Prym and includes the pattern for the shoes and no instructions. They are a new product but widely available; a quick Google search turns up all the online retailers, including Amazon. I ordered mine from Etsy. Simply choose your size (sizing is European) and gulp down that postage cost.
Y a r n is used for that special stitch that goes around the edge of Espadrilles. It basically holds the whole shebang together. Prym produces an ‘Espadrille yarn‘ in a 7 meter length (approx 23 feet); enough for one complete pair of espadrilles.It comes in a variety of colours but if you’re an Espadrille purist then it’s the natural coloured yarn, listed as ‘beige’ or ‘sand’ that you want. Personally I think this looks the most authentic! If you can’t get your hands on the Prym version, any strong cotton yarn (slightly thicker than embroidery thread) will work.
D a r n i n g N e e d l e s are available in any haberdashery section in a range of different sizes. For convenience I ordered Prym needles, or ‘yarn darners’. They come in a pack of six, with three sizes between 1/0 and 5/0. If these numbers mean something to you, great, they didn’t to me but the smallest needle of the three passed through the jute sole and several layers of fabric with the least struggle…this is a good thing.
S e w i n g M a c h i n e is needed however not-yet-sewers, please don’t be intimidated. The machine sewing here is minimal and only requires that you can sew a straight line plus a slightly less straight line and back stitch at the start and ends. Phone a friend, borrow an aunty.
I n t e r f a c i n g A floppy Espadrilles is nobody’s friend. Iron-on or fusible interfacing is available from any fabric store / haberdashery. Approx half a meter / yard of the woven (non stretch), mid-weight stuff is what you want. If you’re new to fusible interfacing, one side looks and feels slightly crystalline (this melts and adheres to the fabric) and the other side takes the heat from the iron. You will only iron directly onto the adhesive side once.
M a i n F a b r i c Go wild! There are no rules but as a guideline choose a mid-weight fabric over something light-weight. Cotton twill, canvas, duckcloth or heavy cotton-linen are all examples of slightly firmer fabrics that will result in a sturdier Espadrille ie. one that stays on your foot. However if you find yourself all heart-eyed over a quilting weight cotton then of course you can use it. The interfacing will beef it up a little anyway and you can always supplement with a heavier lining like a canvas ( I used calico here; mid-weight and breathable). Need some Pinspiration?
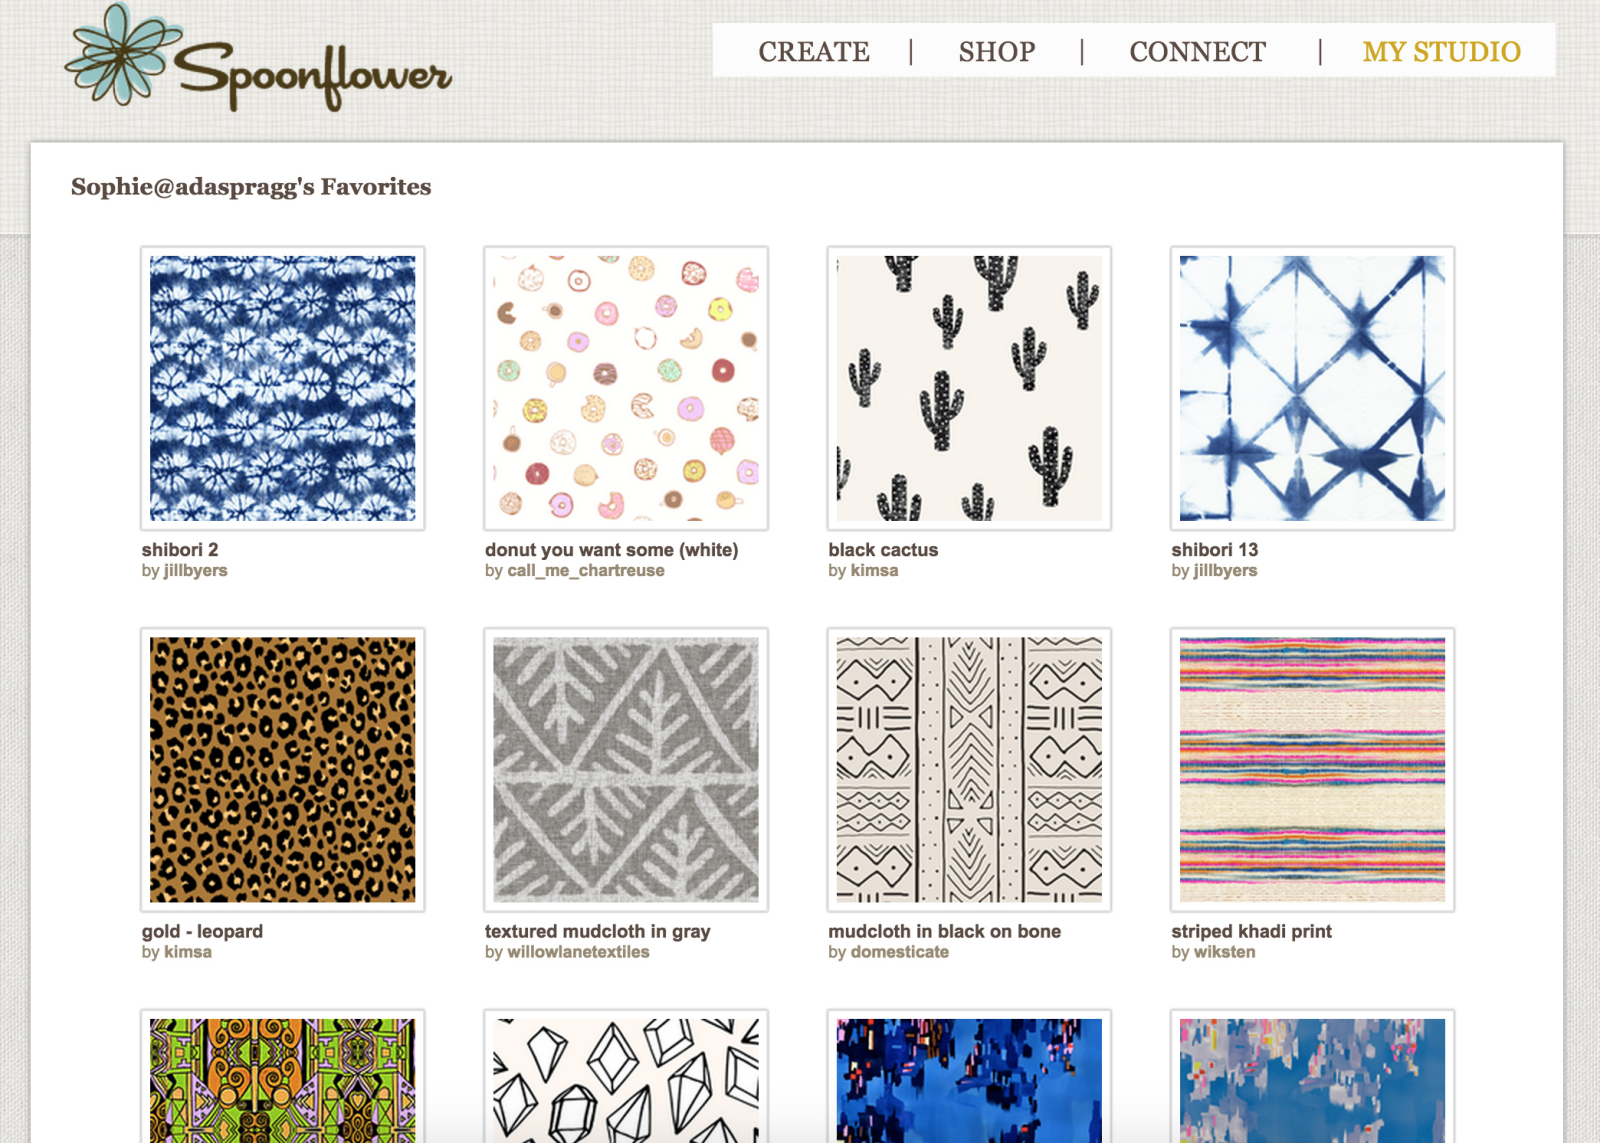 Sourcing fun prints in mid-heavy weight fabrics can be a challenge. So where can one go to find glorious espadrille-worthy fabric? Spoonflower! If you’re not familiar, Spoonflower is a fabric printing business with a mecca of beautiful designs and patterns perfect for DIY projects but more specifically, waiting to be turned into Espadrilles. Of the fabrics that are available for printing, their cotton twill, cotton linen / canvas and eco-canvas (made from 45% recycled material) are the perfect weight for Espadrilles.
 cotton twill | cotton linen canvas | eco-canvas
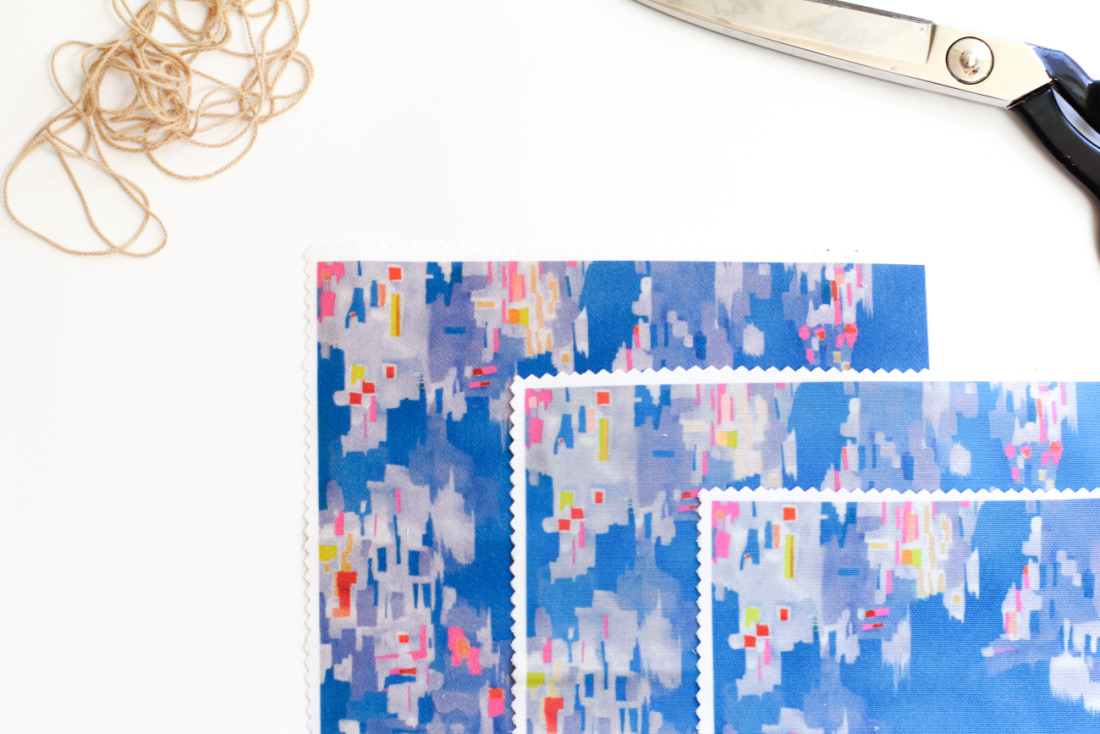
If you’re going the Spoonflower route, I highly recommend ordering samples before you commit to yardage. Samples are fun, yes! But also a good idea. As you can see, the designs come out at varying intensities and slightly different shades from each other, due to the nature of the printing process. It was hard to capture here but the cotton twill is the most muted, the cotton linen canvas is more saturated and the eco-canvas is the most intense (see chartreuse colour). It’s a subtle difference but for designs where colour is the appeal, it will translate most accurately onto the eco-canvas / cotton linen canvas.
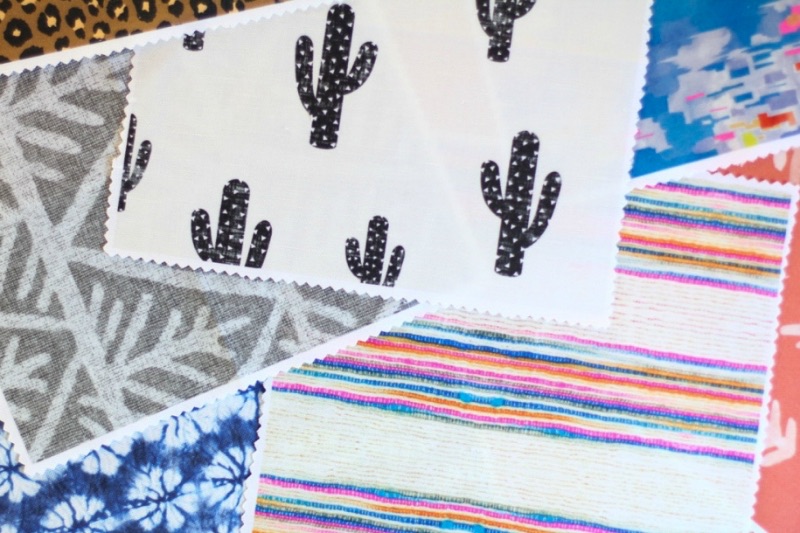 Smaller patterns work best here. While this cactus motif is clearly awesome, the print would be lost on the small surface area of Espadrilles. Also worth noting, Spoonflower sells in increments of fat-quarters (28 x 18″) and yards (56″ width). One fat quarter is enough for two pairs of espadrilles, however the next size down, the sample size (8 x 8″) is not enough for one pair. The solution: go the fat-quarter and get stitchy with a friend. P.S Not sponsored by Spoonflower.
directions:
Once you’ve gathered supplies, trace off the toe and heel pieces from the pattern in your size. If your pattern is printed with both toe & heel pieces on one side, you can cut it straight out, but most seem to come printed back to back. Transfer ‘outside’, ‘inside’, central grain-line markings and ‘sole’. Ignore the ‘ease’.
 Start by folding both main fabric and lining in half. Lay the main fabric over the top of lining fabric and place pattern pieces on top. Take a moment to check that the design will be facing in the direction you want.
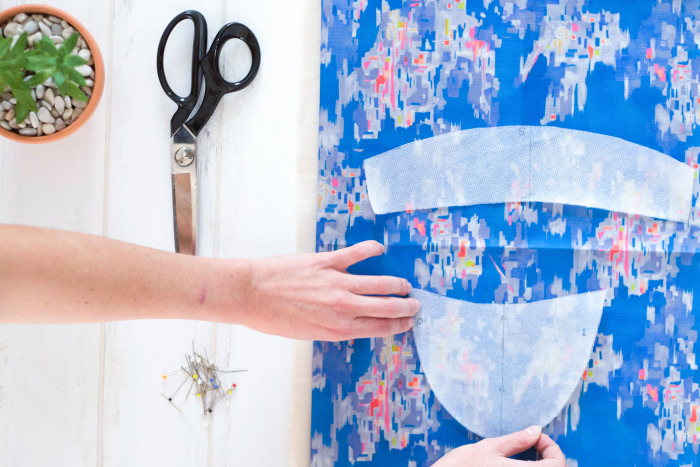
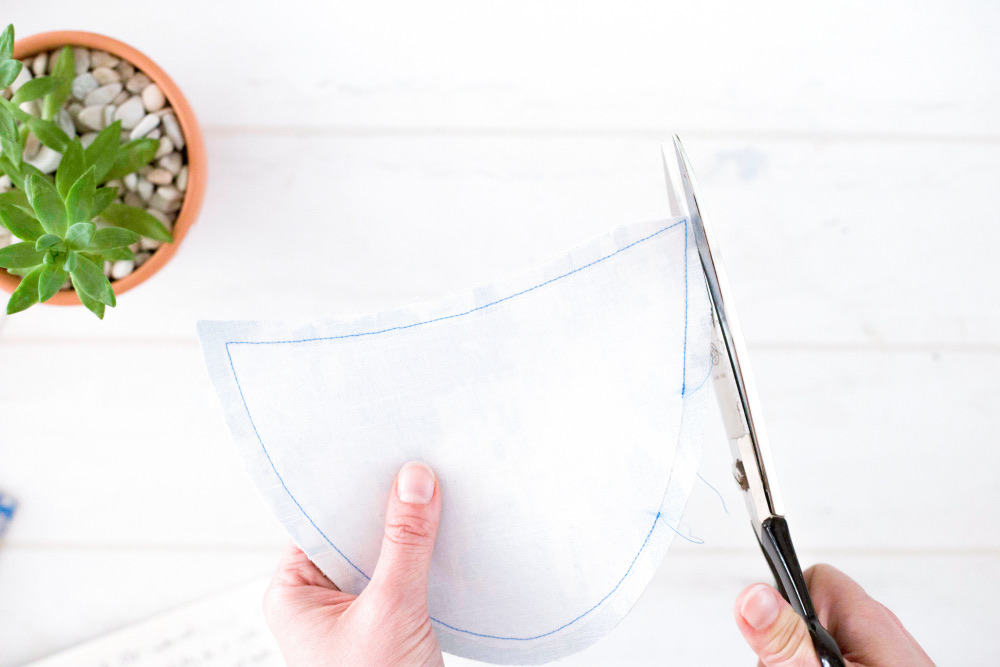
 Pin in place. Seam allowances are not included in the pattern and need to be added. With a chalk marker, trace around the outside of pattern pieces adding a 3/8″ (1cm) seam allowance.
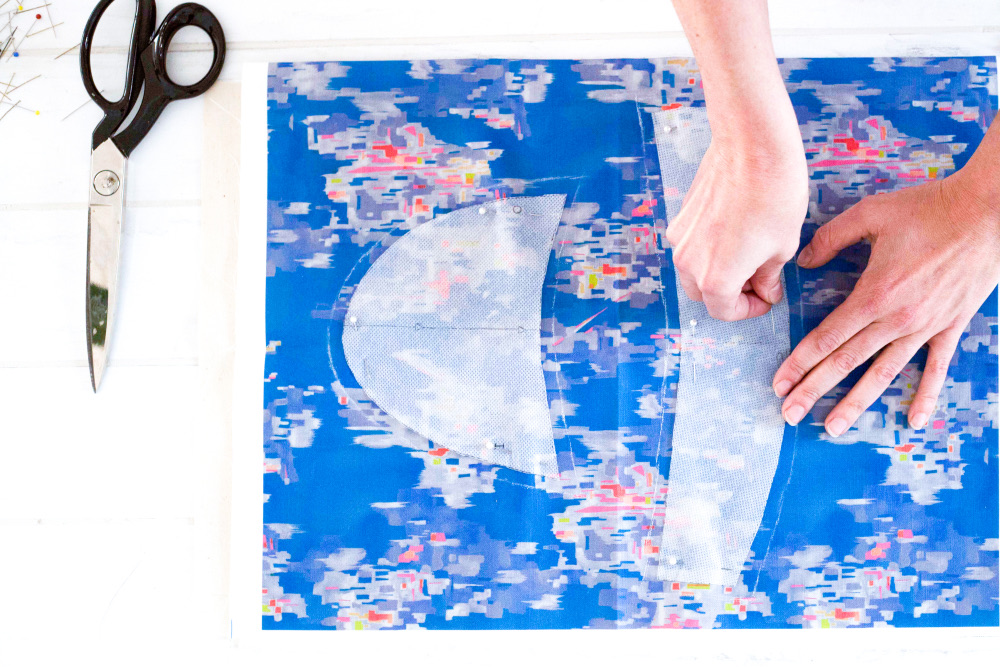
 Following the chalk lines, cut out pattern pieces through all layers. You now have all the lining and fabric pieces for one complete pair of Espadrilles. Woo!
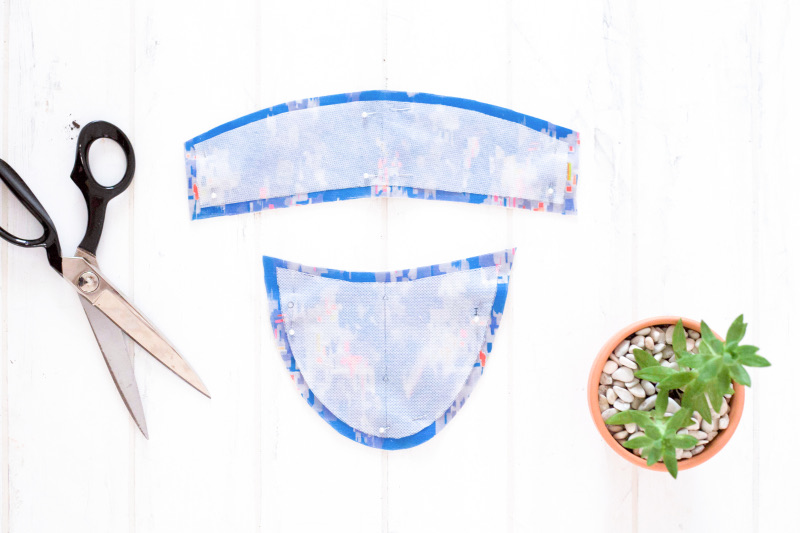
 Double the fusible interfacing over, then once more again. It doesn’t matter which side of the interfacing is facing out at this stage. Place pattern pieces on interfacing, lining up the grainline, and pin in place. Cut out directly around pattern through all four layers (no added seam allowances this time).
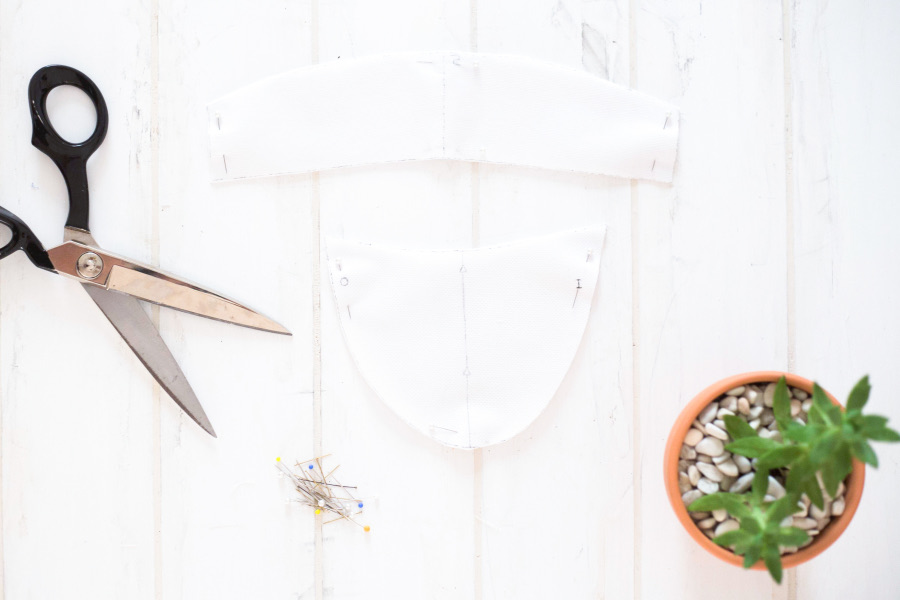
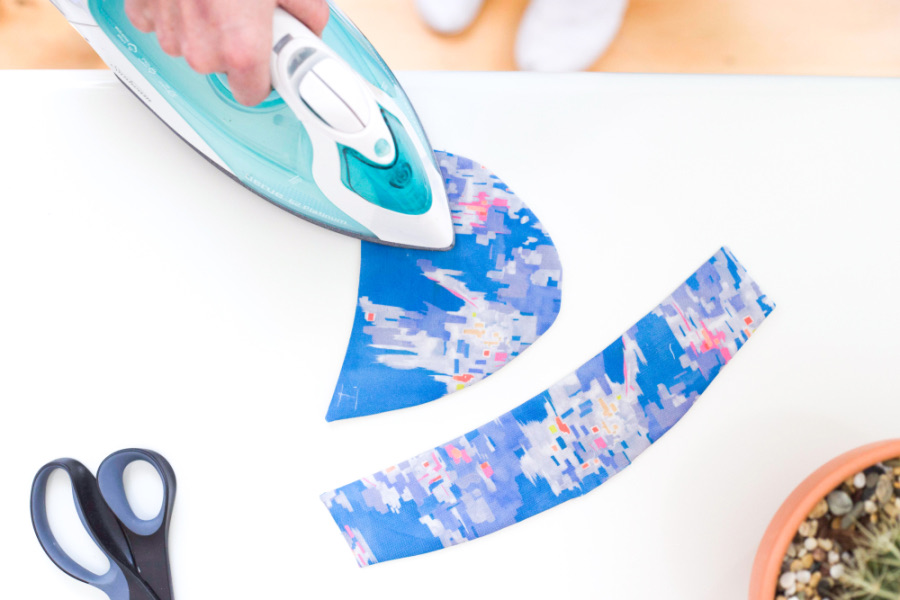
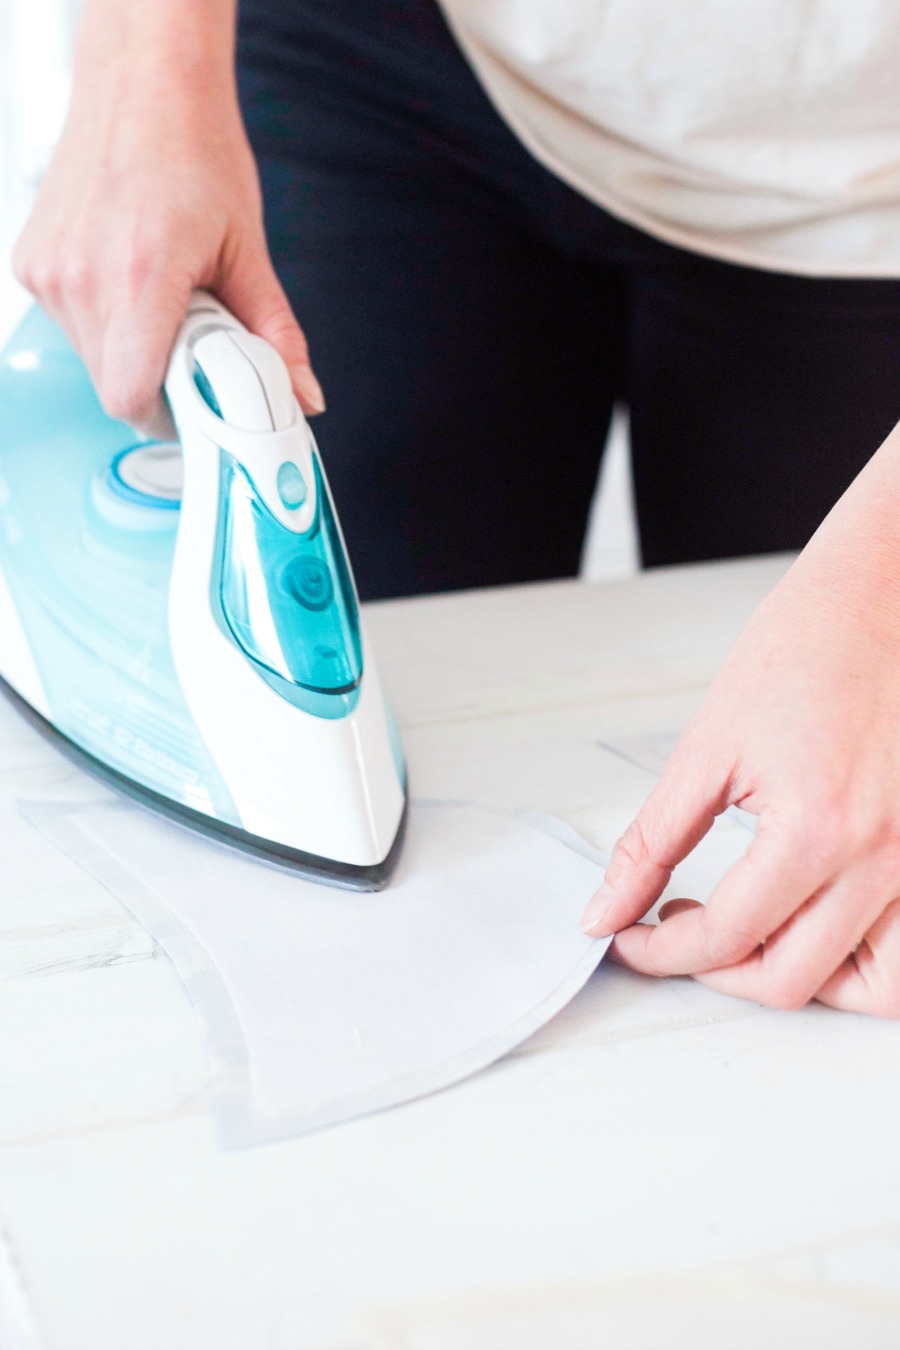 To attach interfacing, place fabric and lining pieces right side down. Centre interfacing over fabric with the fusible side facing down. The toe pattern piece is not symmetrical (inside edge is slightly longer and pointier) so to make sure you’ve got a pair, check to see that the interfacing follows the same shape as the fabric underneath. With iron on a medium setting, fuse interfacing to the back of all pieces.
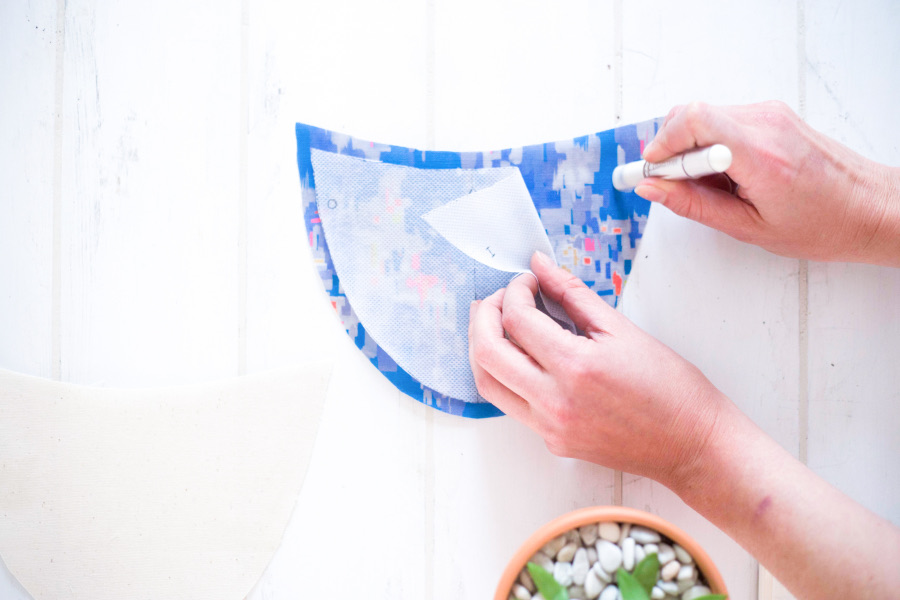
 Using the toe pattern piece for reference, take a chalk pencil and mark ‘I’ (inside) on the corresponding edge of all toe pieces on the right side of the fabric. Phwoa! I don’t recommend using a soluble marker here as the heat from the iron can set the ink…speaking from experience.
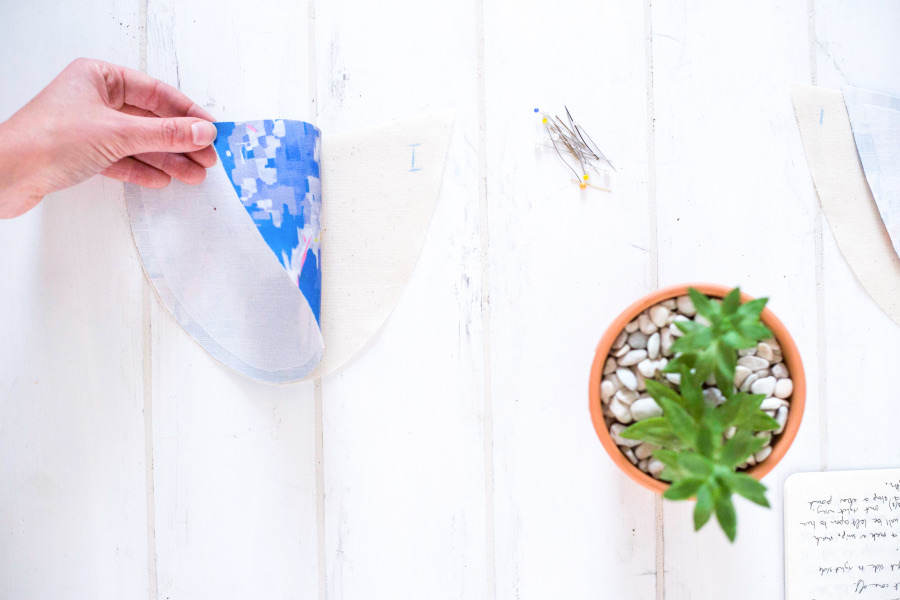
 Take one toe lining and one fabric piece and place right side to right side. Check the inside to make sure the ‘I’ markings are facing each other. Pin together. Repeat for other toe piece.
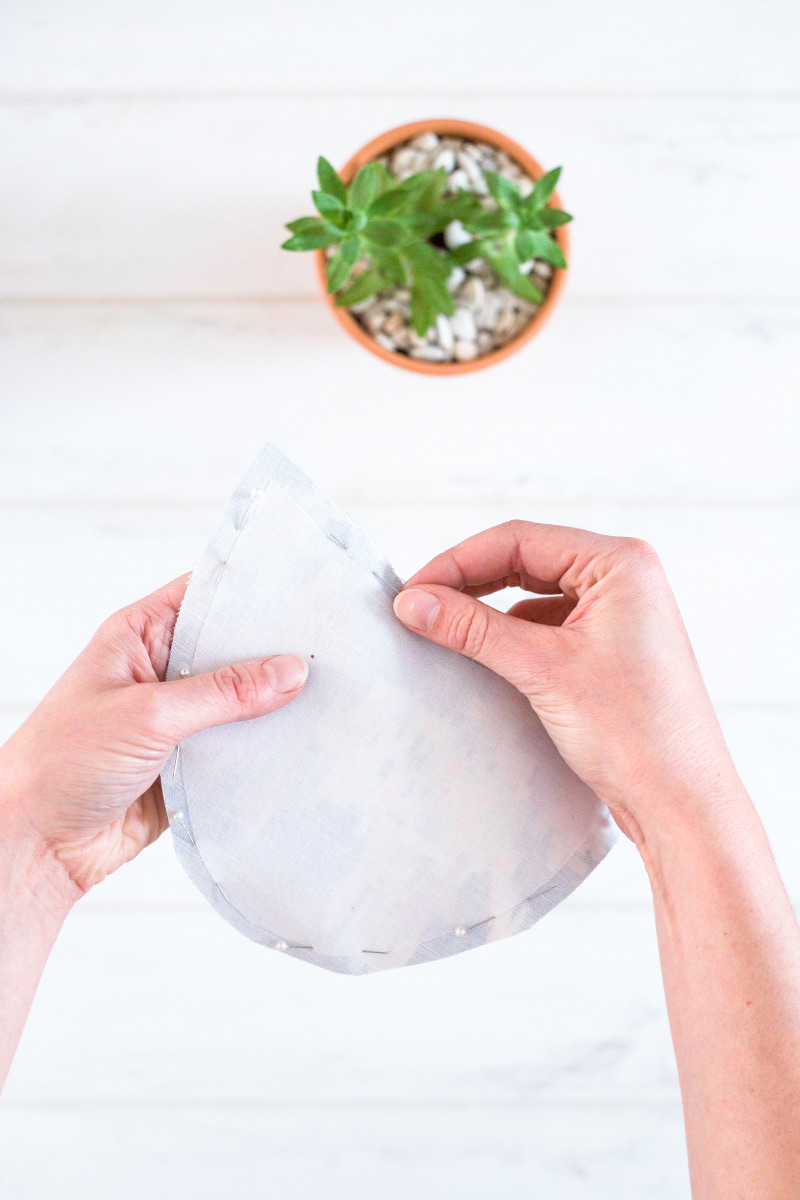
 Flip pieces to face lining side up. With chalk pencil, make a mark about half way along inside edge. Mark a second point approx 2″ (5cm) away from first. This area will be left open and un-sewn to turn out the right way.
 Start with your sewing machine needle at either point just marked. Stitch a 3/8″ (1cm) seam around the edge and stop at second point, leaving the area between markings un-stitched. It is a good idea to backstitch a few extra times at these start and end points as they take the brunt when we turn it right side out. Trim the corners directly across the ends and then diagonally towards each tip, close to stitching but not through.
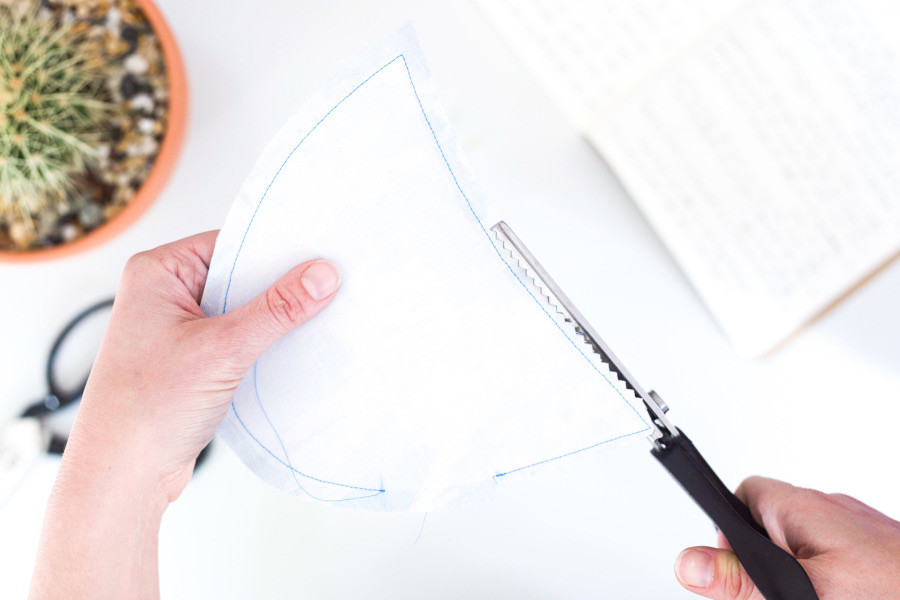 With pinking sheers, trim the edges approx 1/8 (3mm) from stitching, leaving the un-stitched area between the two points un-trimmed. If you do not have pinking sheers, carefully notch into the seam allowance at regular intervals. This reduces bulk in the seam and gives a nice smooth edge when turned right side out.
 Begin to turn the turn pieces right side out by poking the corners in first. The rest is just wrangling the fabric out through the hole.
 With scissors or a point turner if you have one, gently poke the corners out.
 Tuck fabric neatly into the hole and press flat. The opening will not be visible once we attach fabric to the sole.
For heel pieces repeat the same process: Pin one main fabric and one lining right side together. Find the middle point of heel piece by folding in half width-ways and finger pressing the centre fold. On the convex edge (outwardly curved) edge, mark two points either side of centre crease, approx 2″ (5cm) apart. Repeat as above: stitch with 3/8″ (1cm) seam allowance, leaving open between points. Trim corners and notch edges. Turn right way out and press.
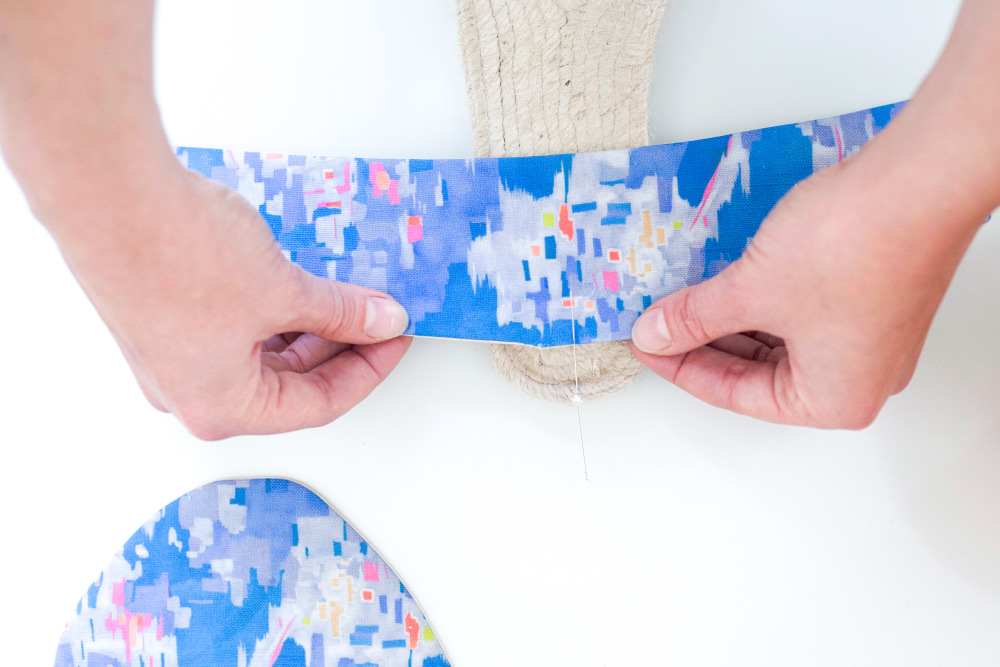 Now the fun part! Grab an Espadrille sole and mark the centre of heel with a pin. Take one heel fabric piece and find centre point again by folding in half. Mark with a pin on convex (outward curve) edge.
 Lay heel piece on top of sole, lining up centre points. Poke a pin down through the fabric and into the sole at an angle. The pin should stay firmly in place. If it doesn’t, try out some other types of pins; I found the longer plastic headed pins worked better than short dress-making pins.
 Continue pinning fabric around the edge of sole right up to the end of heel piece. Place pins at regular intervals, roughly 1/2″ is good; the closer together, the easier it be come hand-stitching. Trust me.
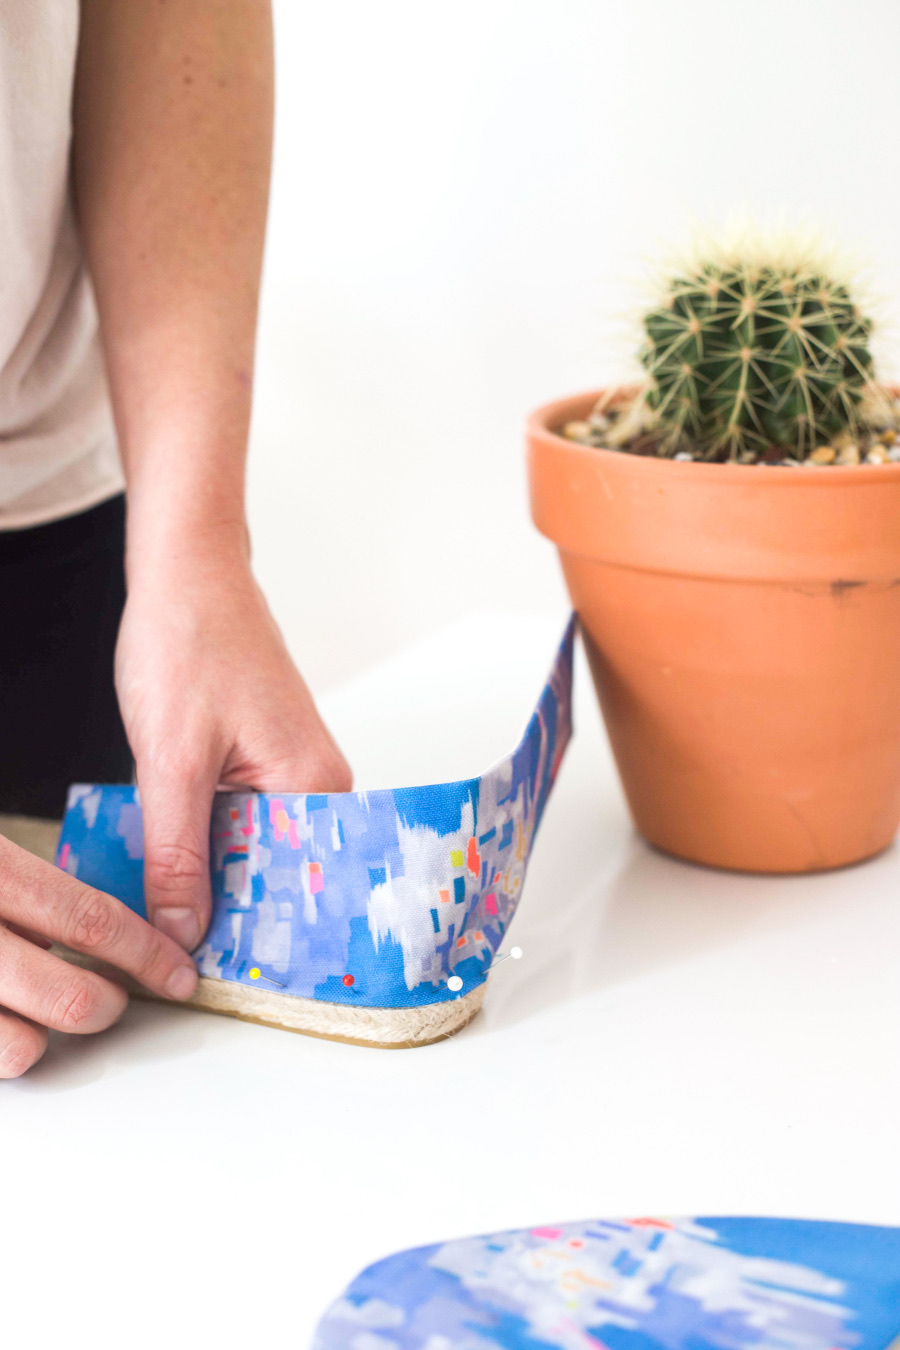
 Measure in 1″ (2.5cm) from end of heel piece on each side and place a pin. Now take the corresponding toe piece (the ‘I’ should be matching the inside edge of sole) and place over heel piece up to pin marker. Pin in place, ensuring it has gone through both layers of fabric.
 Continue pinning around toe piece, starting from the sides and working towards the middle. You may need to ‘ease’ the fabric ever so slightly around the toe.
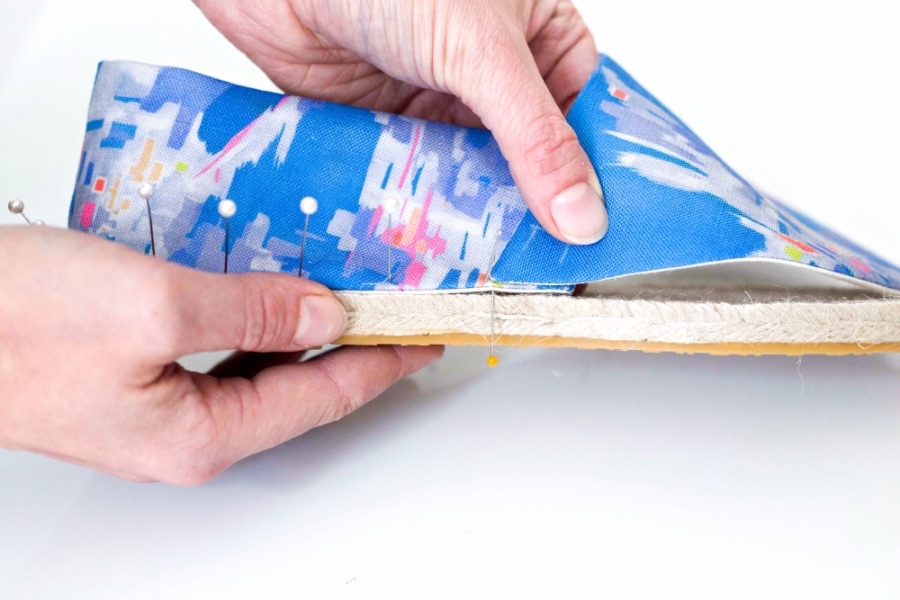
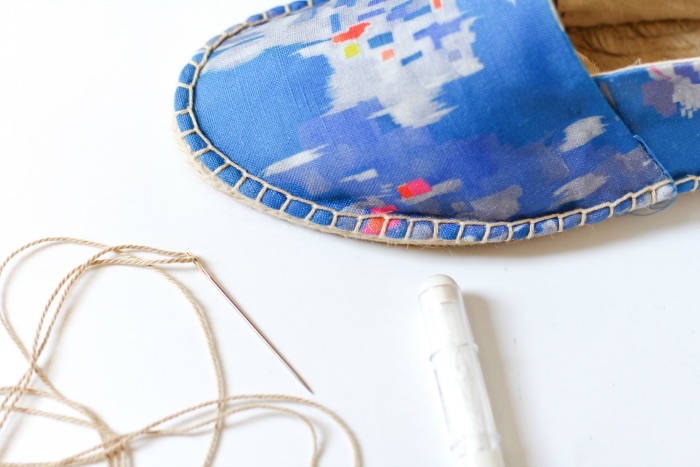
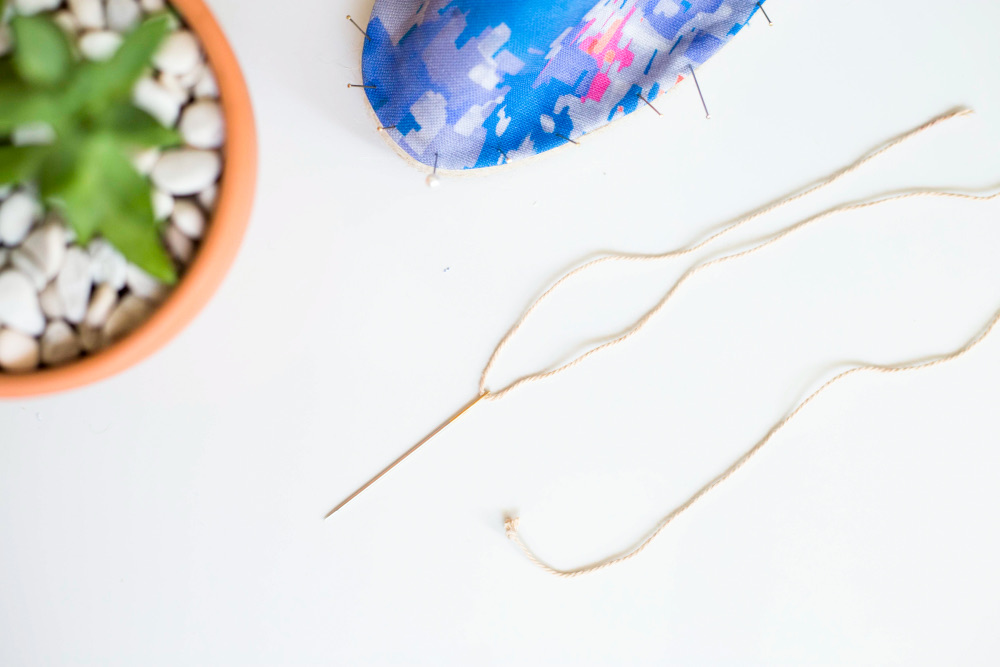 Cut off a 98″ (2.5m) piece of Espadrille yarn and thread the darning needle. The thread will go through but you may need to wet / shape the end to coax it through. Pull thread through other side to approx 10″ (25cm) length. Knot other end. P.S I realise this sounds like a ridiculous amount of thread however it is exactly the length needed to go around the whole shoe with some leeway.
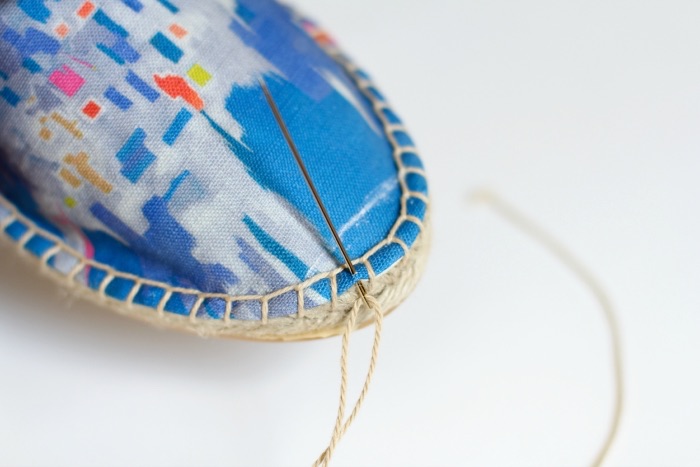
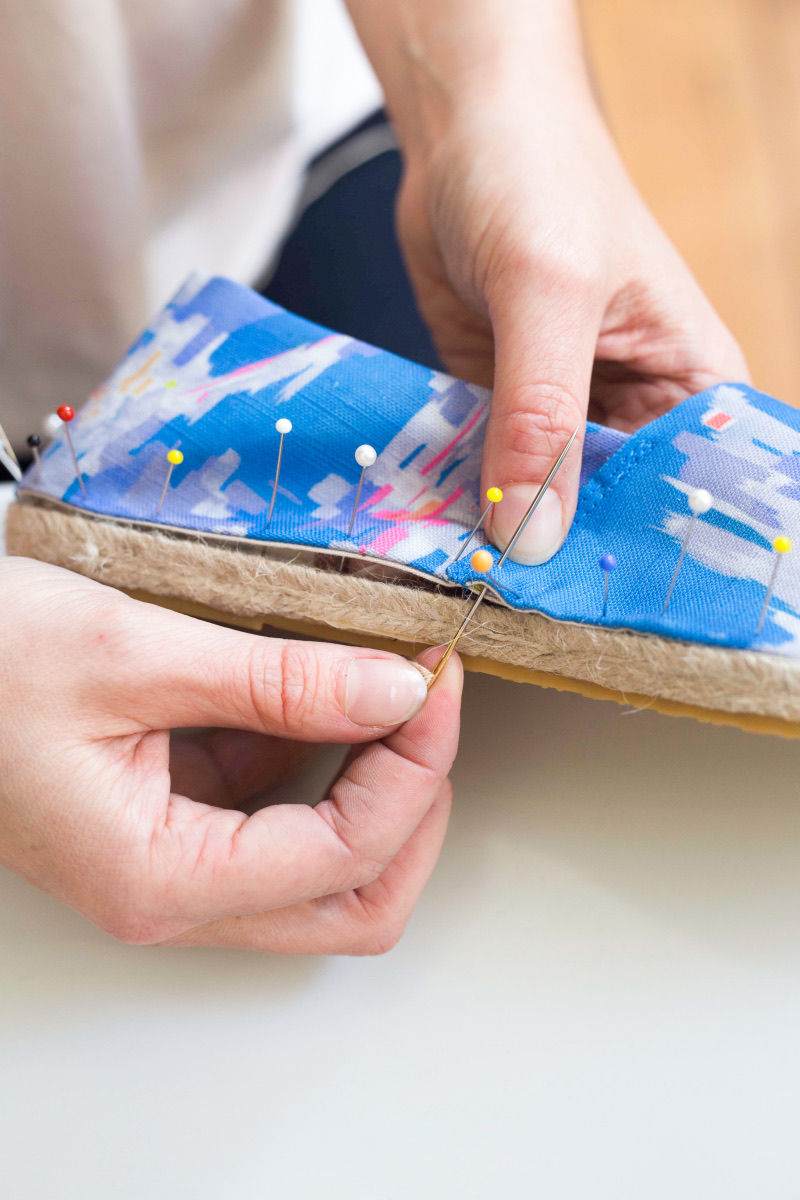 Starting on the inside edge where toe and heel overlap, slip needle up through fabric to poke out 2/8″ (.5cm) in from edge of shoe. Pull through. Tuck the knot up under the fabric on inside of shoe.
 Moving around the shoe in an anti-clockwise direction (to the right), poke needle into sole between 2/8″ and 3/8″ (literally .8cm is a great Espadrille stitch length) along from first stitch and 2/8″ (.5cm) or about half-way down the sole. Bring needle up through the fabric at 2/8″ (.5cm) from the edge, in line with the first stitch.
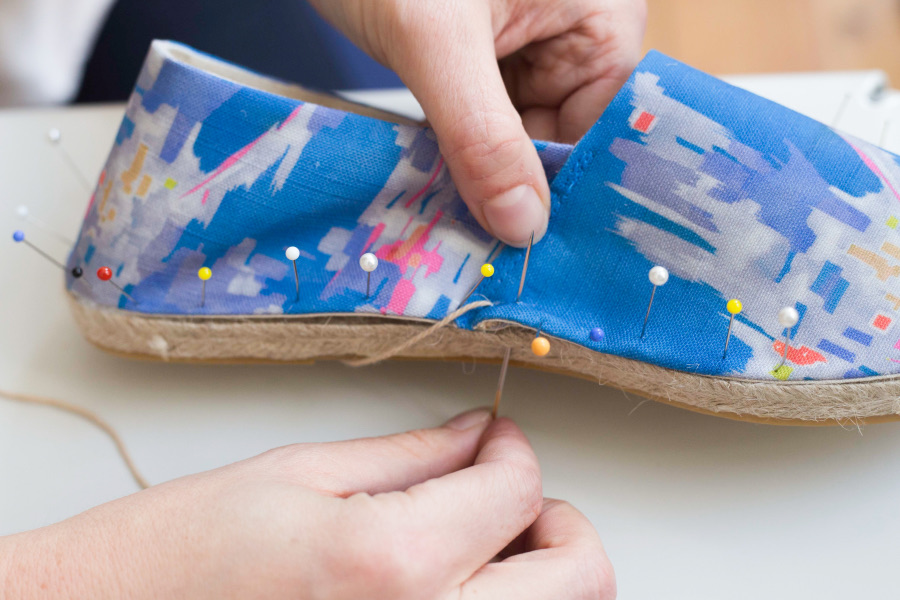
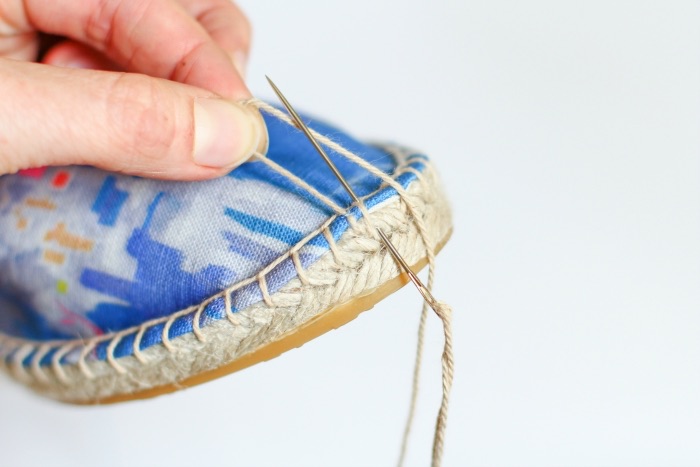
 Before you pull the yarn all the way through, hold the other end taut across the top of needle exit point. Now pull it through. Cheer loud my friends because you just did an Espadrille stitch!
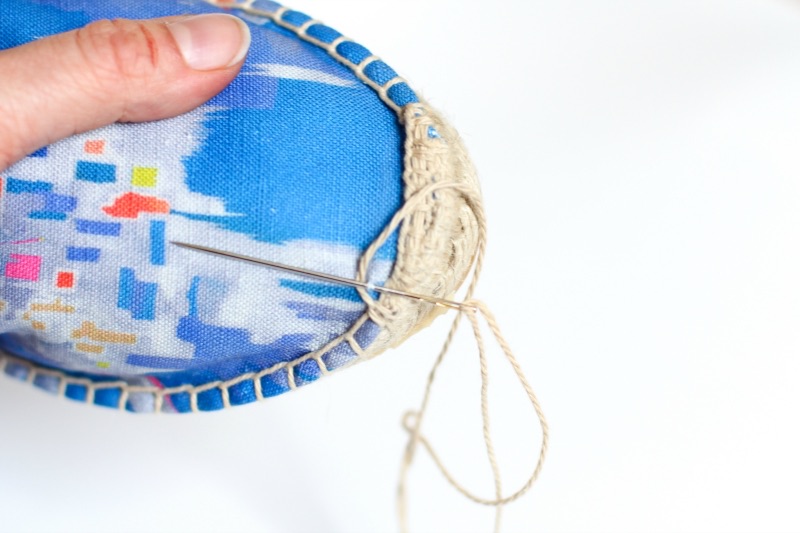
Continue merrily around the entire shoe, pulling each stitch as taut as possible before starting the next. When I say merrily, after stabbing yourself in the cuticle of your left thumb three or four times you will get into a rhythm. Go by sight and remember…rustic is authentic. If the yarn starts to tangle, which it loves to do when working with a long length, try to make sure it’s not bunched up before pulling through. If you do get a knot that can’t be undone, just cut the yarn and begin again. Start directly over the last stitch, tucking the new knot up under the fabric.
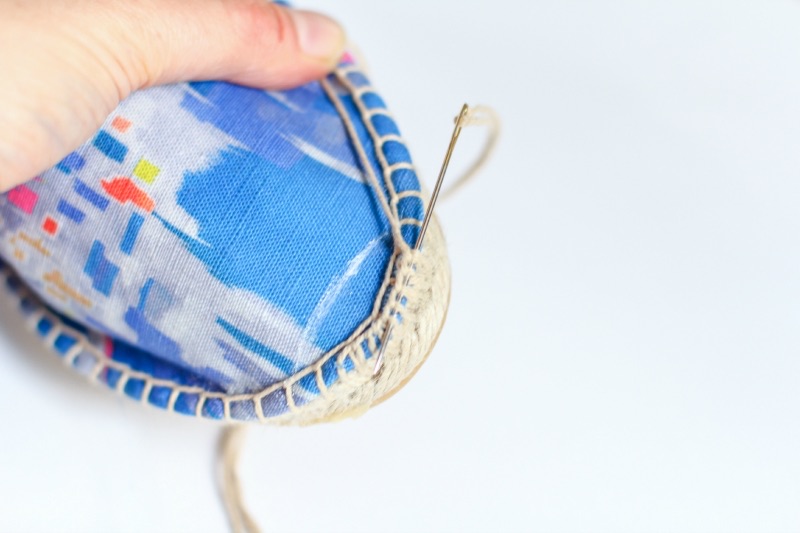
 Once back to the start, it’s time to knot the yarn and tie off. Stitch once again over the very first stitch then plunge the needle down and out through the side of the sole. Knot off once and trim.
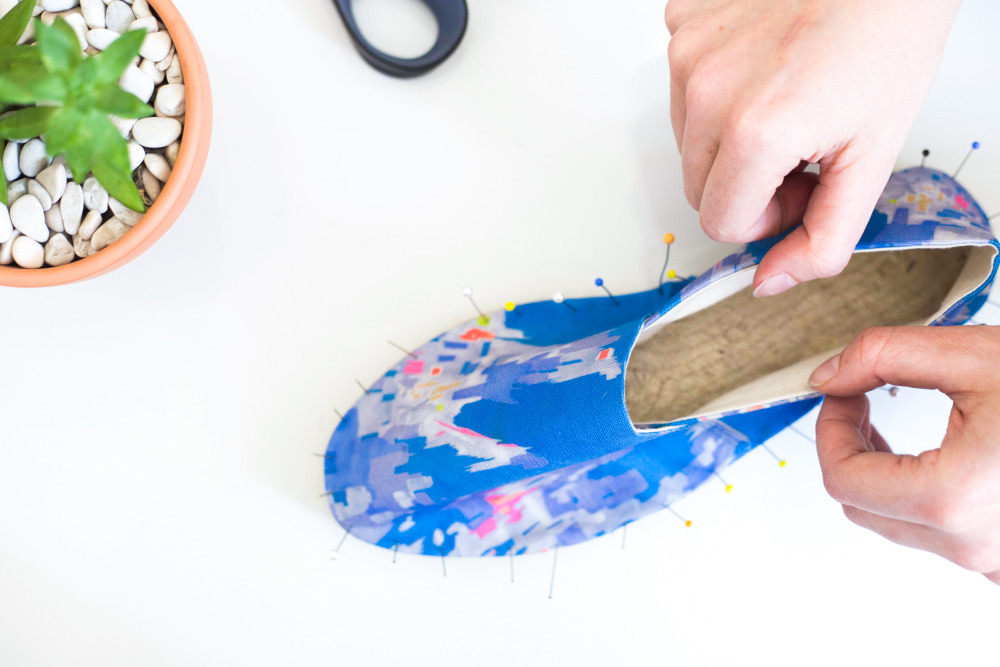
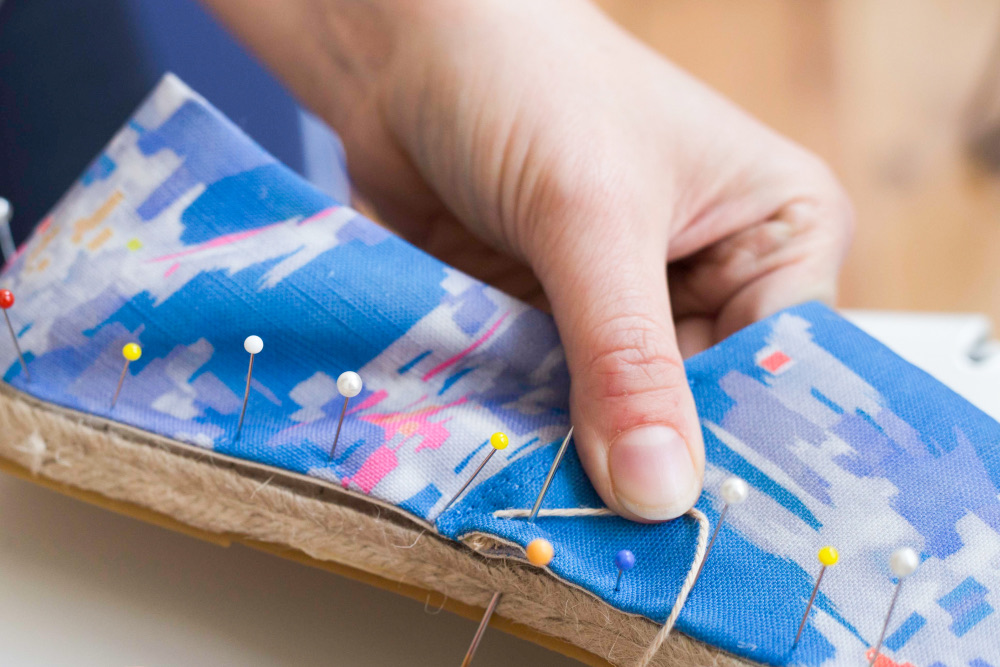
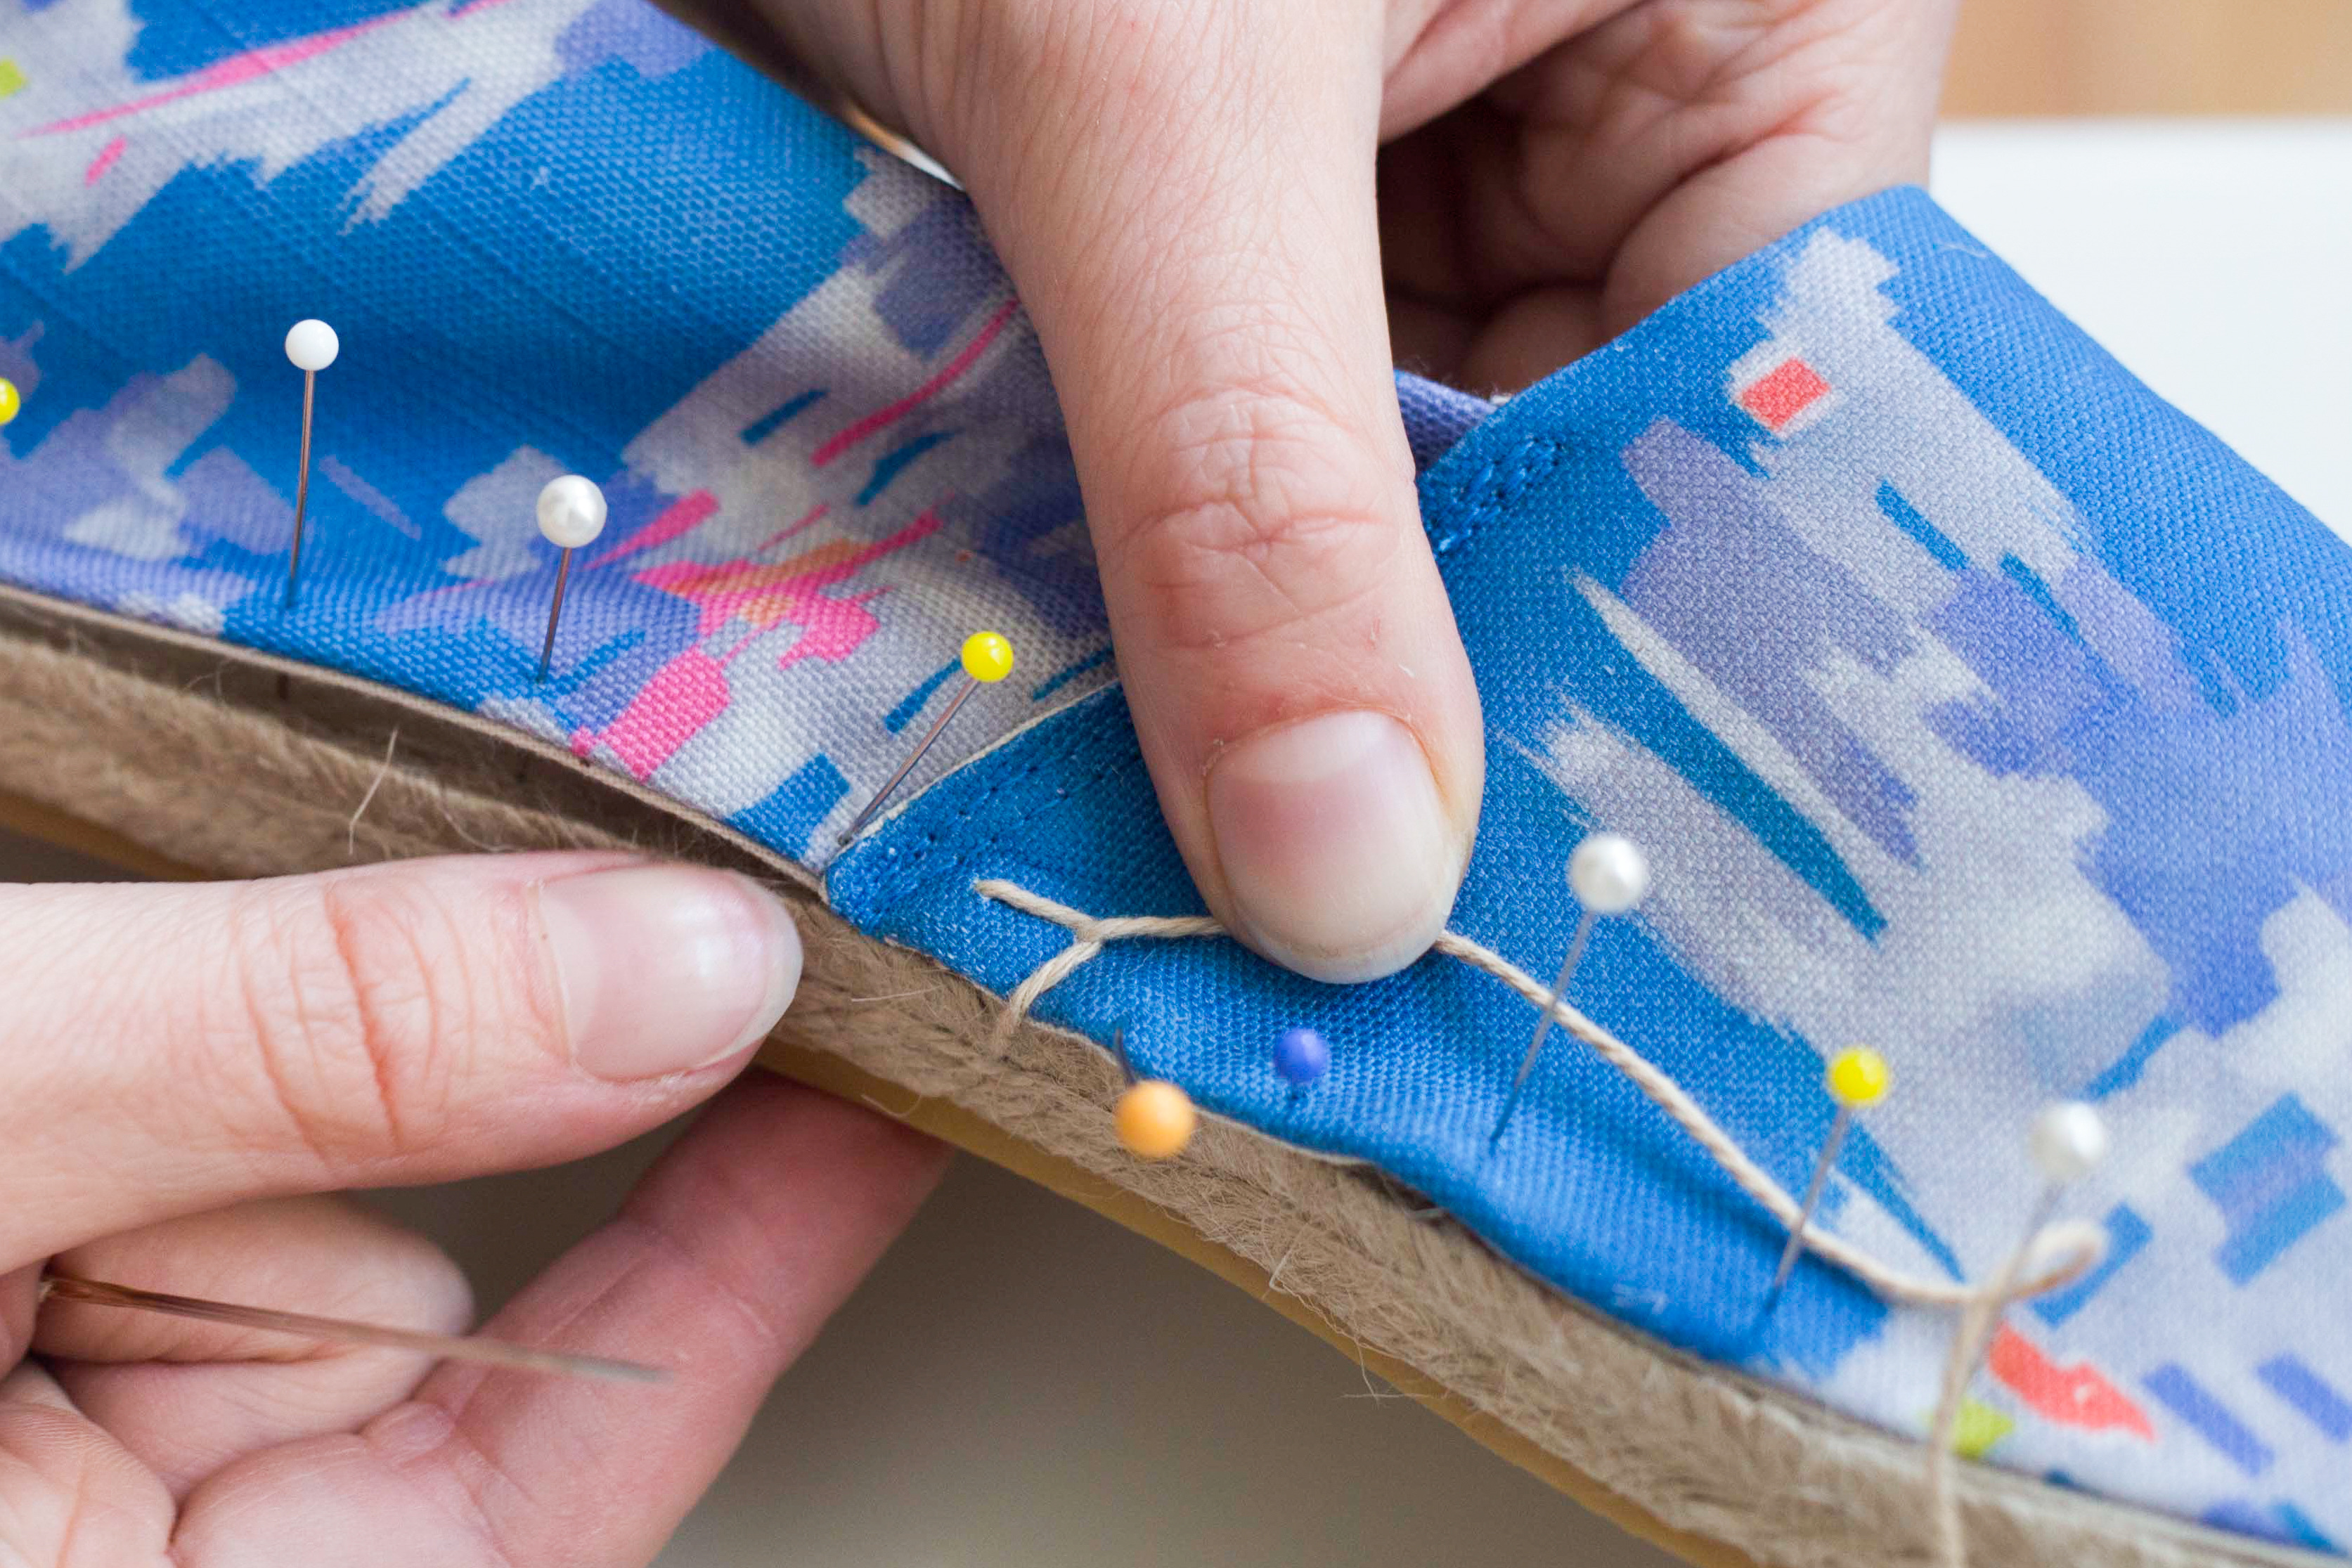
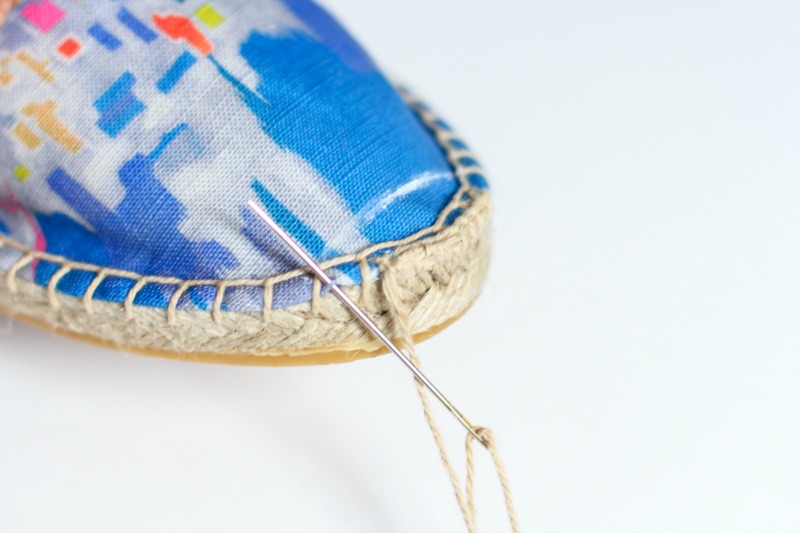
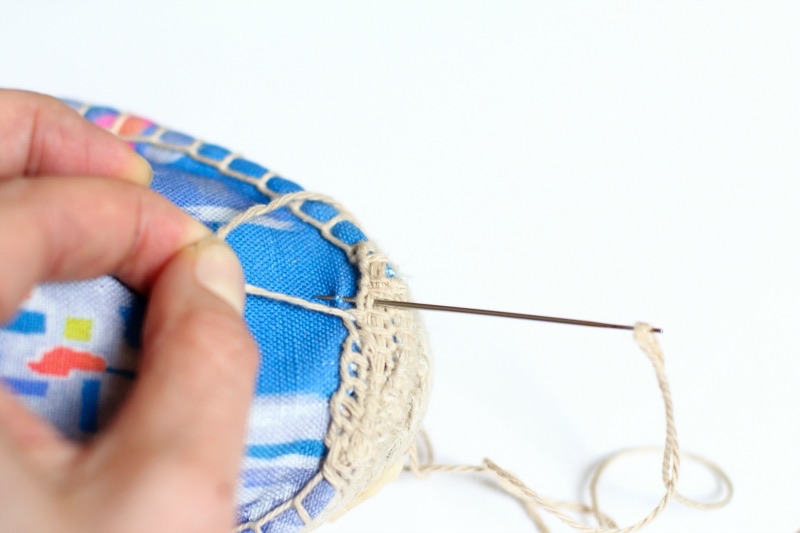
 Now it’s time to fit. Carefully slip your foot in. When it feels snug in position, pull the heel piece firmly up under the toe piece as far as you can without distorting the shape. Working with one side at a time and trying not to jab yourself, secure the over-lap by pinning once close to the top edge and once below (optional). Carefully slip foot back out, leaving pins behind.
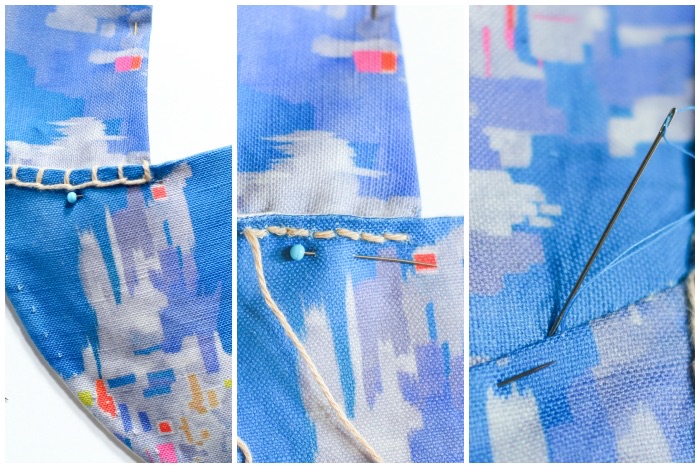 To secure this section there are three stitch options: continuation of the Espadrille stitch, back stitch and slip-stitch. Each gives the finished shoe a different feel. If you don’t want this section to be a feature then slip-stitch is the option for you; it’s almost invisible. Select your stitch of choice and hand-stitch the toe and heel section securely together at the overlap. Side note: there is a secret fourth option, visible in some of the photos, to machine top-stitch this section. While it’s a neat finish, I won’t be recommending it as it requires the fabric be pinned to the sole twice and trying to fit the shoe with the pins in…neither was fun.
woven espadrille toe piece
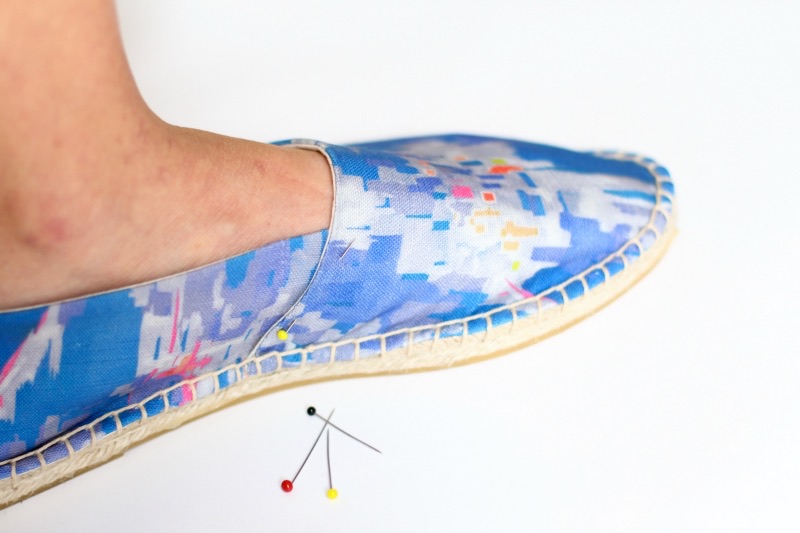
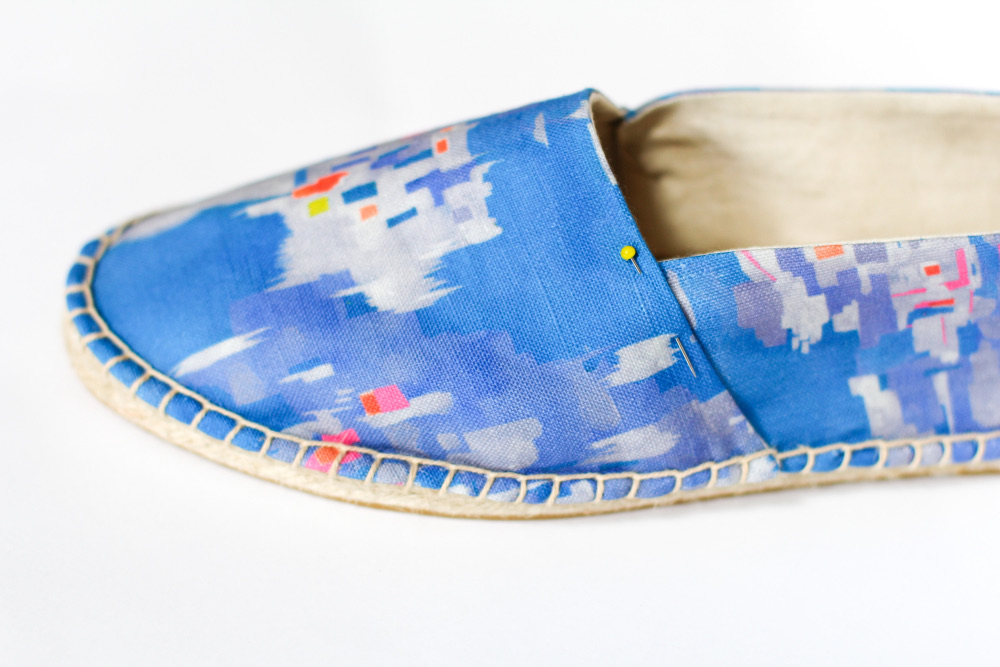
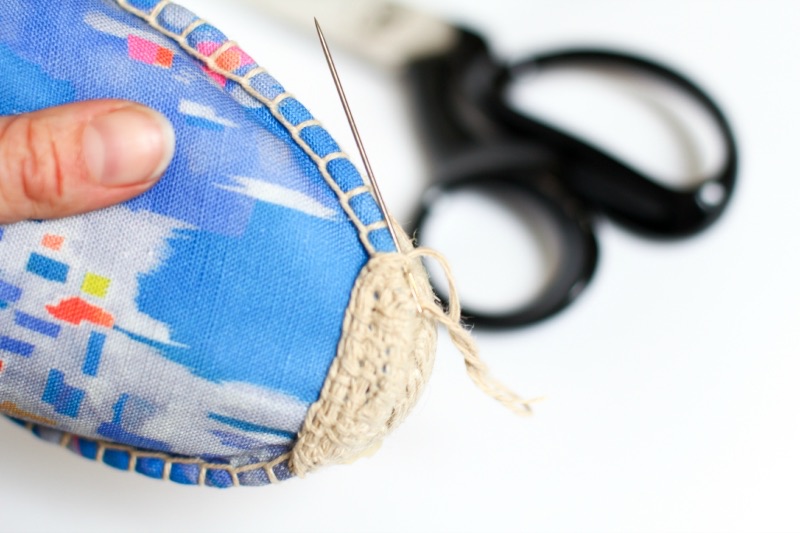
When you have repeated steps up to this point for the other shoe, absolutely you can stop here and call it a day…you now have a wearable pair of Espadrilles in front of you! However, you’ve made it this far and personally, I think this next step makes the difference between great looking Espadrilles and an omg-where-did-you-get-those Espadrilles: the woven toe piece. Kid not, I stared at the toe section on my only pair of store-bought Espadrilles for hours, trying to figure out how, what, even is THAT stitch? And I tell you, cracking the code felt like discovering the pyramids. Would my authentic-Espadrille-making-nonna be impressed by my ‘technique’? Probably not. But I don’t have an authentic-espadrille-making-nonna (if you do, make full use of that resource). Here it is:
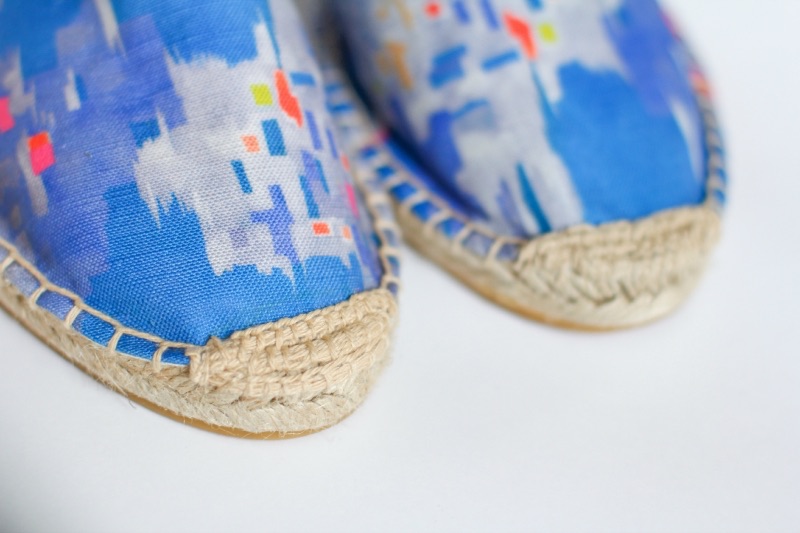 Basically, the woven toe section is made up of three rows of narrow Espadrille stitch, shaped in a slight arc like a rainbow (each row wider than the one before it). On store-bought Espadrilles, the end of the toe is narrower and so the arc has more of a curve. Here, the toe is wider so we have to straighten the arc out a little, otherwise it would end up too big and take up too much of the front. It’s a good idea to get your confidence up on a separate piece of fabric first.
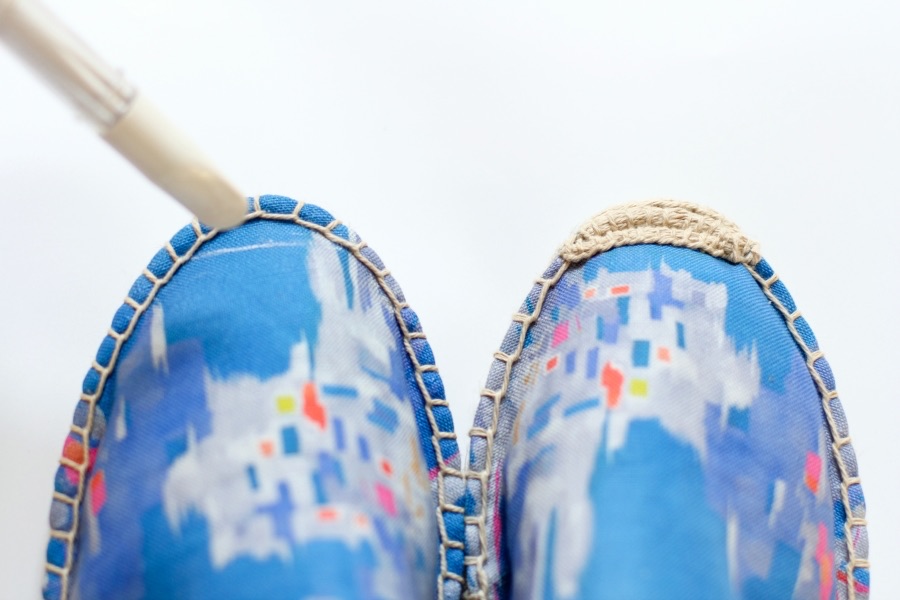 With chalk pencil, mark a line across the tip of the shoe where you would like your top row of stitching to finish.
 Thread the needle and knot the end. To create the first (bottom) row, slip the needle up through the fabric. Pull all the way through and tuck the knot up underneath.
 Moving along in approx 1/8 (3mm) increments, begin your Espadrille stitch. This first row sits across the front of the shoe, just overlapping the fabric by about 1/8″ (3mm). Go by sight.
 After approx ten stitches, stop. Now for the magic: take your needle (catching a little fabric just at the start to secure that last stitch) and run it back through the whole row of stitching, behind the vertical stitches. Repeat several times, running it back and forth until there is no fabric visible underneath that row. Finish the last run-through on the same side you began.
 Begin second row starting over further to the left this time (this arc scoops over the first). Each time you make a stitch, instead of poking the needle into the sole like we did in the first row, slip it under the top line of stitching from the first row.
 Repeat process for third row. If your chalk marks rub off by this point, it’s not a biggie, you can re-mark the arc or to go by sight at this stage.
 After running the yarn back and forth through the last row until there’s no fabric visible through the stitching, finish on the opposite side to where you began. Knot off the yarn by slipping it through the stitching several times. Cut off.