 Filler post! With bonus hand-make! So I thought it might be interesting to share a side project from last year while I’m in the process of shooting some recent springy / summery sews. It’s a rambling tale, one that I haven’t properly dissected until now, but the abbreviated version is that last year, I was randomly approached by a US publishing company with the possibility of creating an open-ended sewing book of sorts. As in, a book of my designs, with sewing patterns in the back. Initially the publisher didn’t realise that all the hand-makes I share on the blog, are sewn from other people’s patterns…which is pretty obvious when you actually read the posts. So it started off as a flippin exciting and viable idea to looking like a very expensive and high risk one from the publishers end, as I would have had to outsource alllll the pattern drafting and grading. Turns out, several quotes later, this service is massively expensive here (and rightly so, there’s a freakin lot of work and skill involved) and multiplied by 8-10 different designs, the publisher came to the conclusion that their allocated budget wouldn’t come close to covering it. This all took place over a several month period in which I worked with a local service to have one design trialled and drafted into actual pattern form, to suss out costs and time involved. Answer: A LOT and A LOT. We left on good terms with the lines open for the future in case of any less costly book ideas (insert cry-laugh face).
 I learned so much. The whole process was equal parts frustrating and interesting. Firstly, I now know I am not remotely interested in the technical aspect of drafting patterns. That is a good thing to realise. The design and concept side of things, yes. The technicalities, no. Happy to outsource drafting and grading forever and always, if in future I wanted to produce sewing patterns, which is looking unlikely. For those who actually do this crazy shit for a living, I am in awe. Mucho respect to our beloved independent pattern companies: Closet Case Files, True Bias, Baste and Gather etc etc etc…all of you!
 The creative process is basically one big tussle, ain’t it? Even when it’s just you and you. One of my fav popular musings on it ~ This is Awesome! This is tricky. This is shit. I am shit. This might be okay. This is Awesome! ~ So true. And when you’re trying to get your ideas out of your head and into someone else’s, it’s adds a whole new dimension. Words on their own weren’t enough to convey the idea, sketches didn’t quite reach either and in the end we arrived at an agreement of how this particular dress should sit and fit and move from a combination of talking it out, sketches and fabric swatches. We did four or five muslins, which maybe could have been two or three, had we muslined the dress in a similar fabric to the actual version, something lightly and floaty, rather than stiff calico. As you can imagine, it was kind of hard to gauge how the actual fabric might fall.
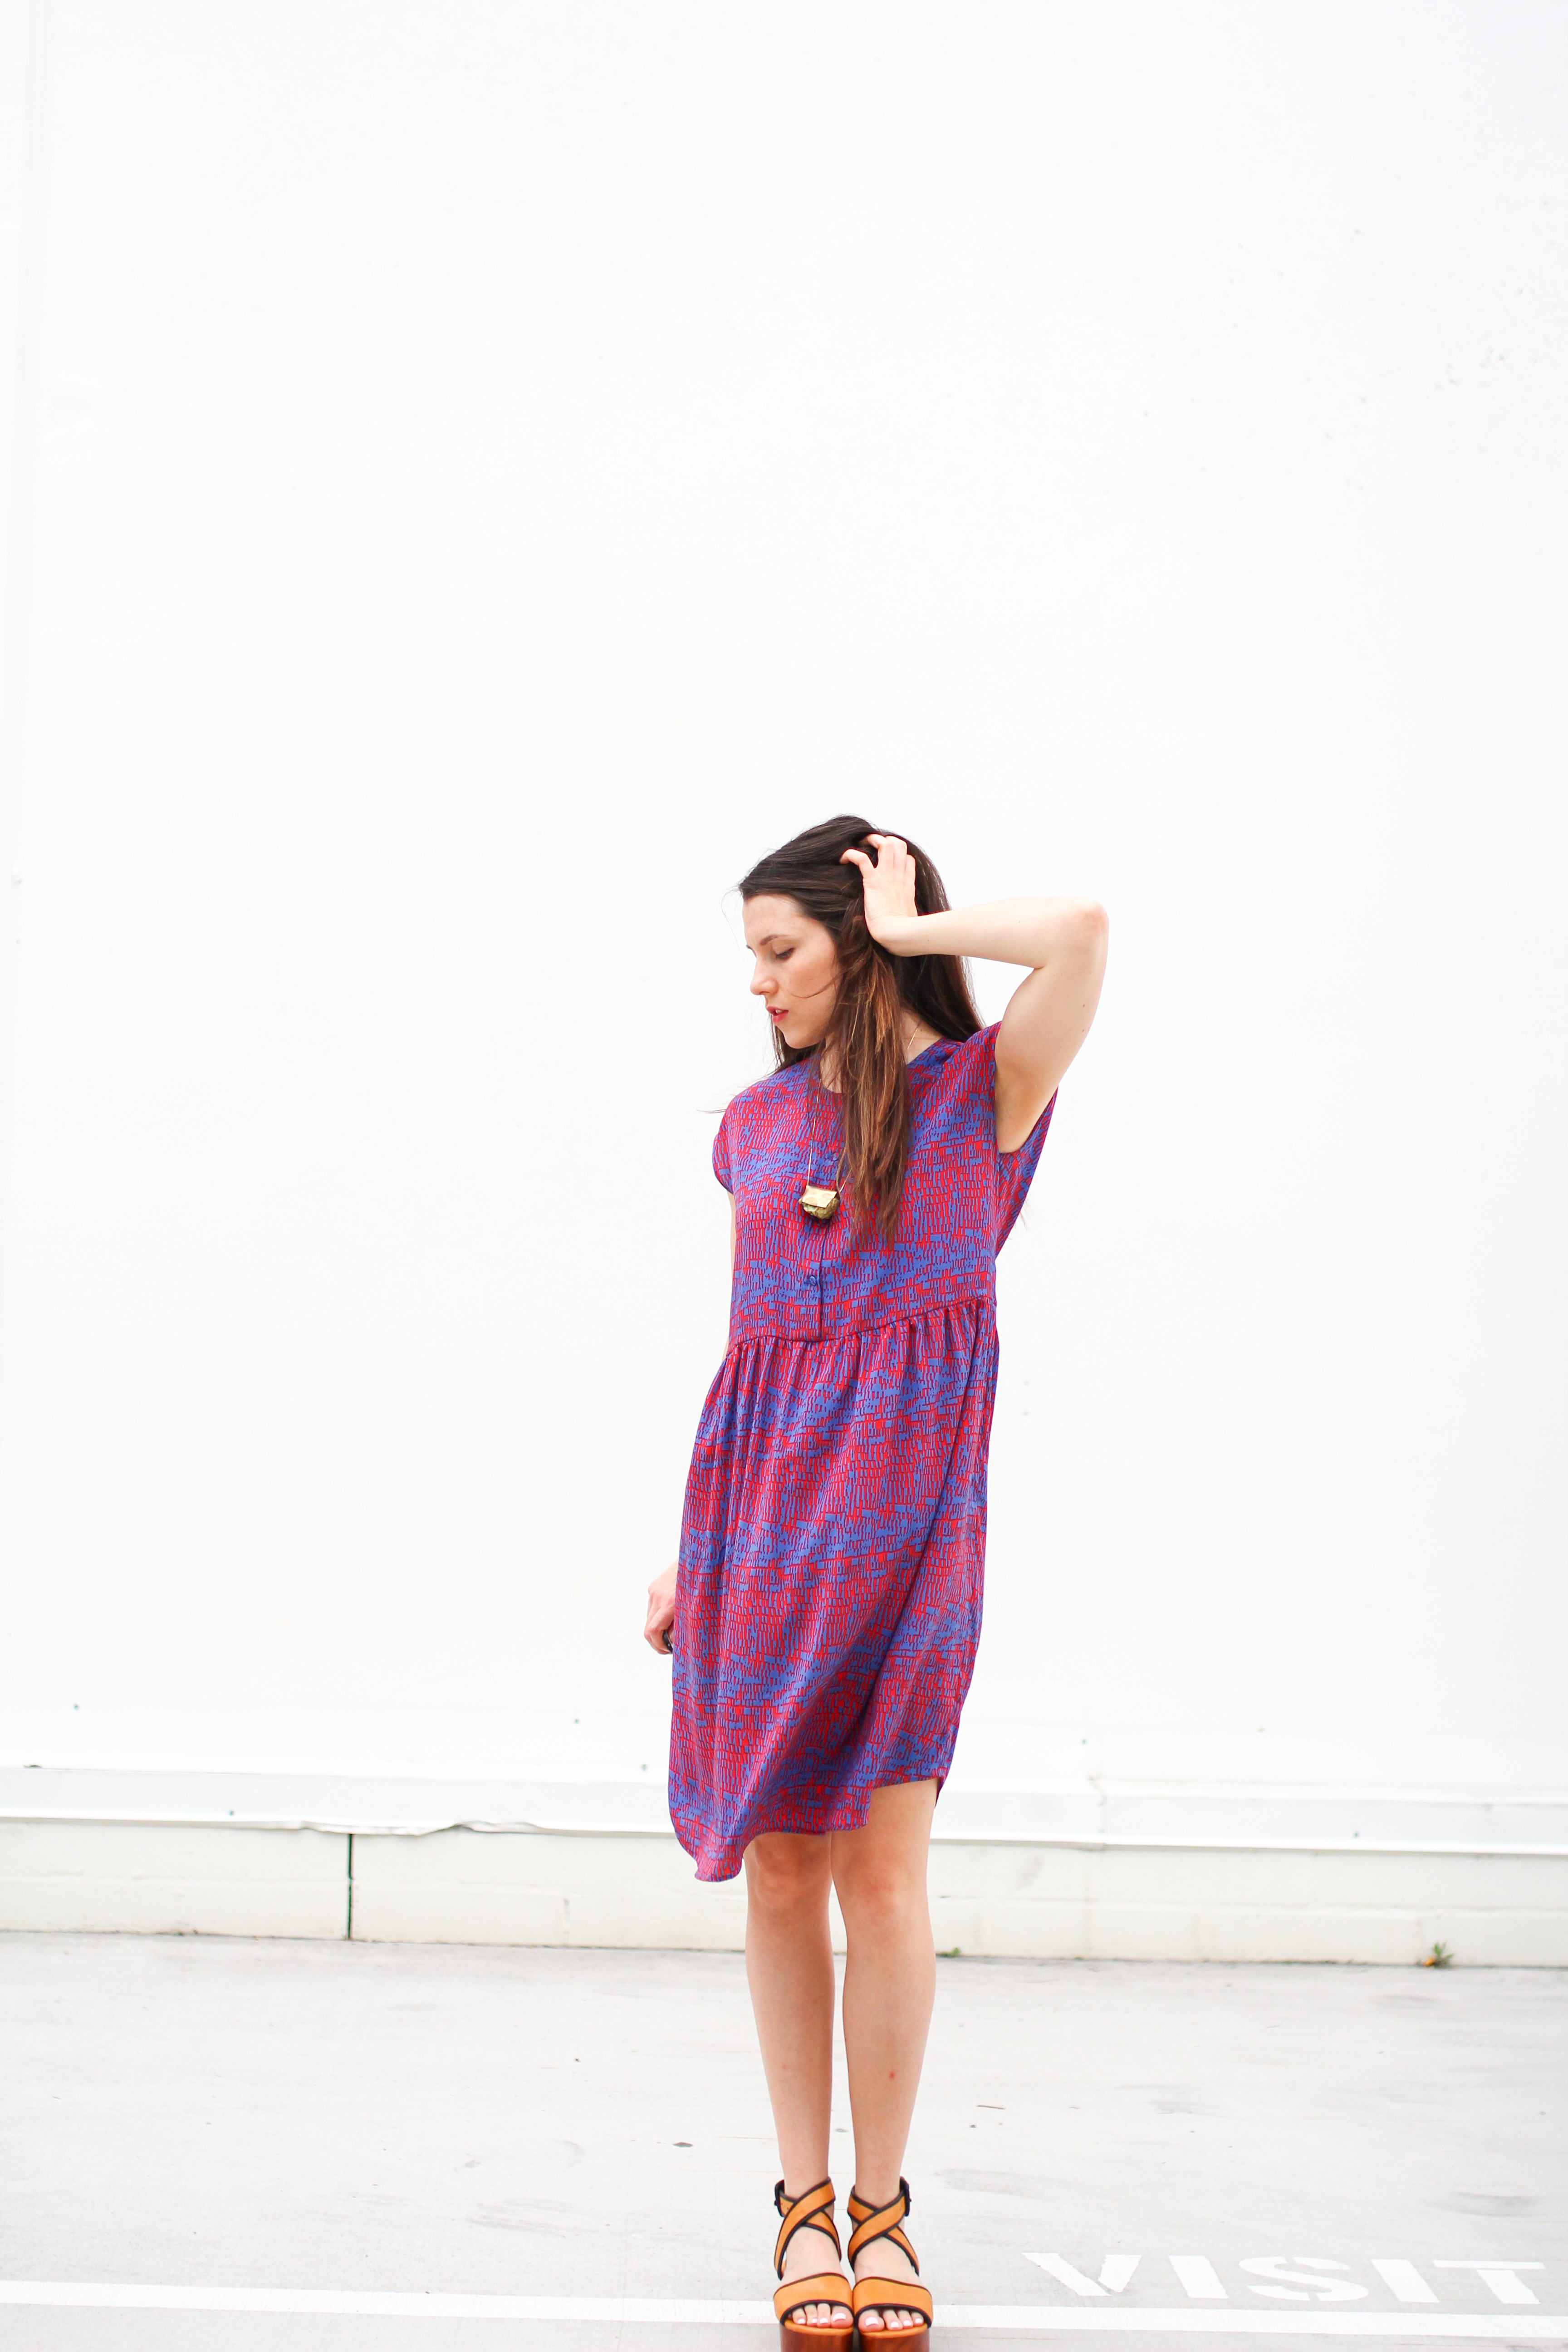
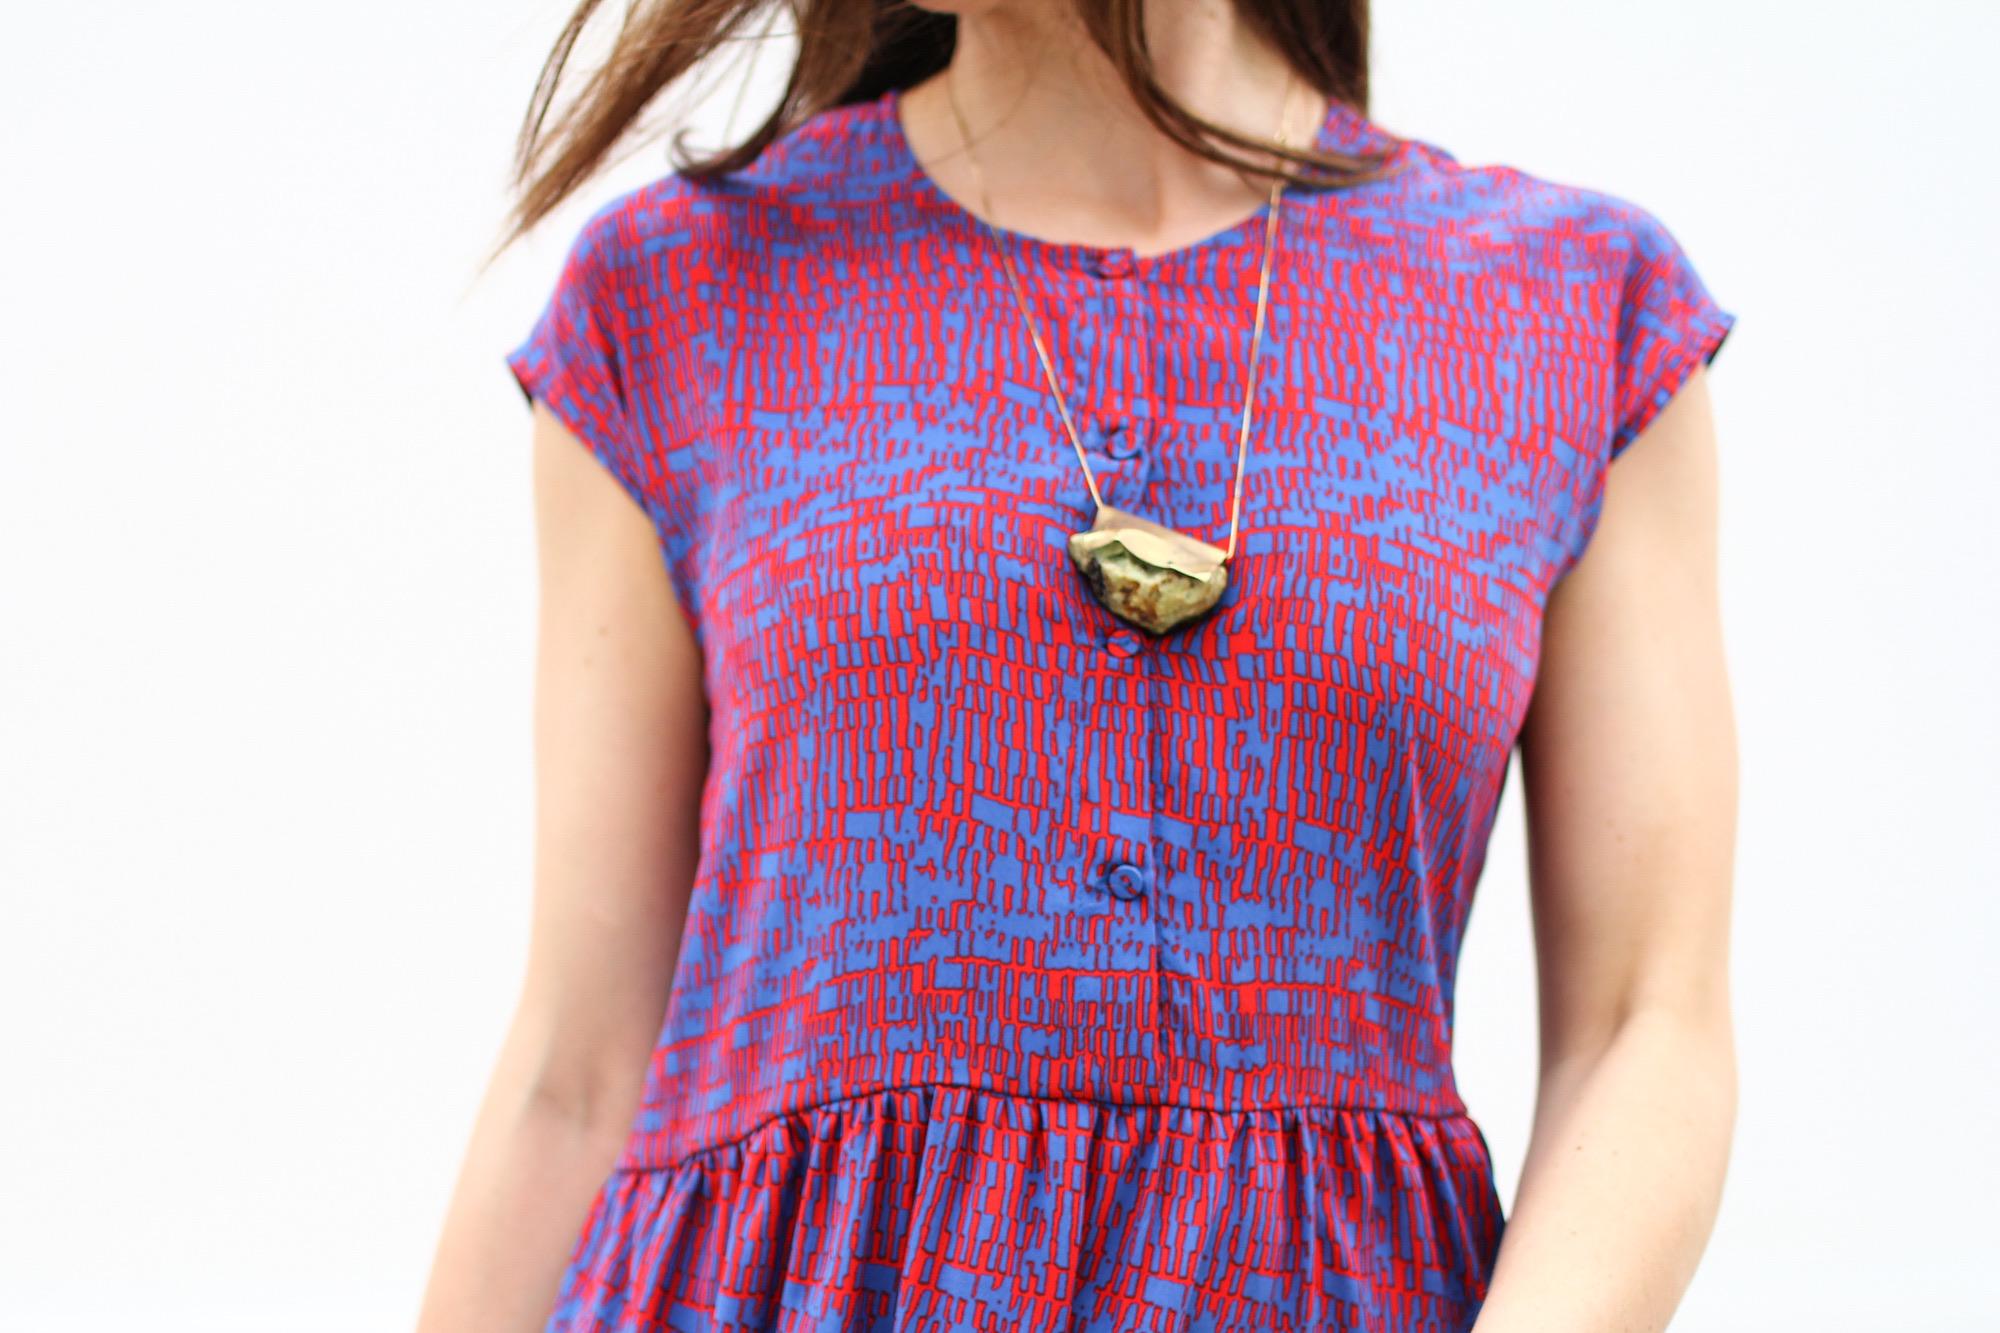
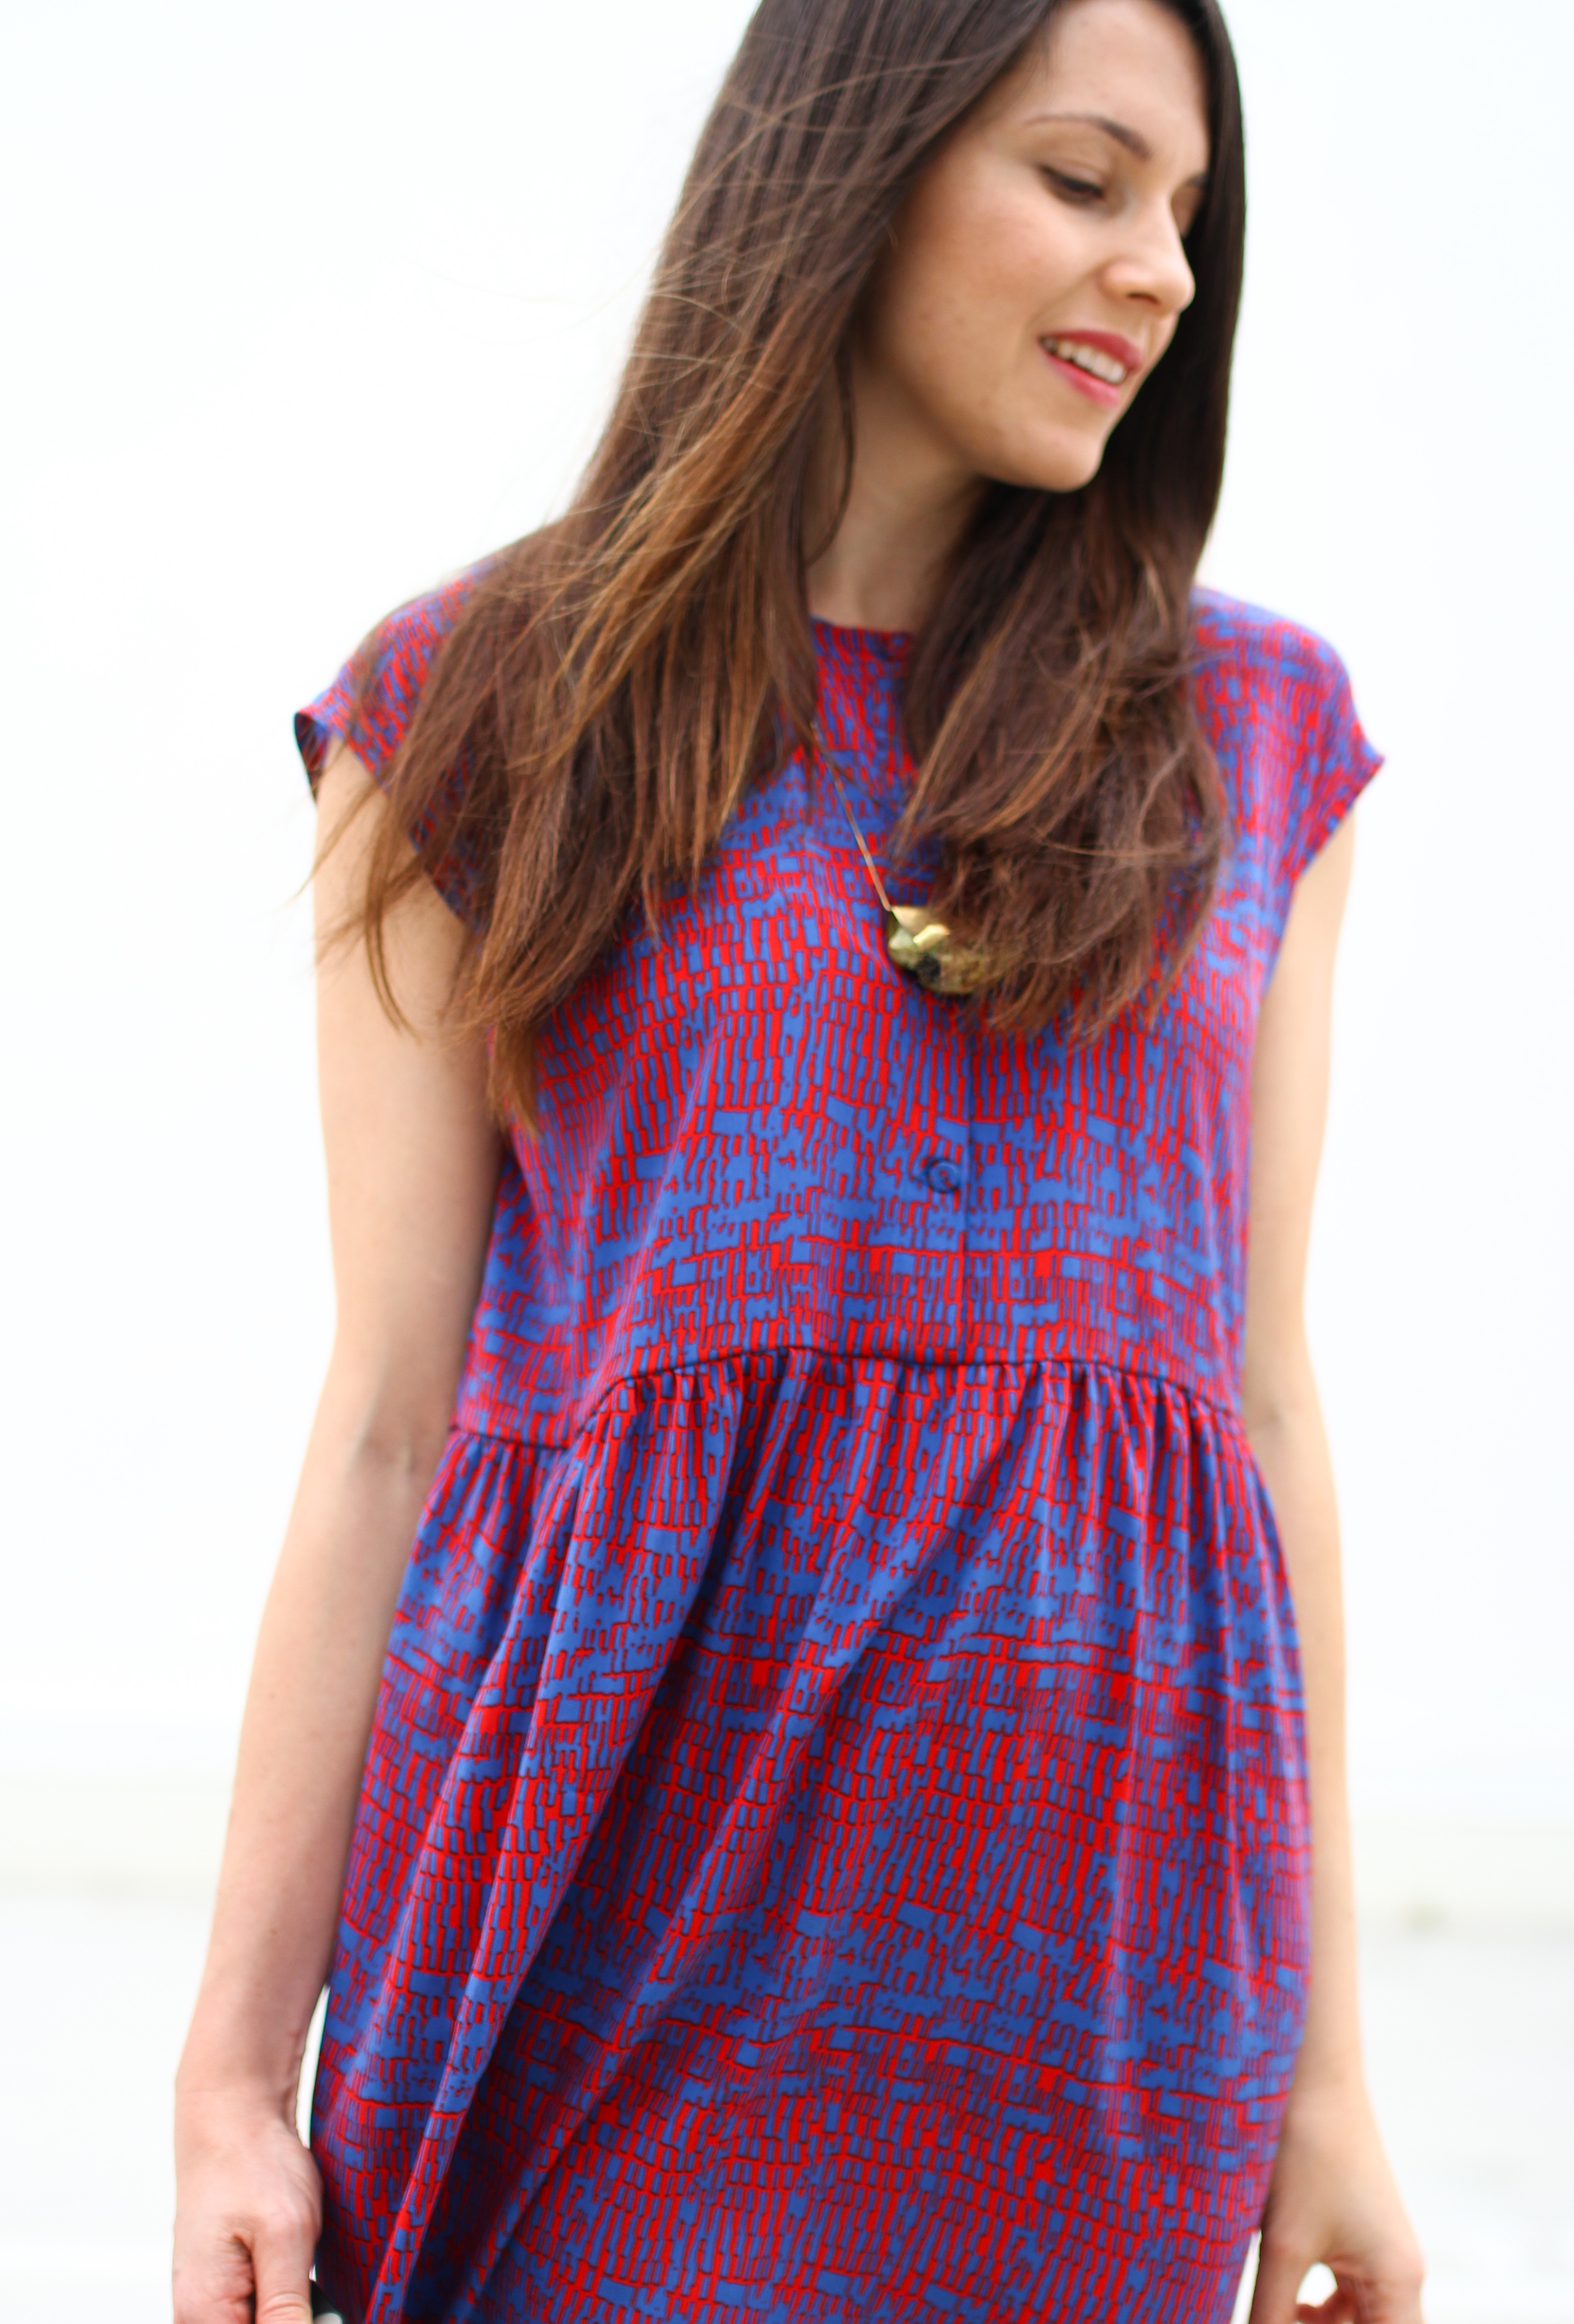
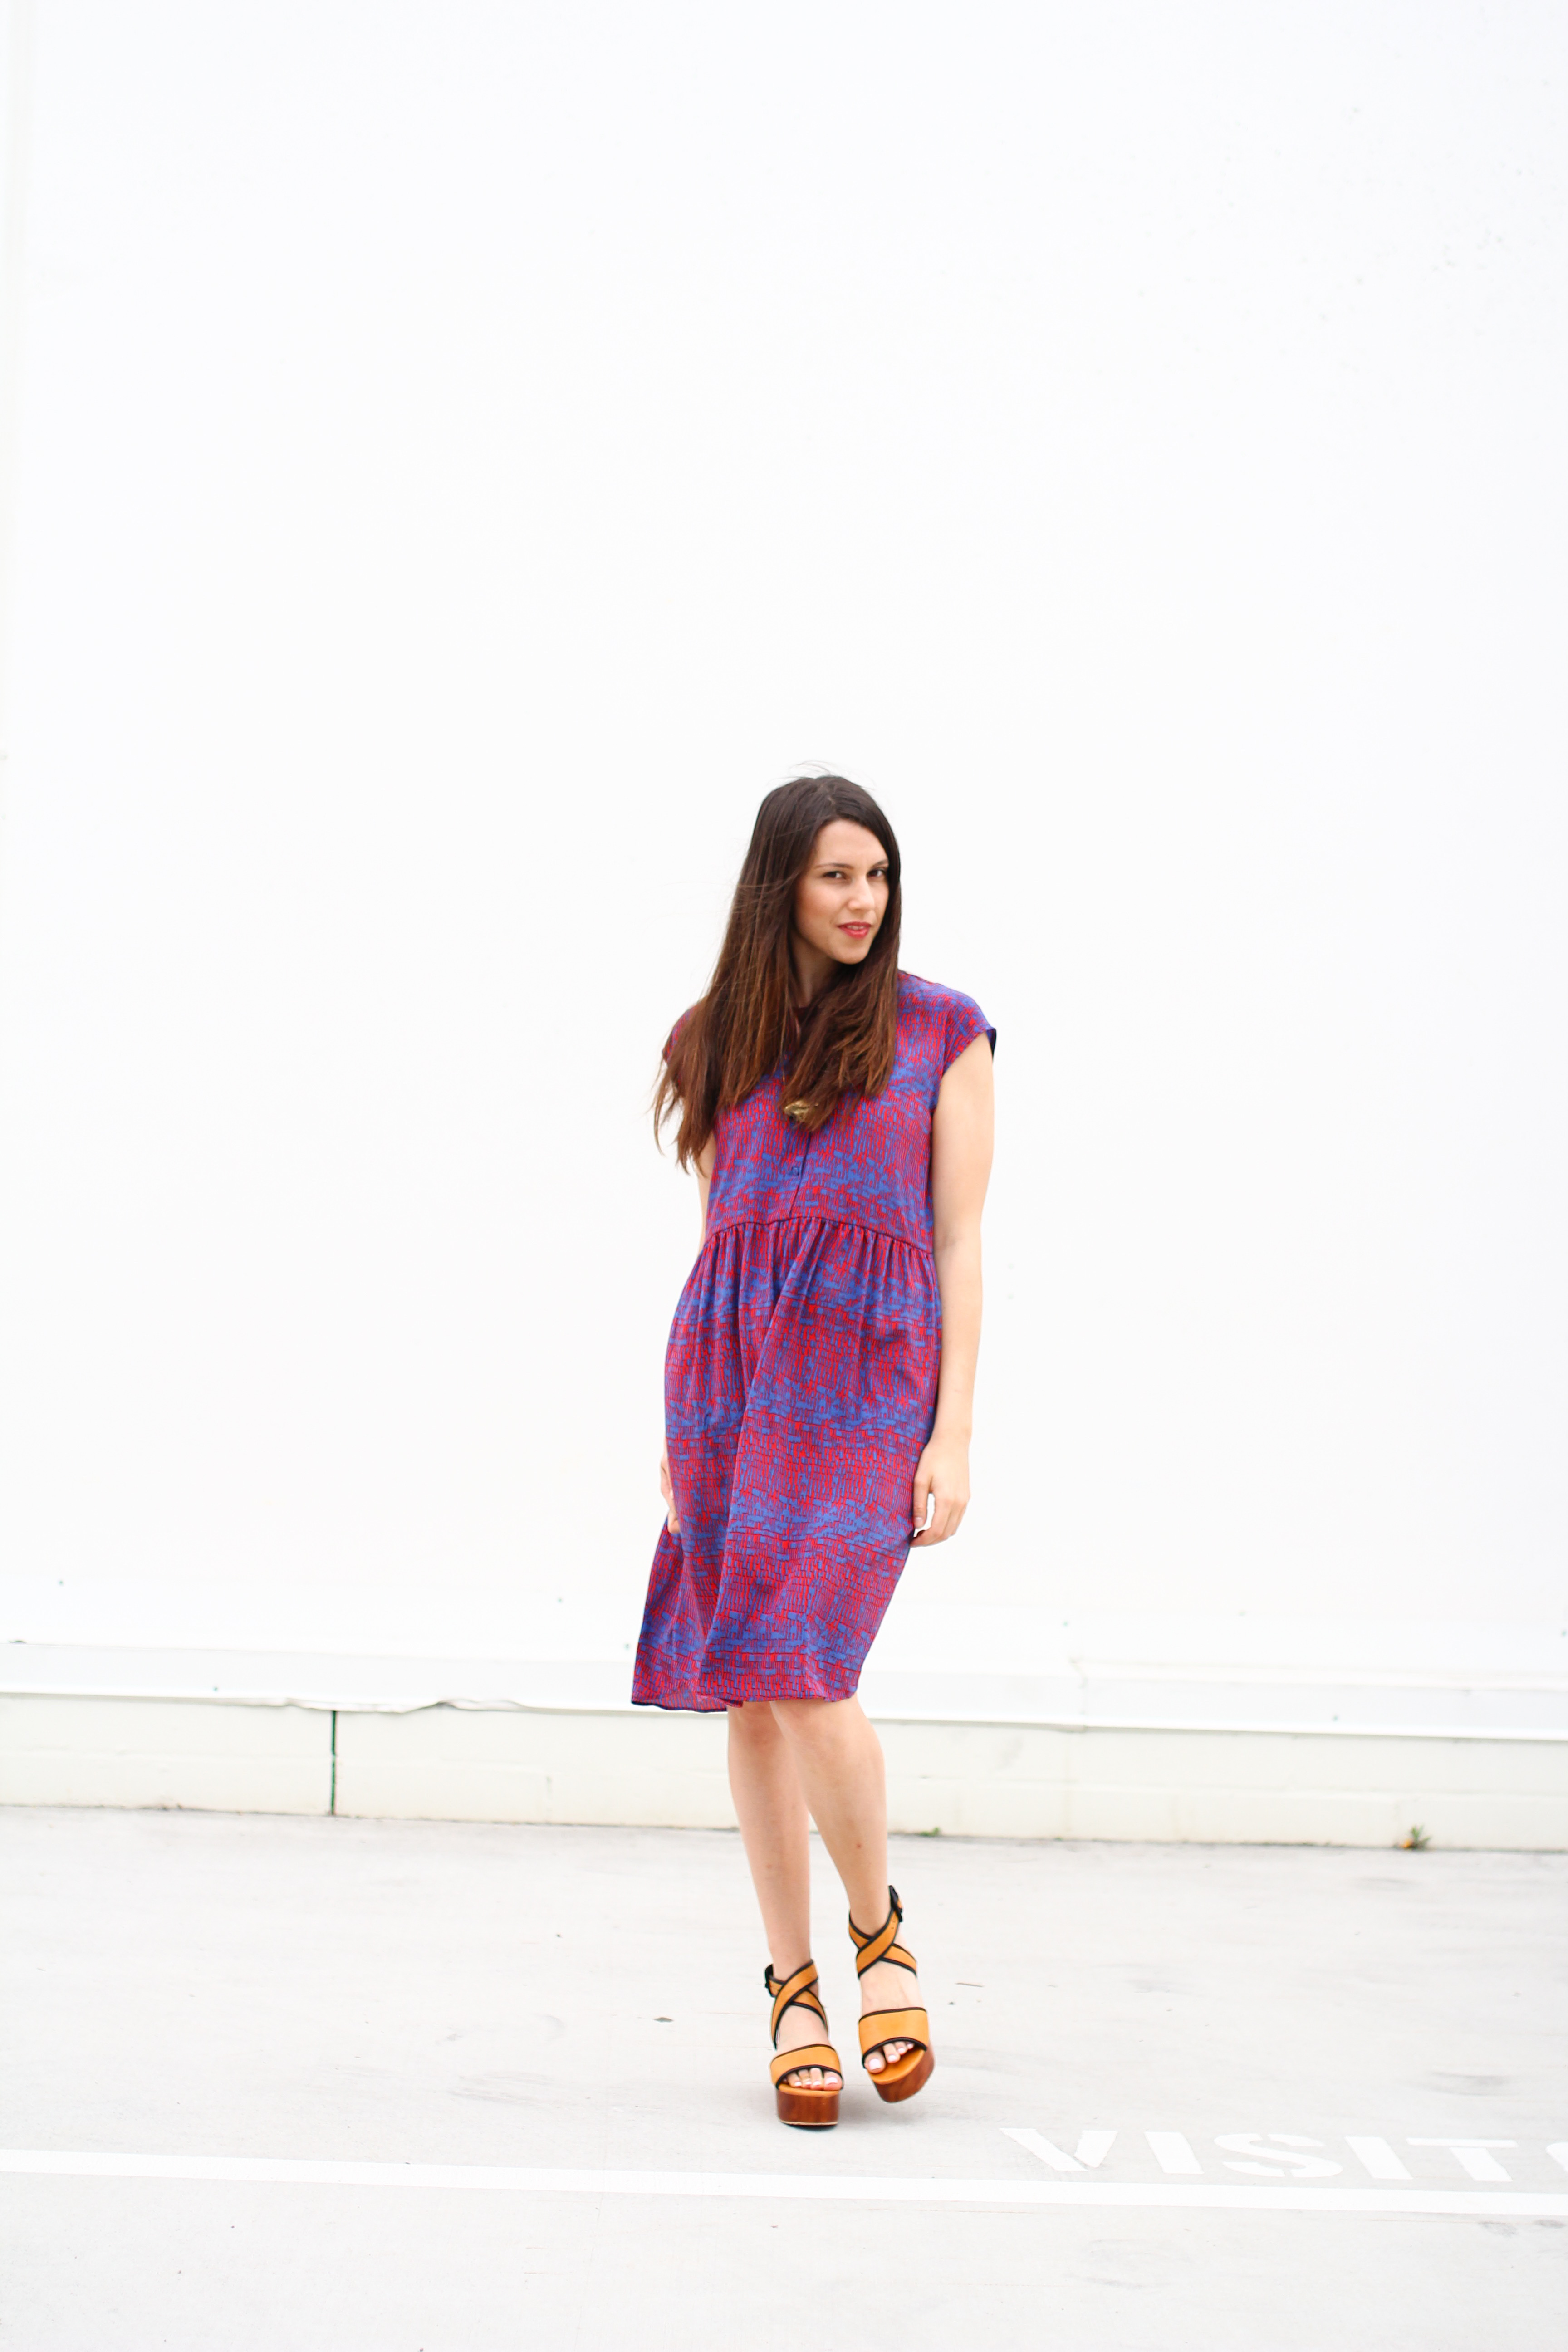
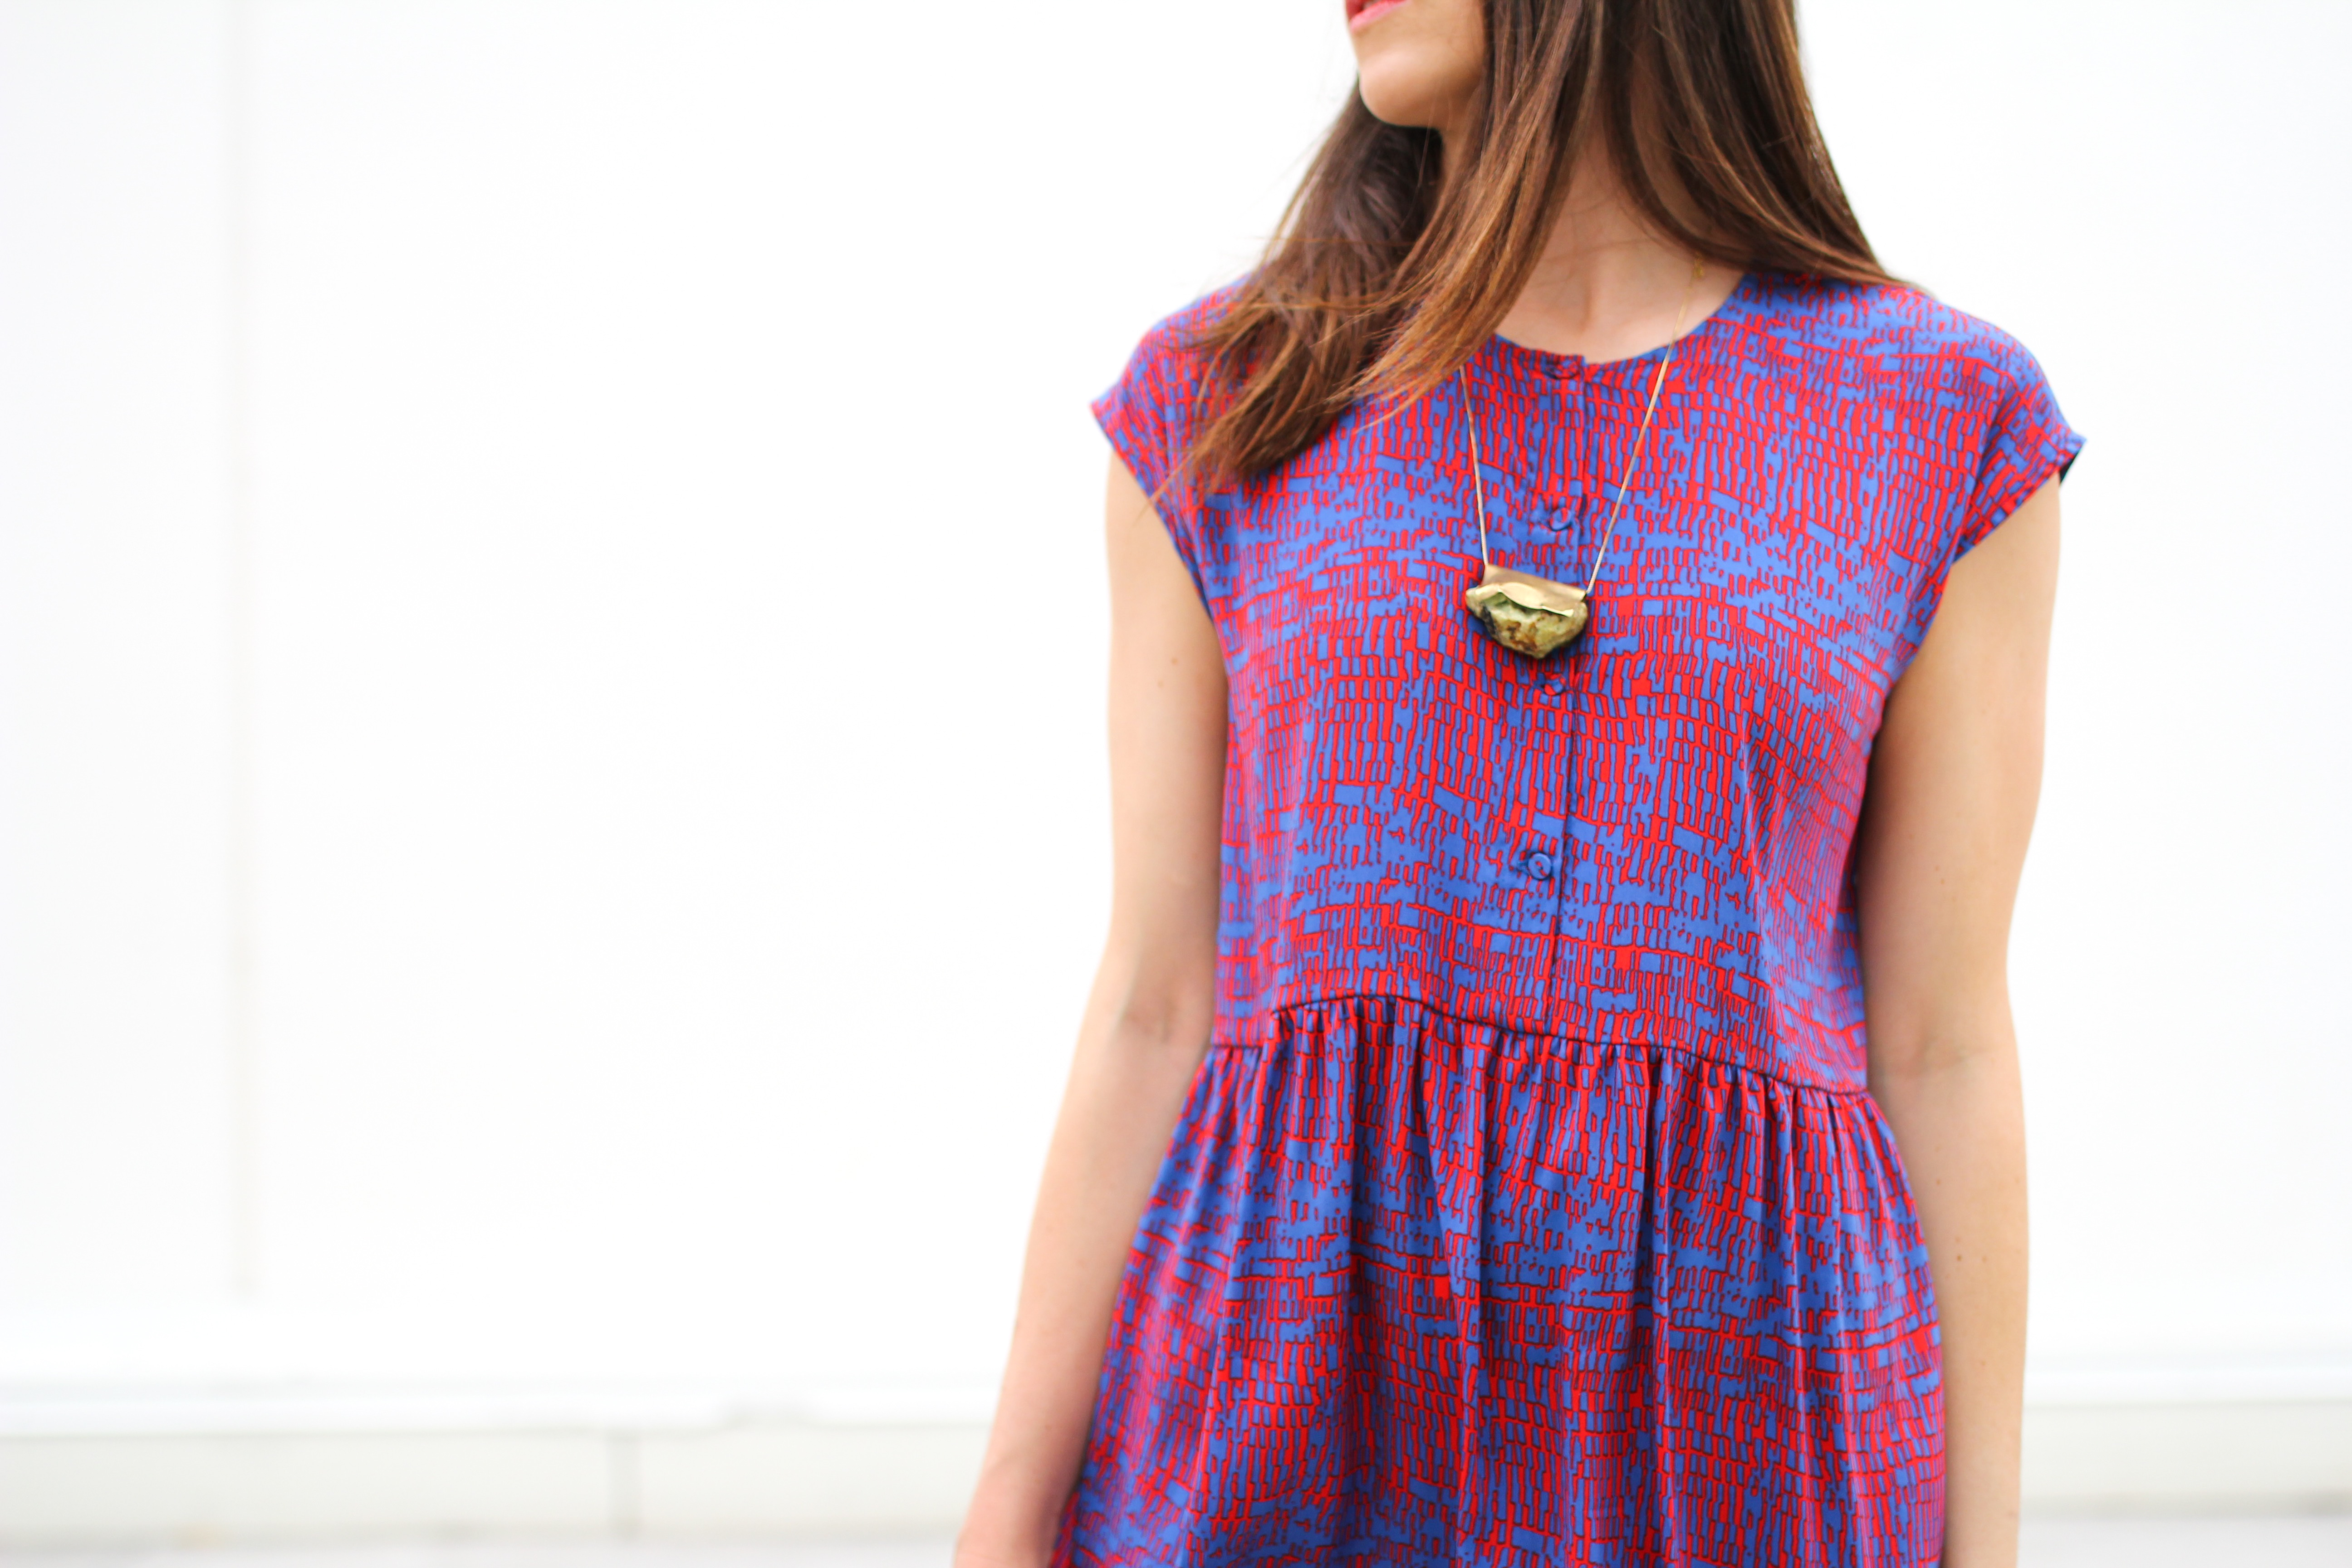
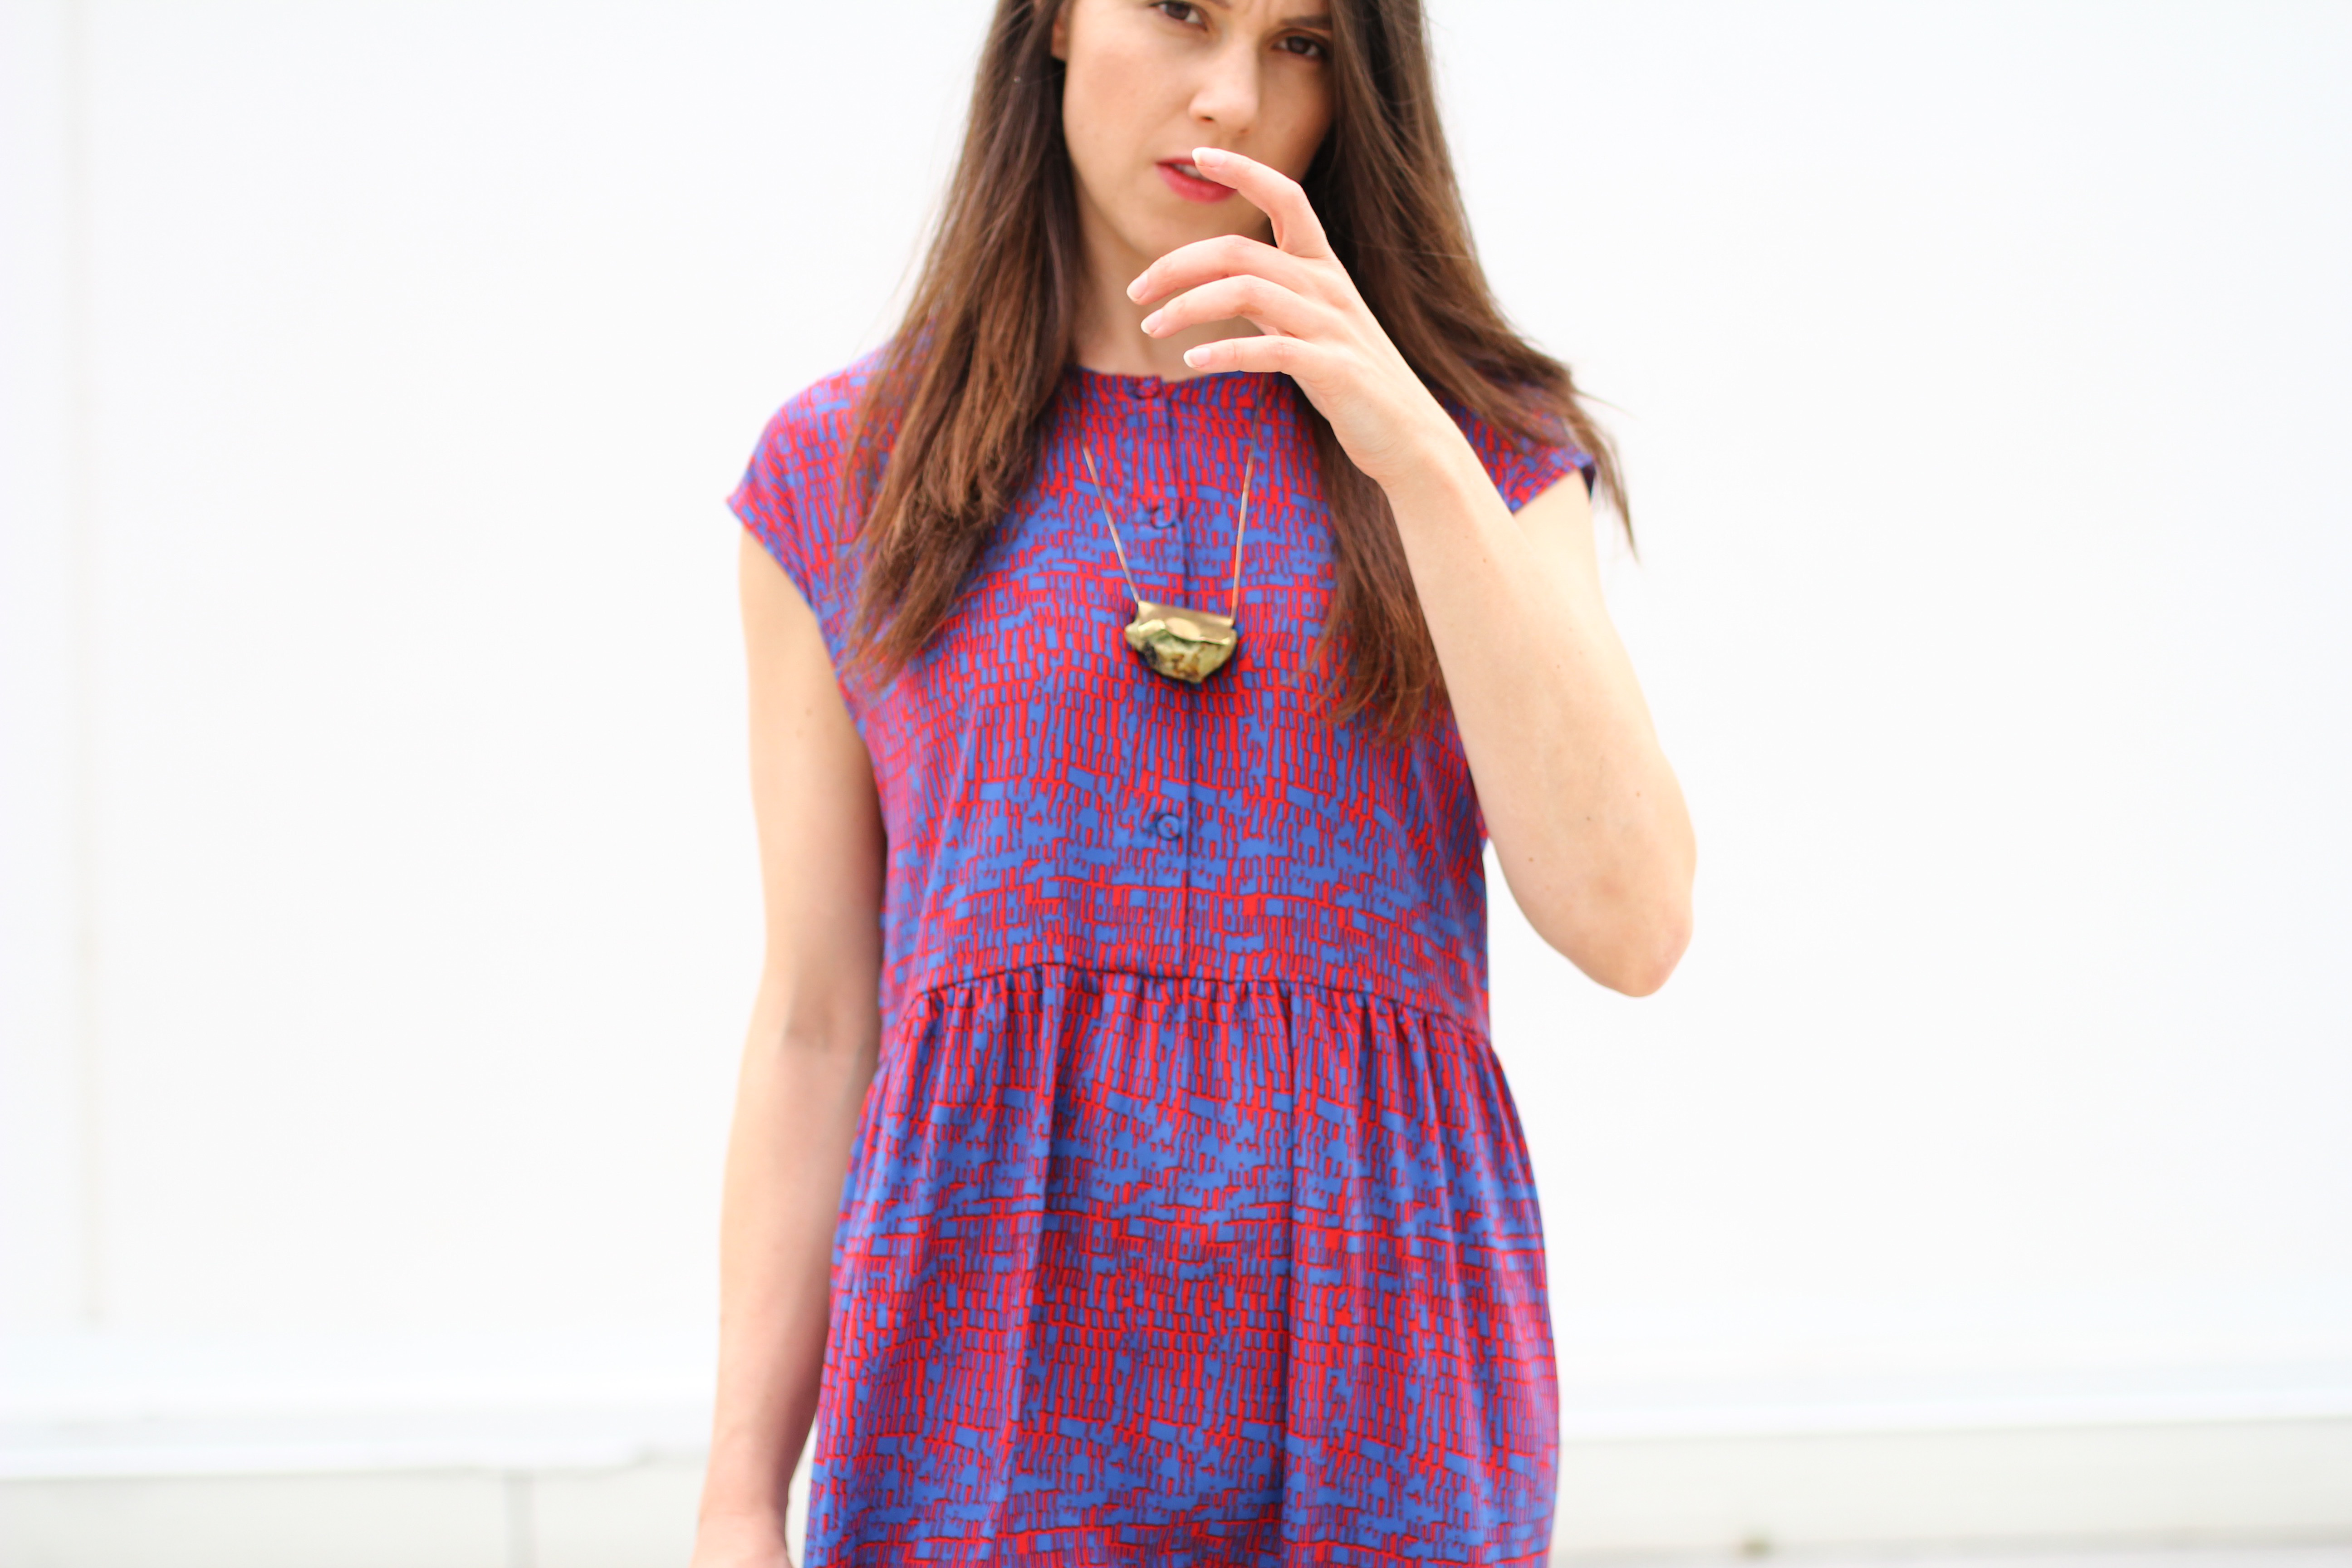
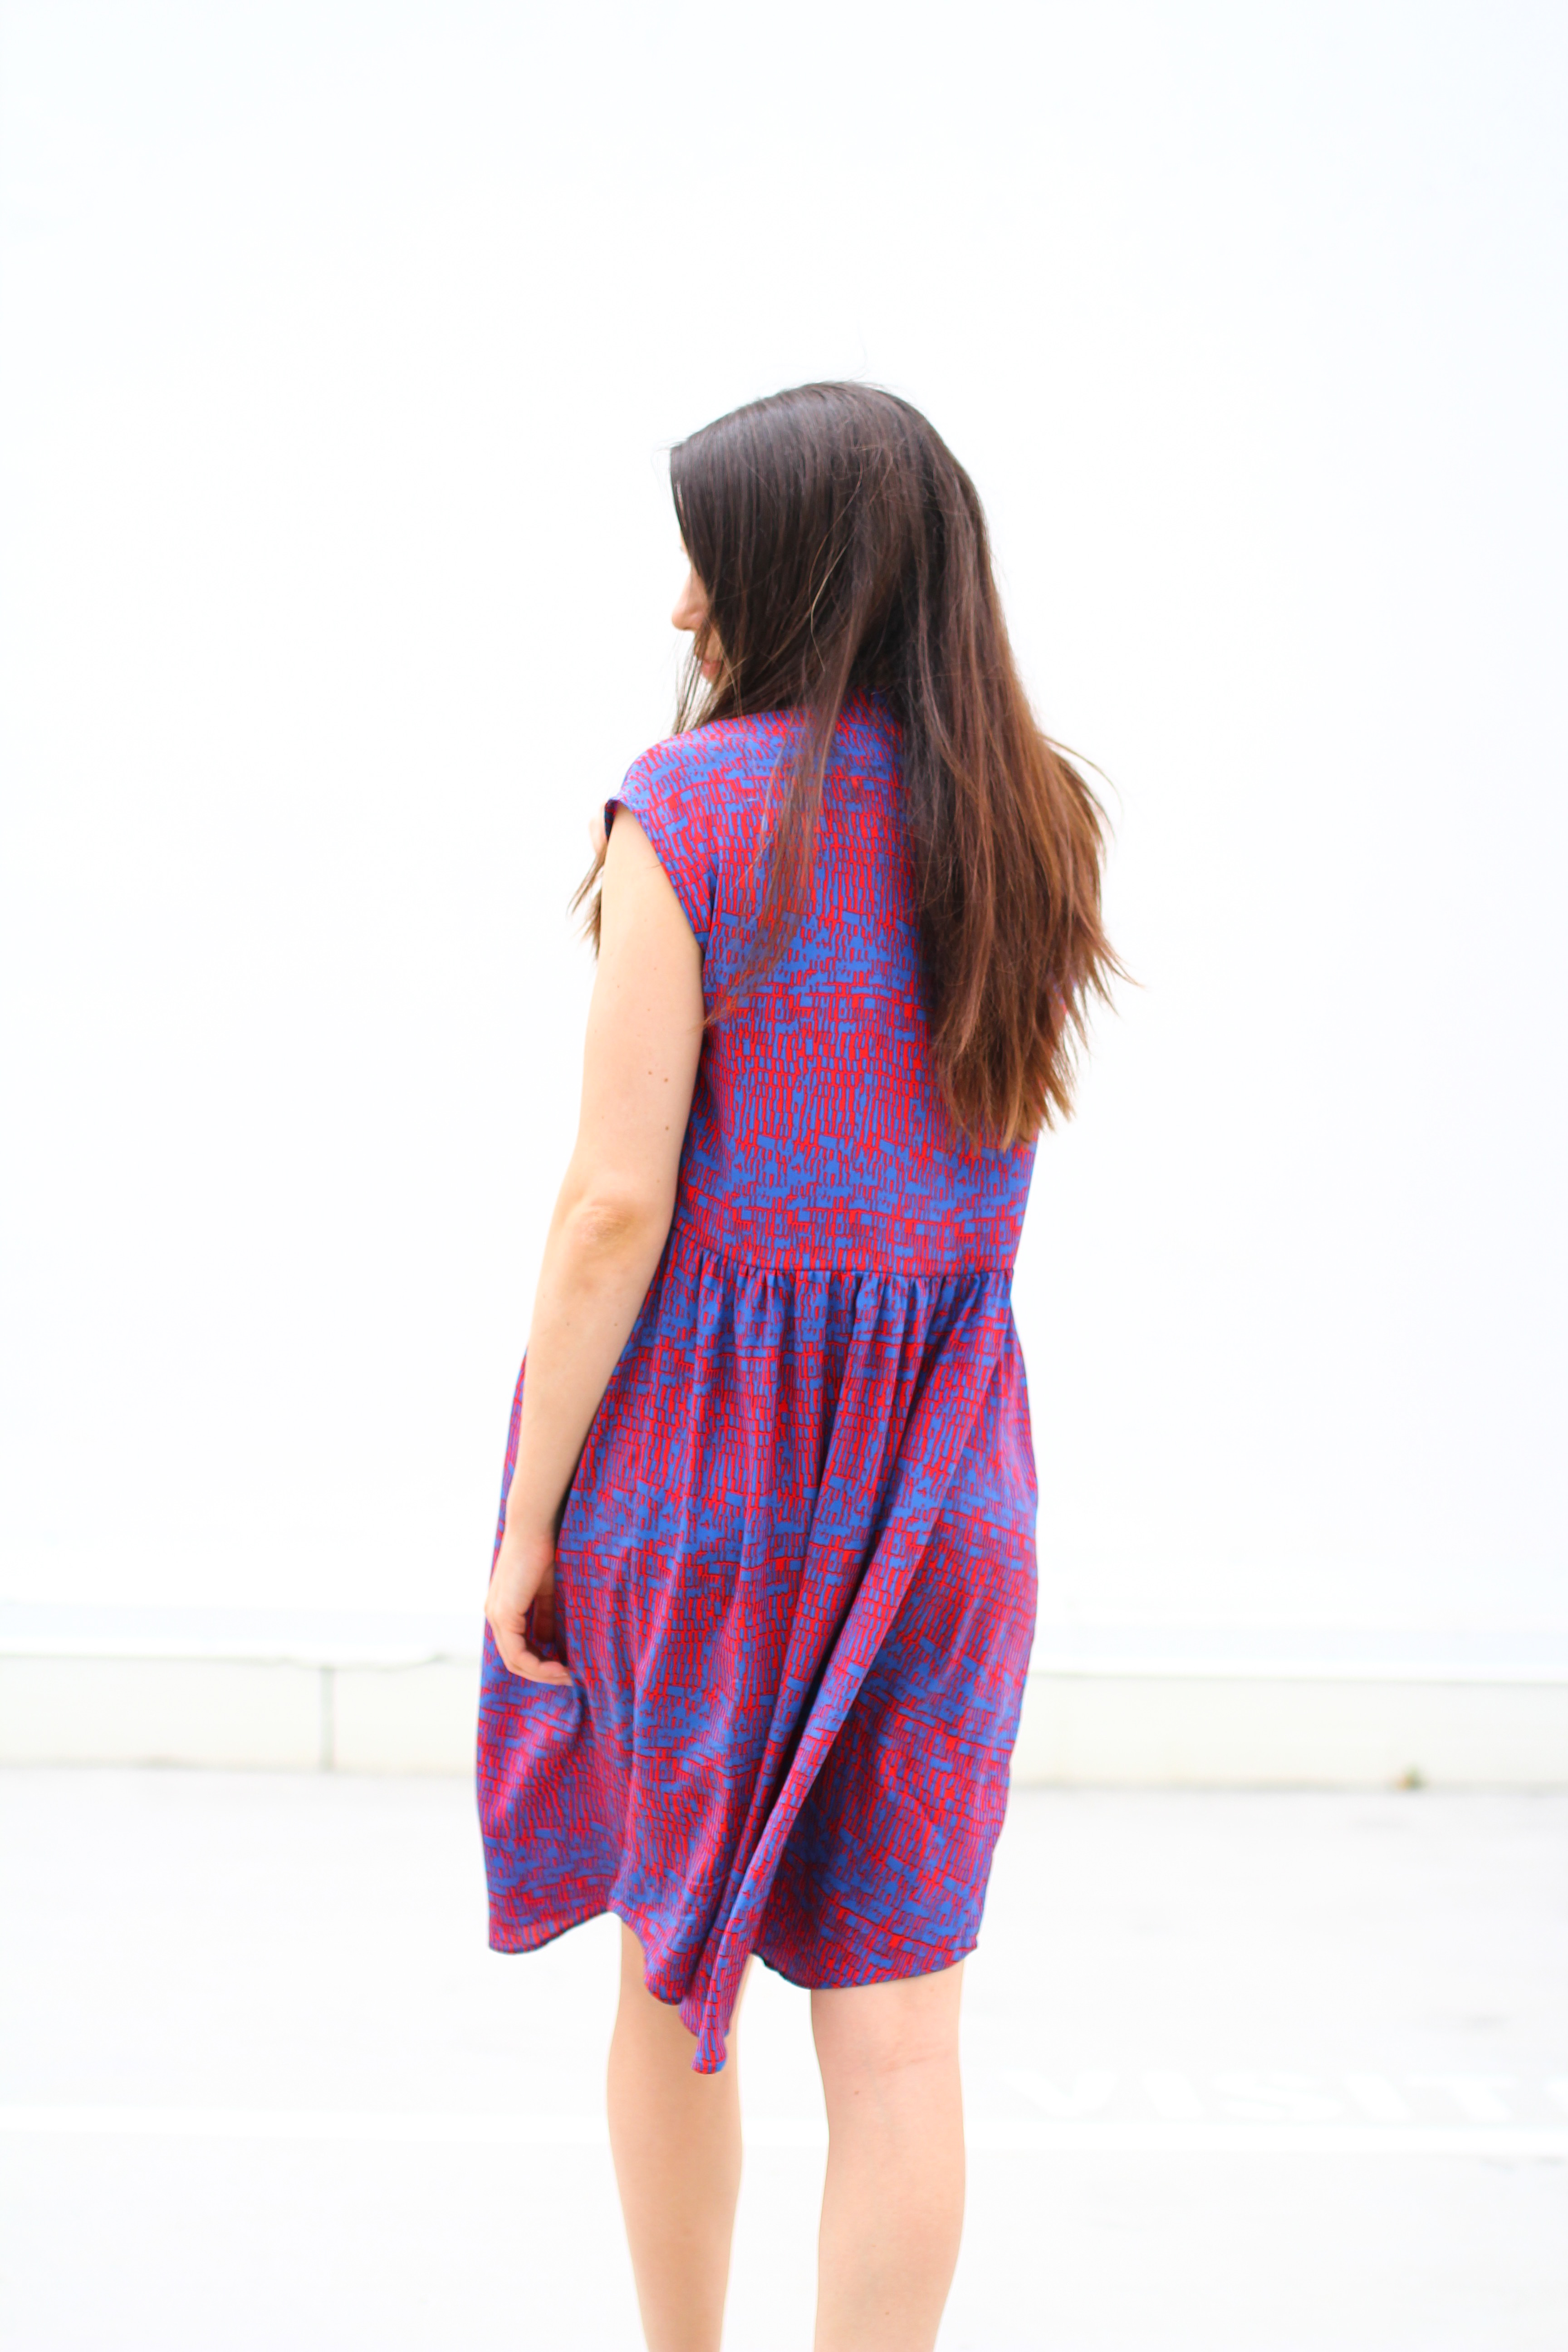 And the result? A dress that is actually pretty close to what I was imagining. Which was: a loose fit, high-ish necked bodice with kimono sleeves / dropped shoulder, a front placket, gathered waist, raised slightly higher in front and lower at the back, round knee length-ish hem scooped up at the side, french seamed with bias bound neck and armsicles and waist seam. And a cherry on top. I sewed up this sample size in this silk crepe de chine print from The Fabric Store but I actually think it might work better in a solid, since some of the features get lost. Am I allowed to confess, after all that, that I’m not totally in love with it? Don’t slap me. I’m actually okay with this. Seeing it come to life from an idea was irrevocably the coolest thing ever.
 To be honest, when it didn’t all go ahead, of course I was disheartened but a little part of me was relieved. The timing was not great. I’m not sure I really had the creative energy to devote to such a massive project last year, with my littlest man still at home. So, I’ve filed this one away in the box of life experiences! And the dress and pattern are just kinda chillin with their homies for now. As always, I love to hear your thoughts…and am curious…would you actually wear this dress? What’s working / not working?
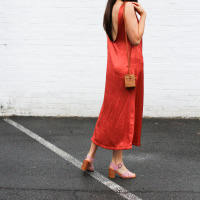
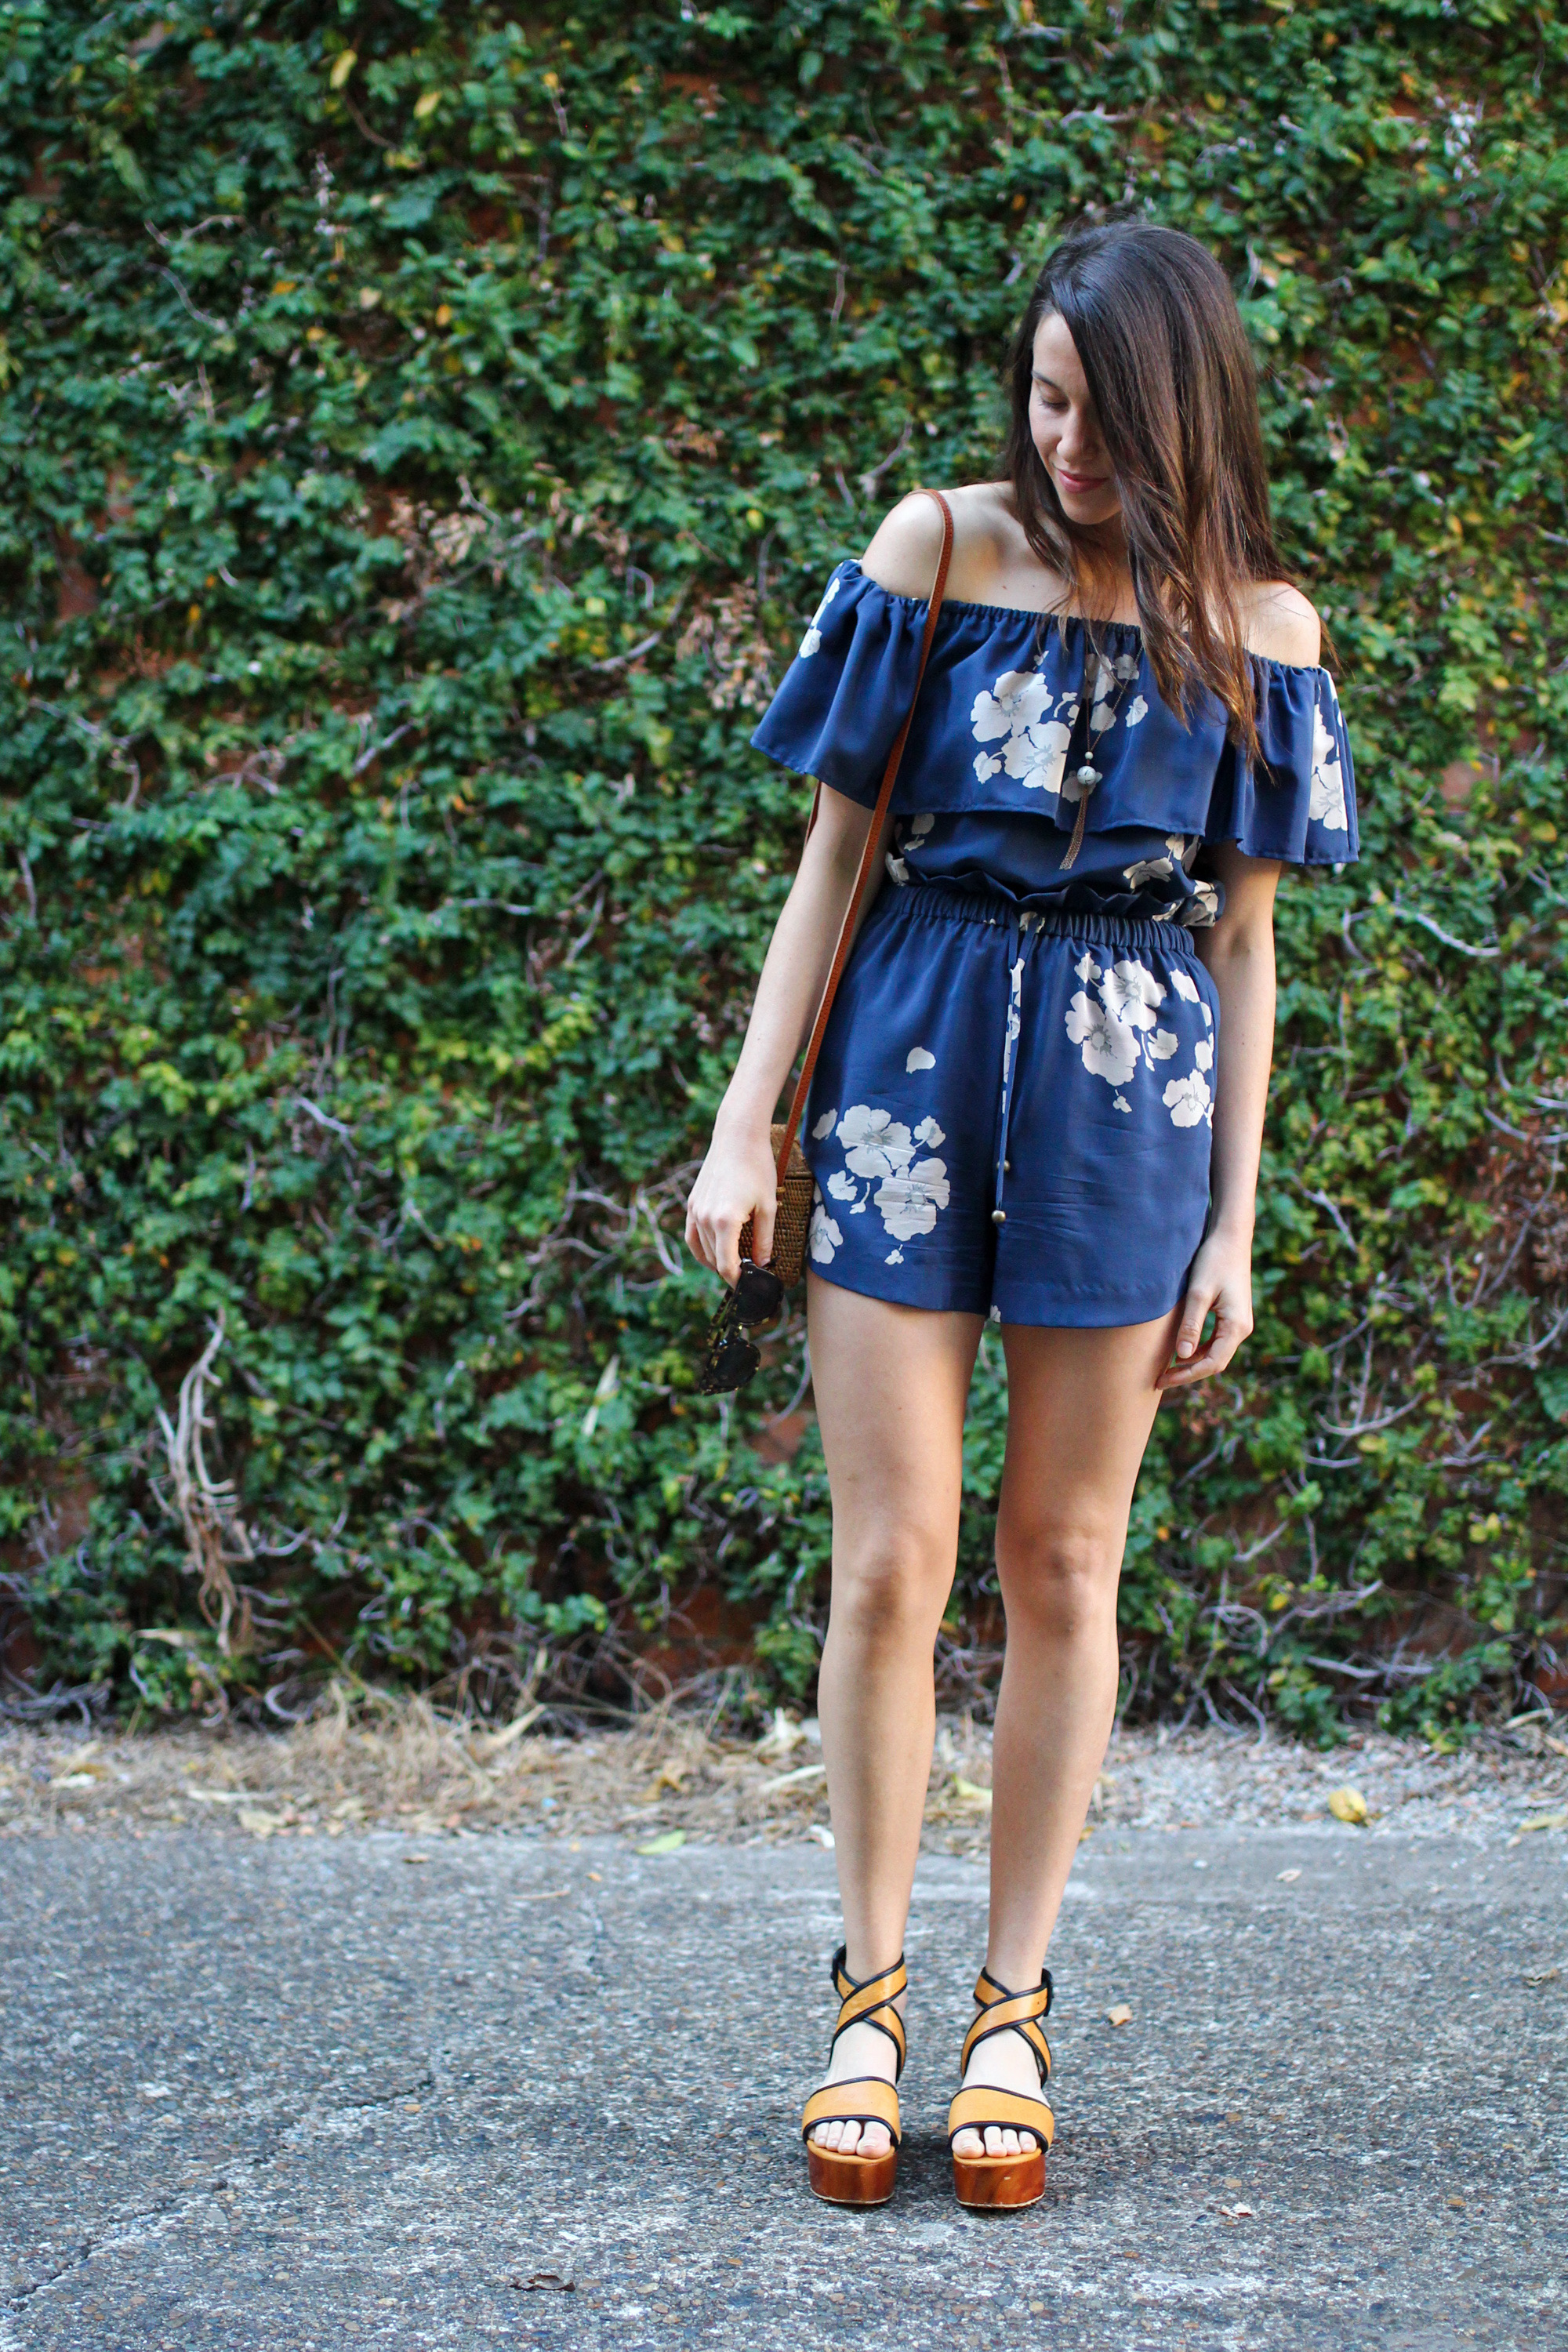
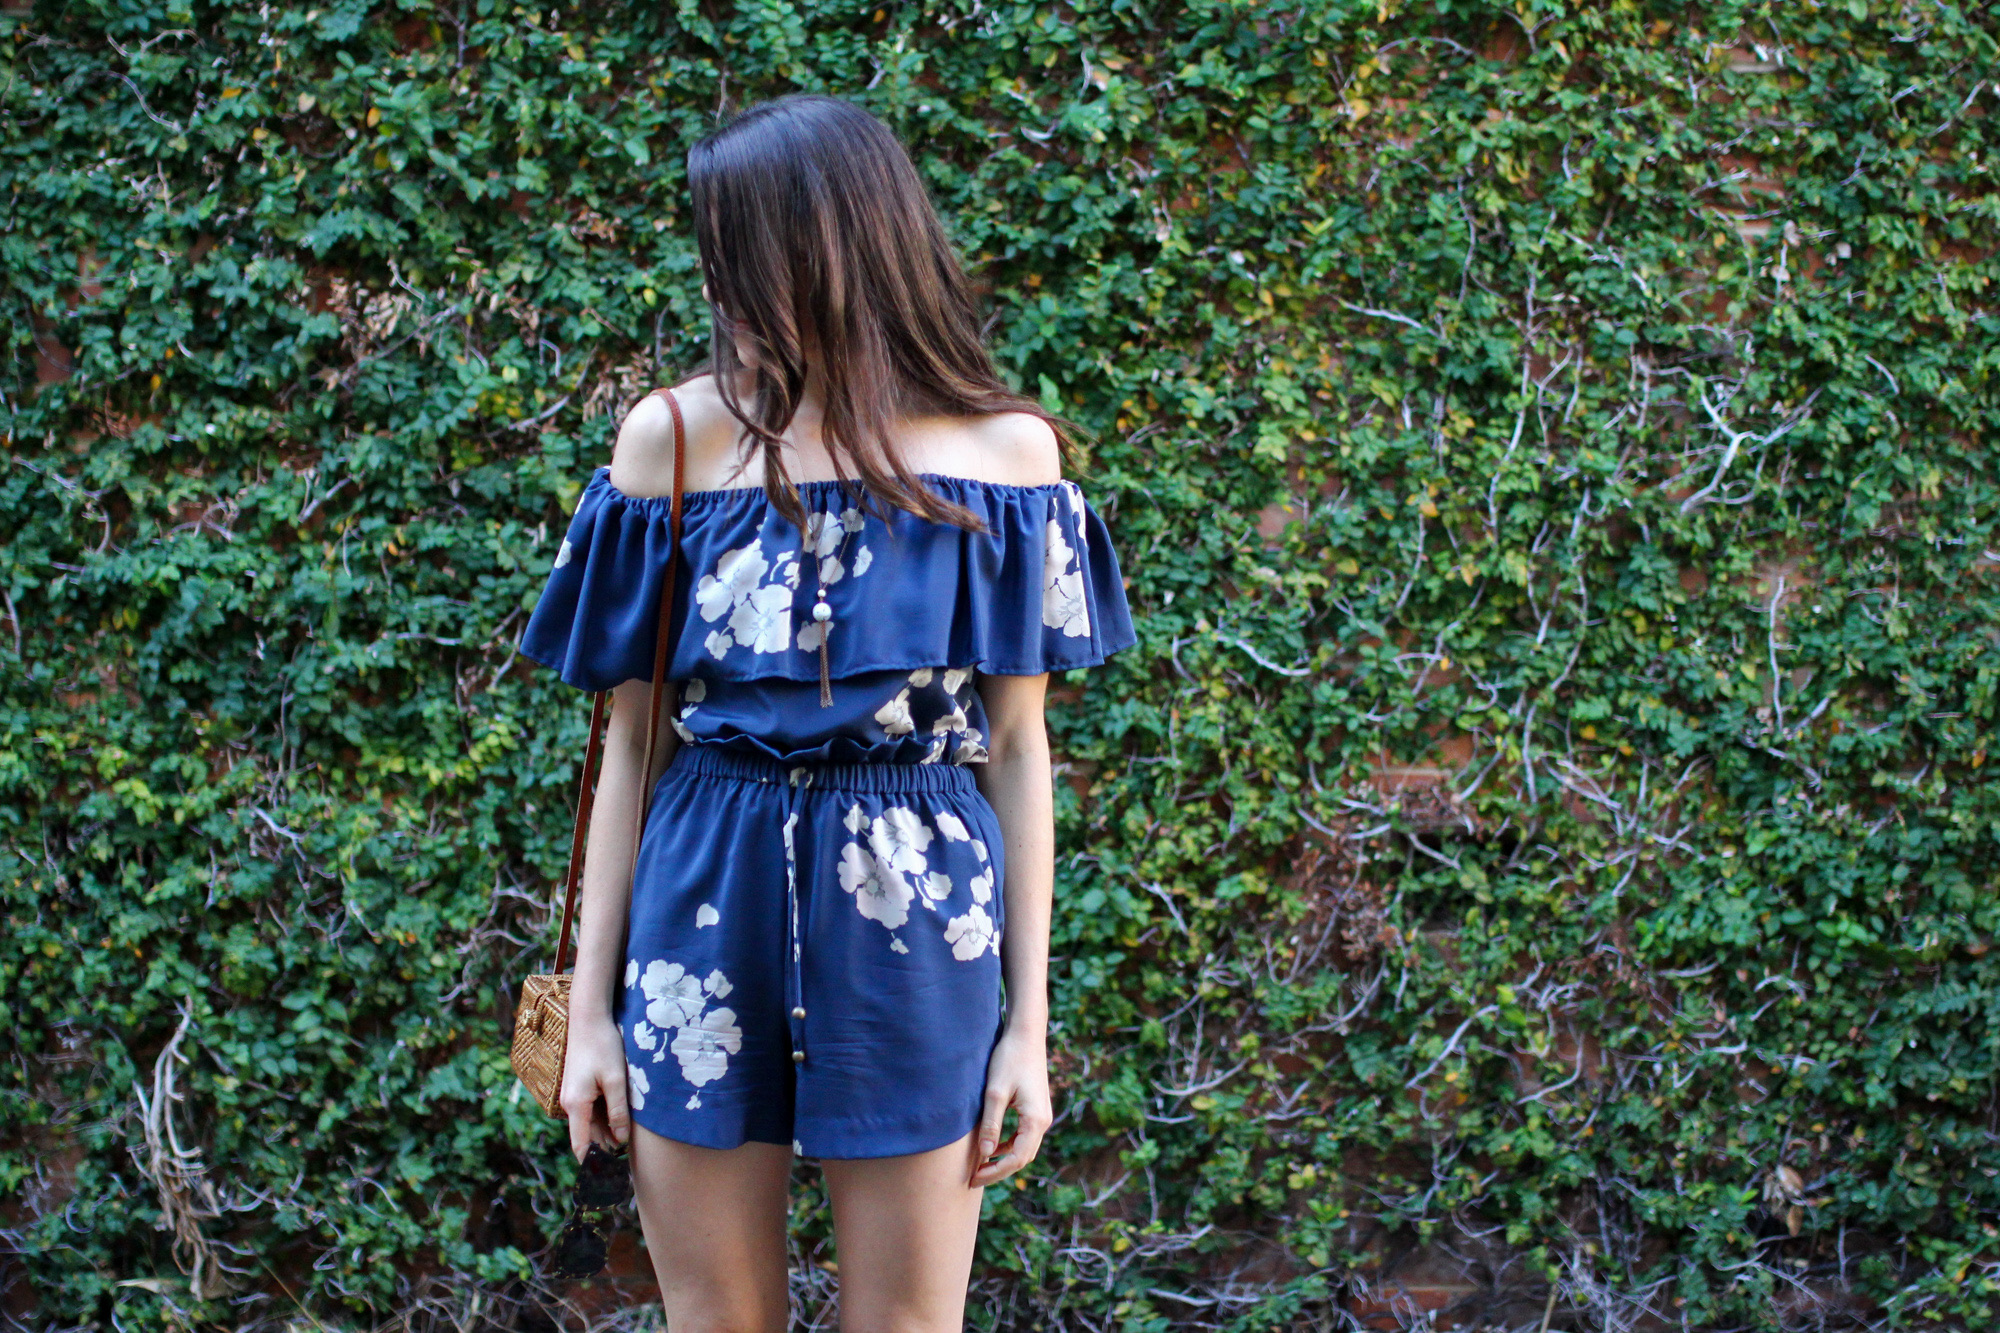
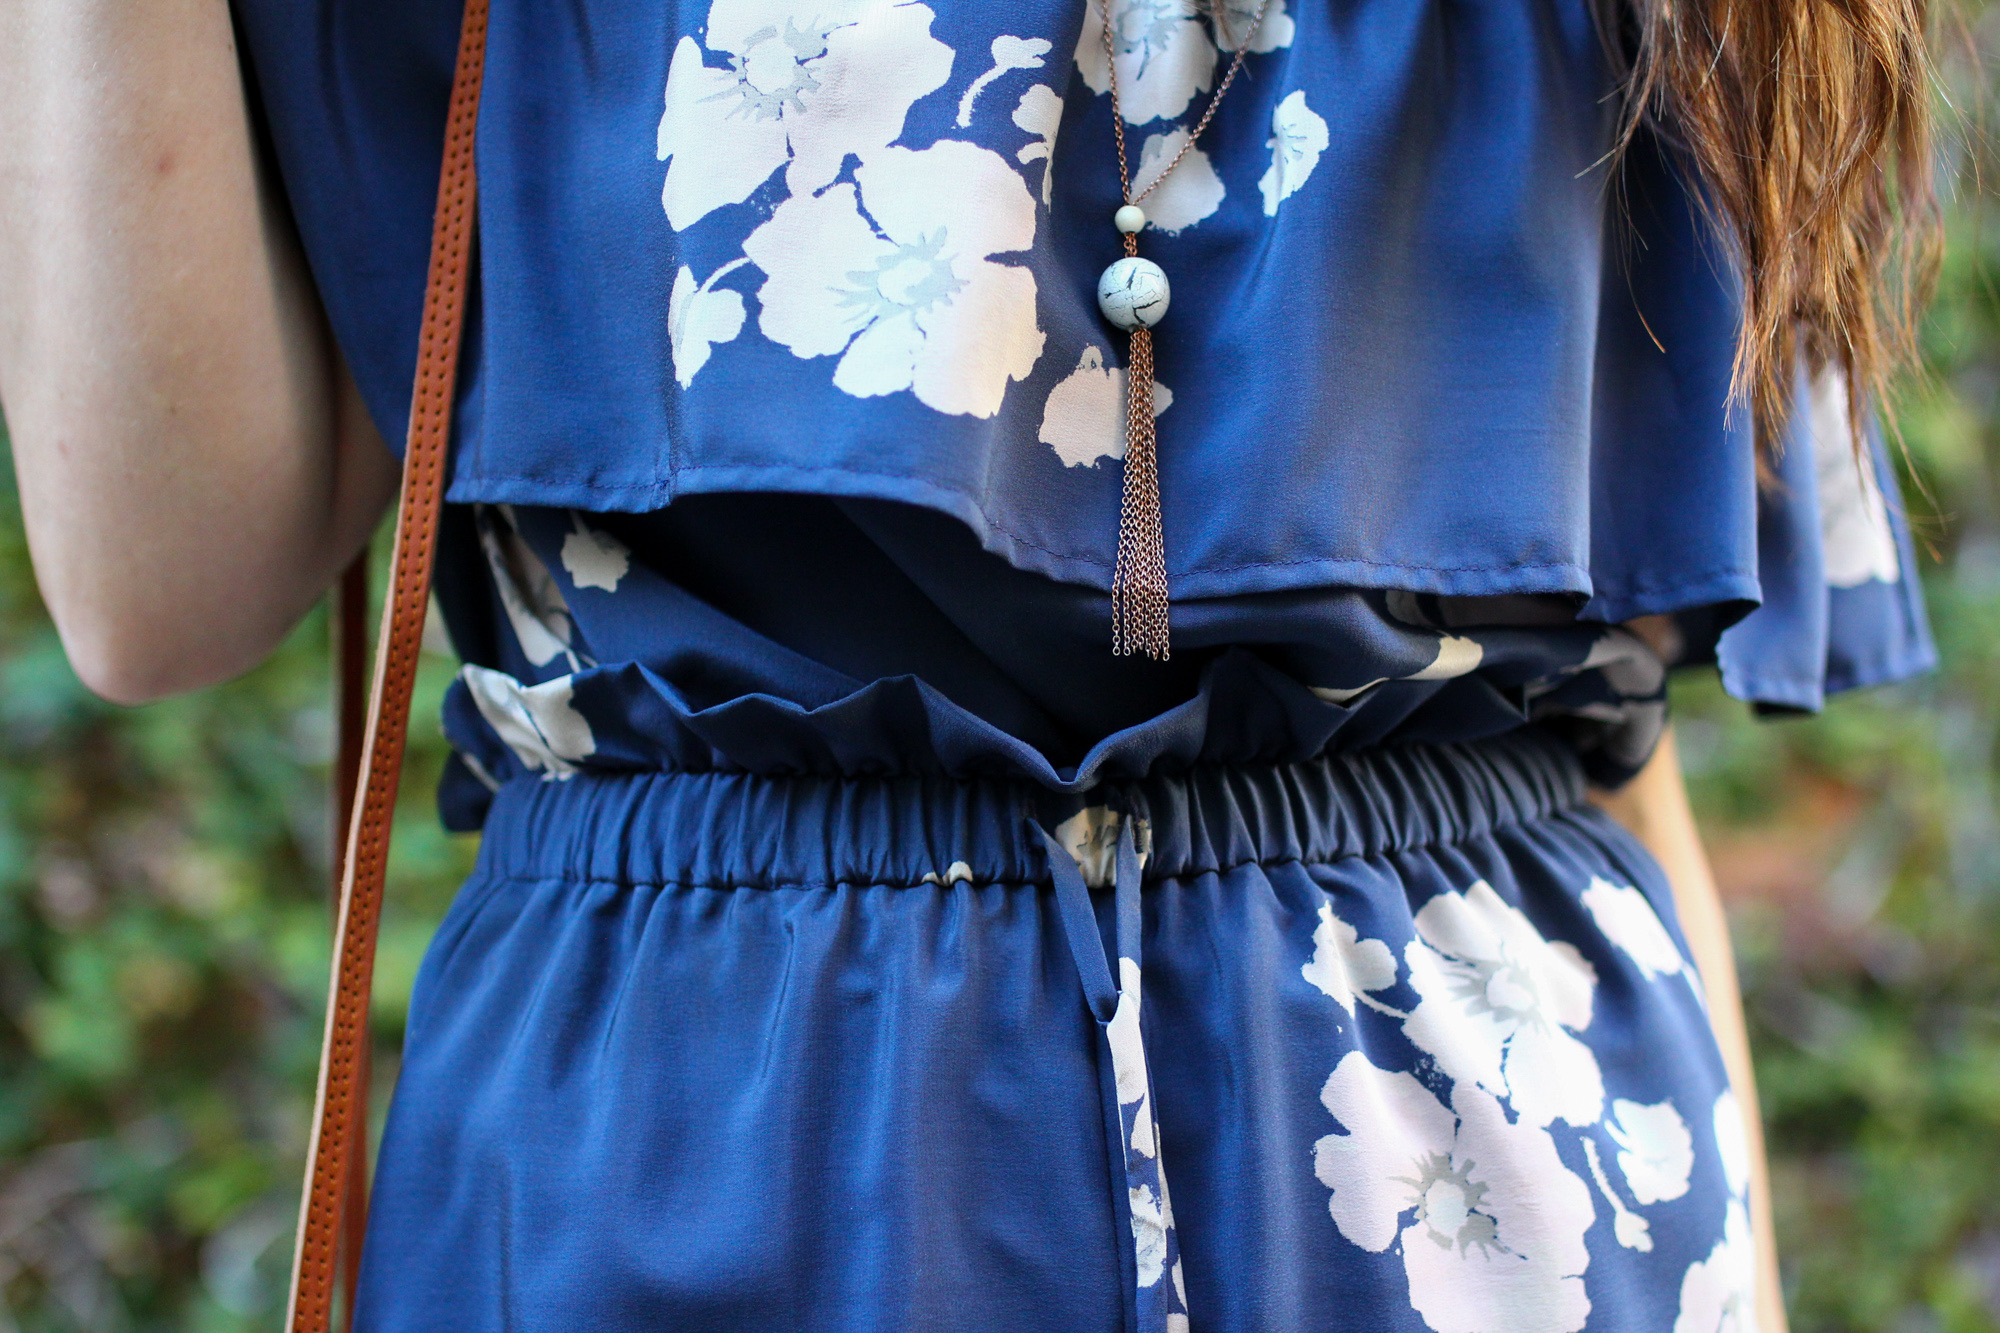
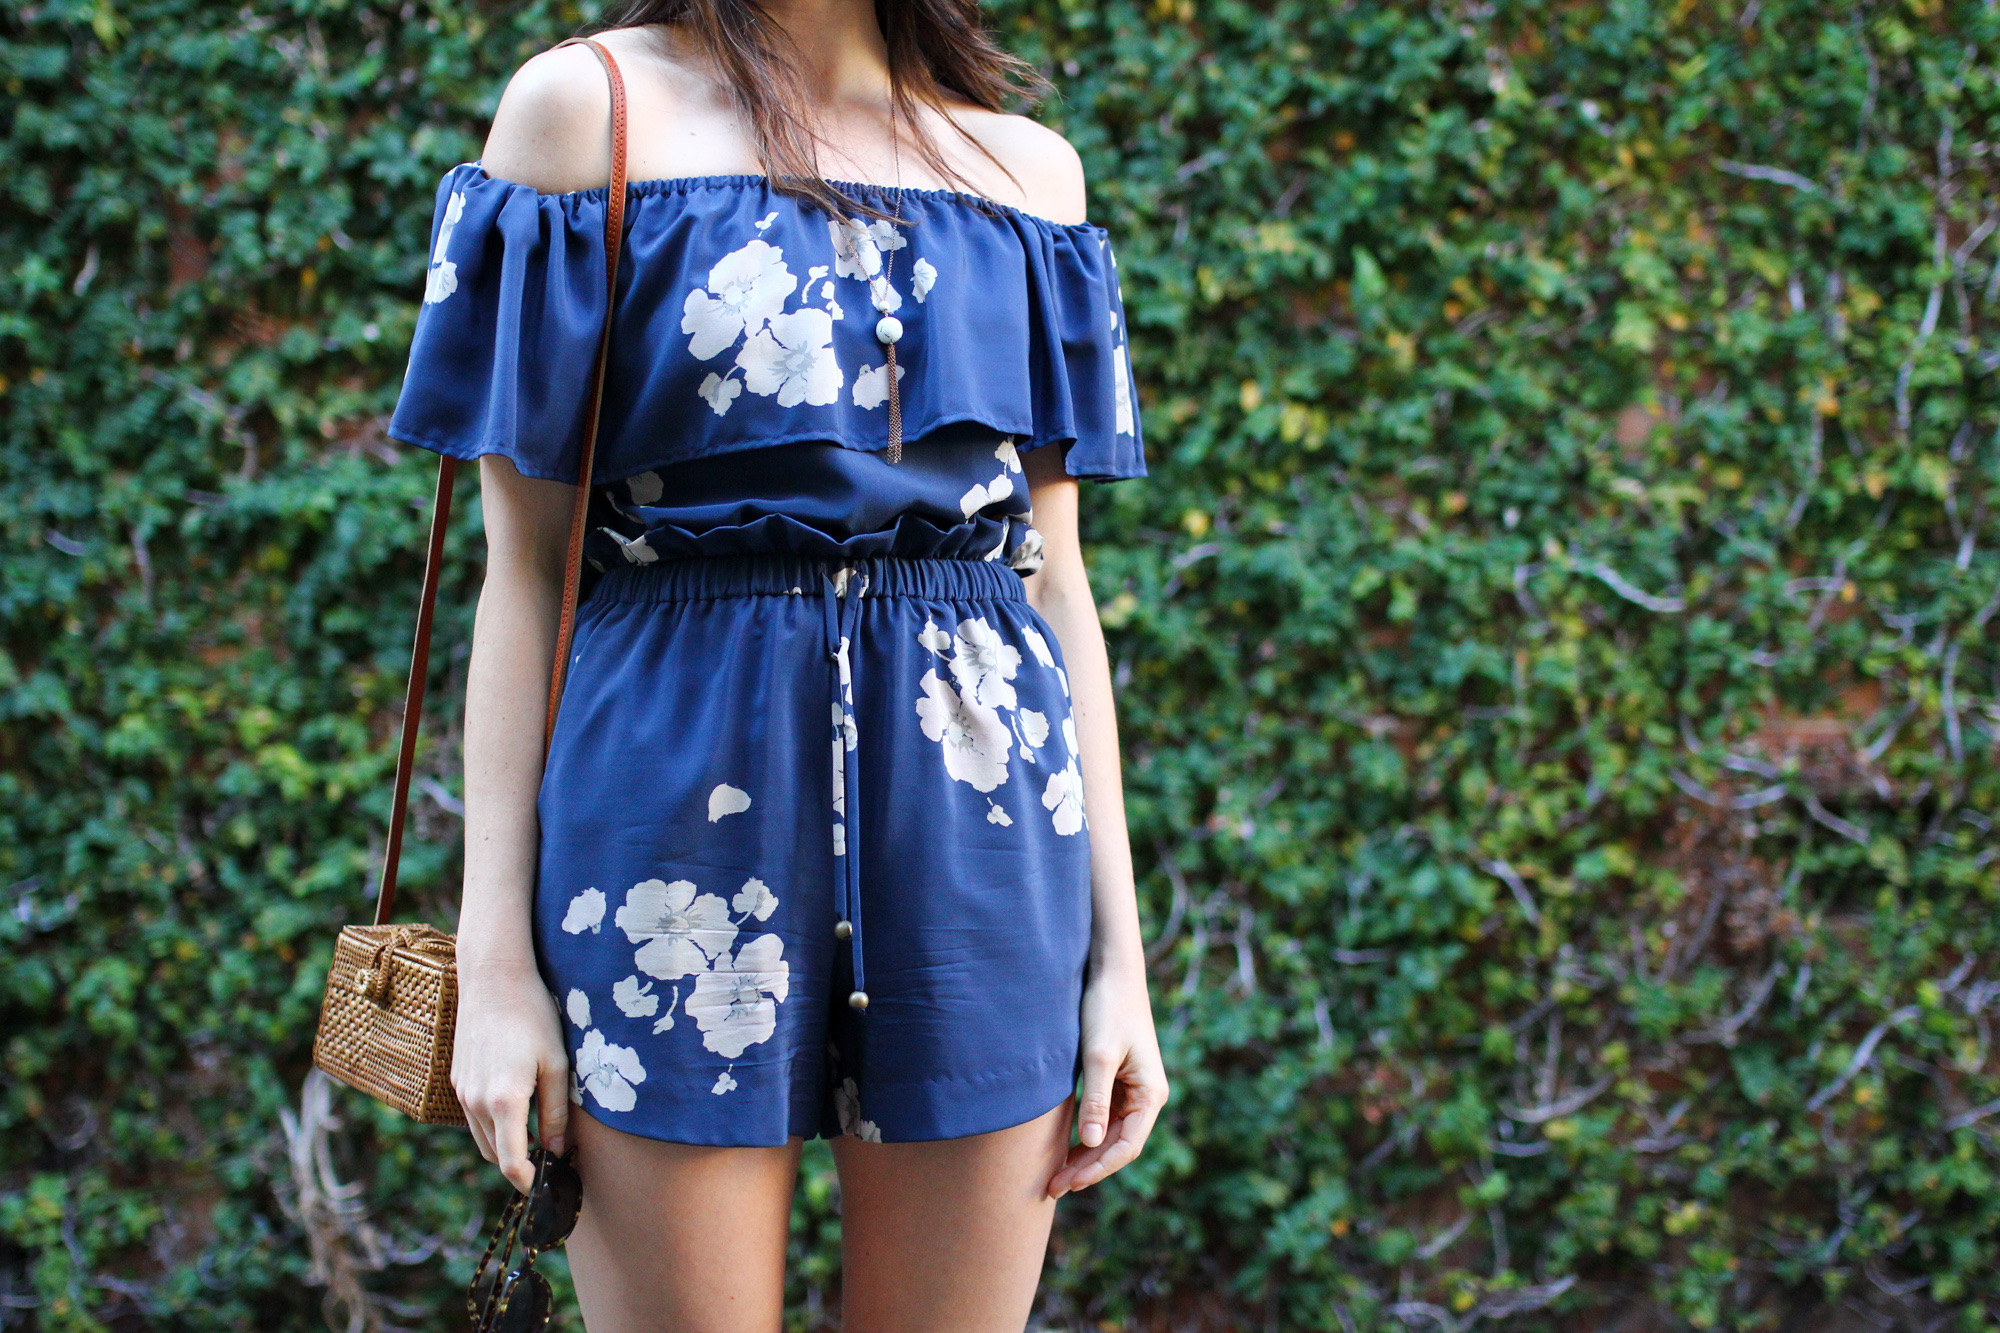
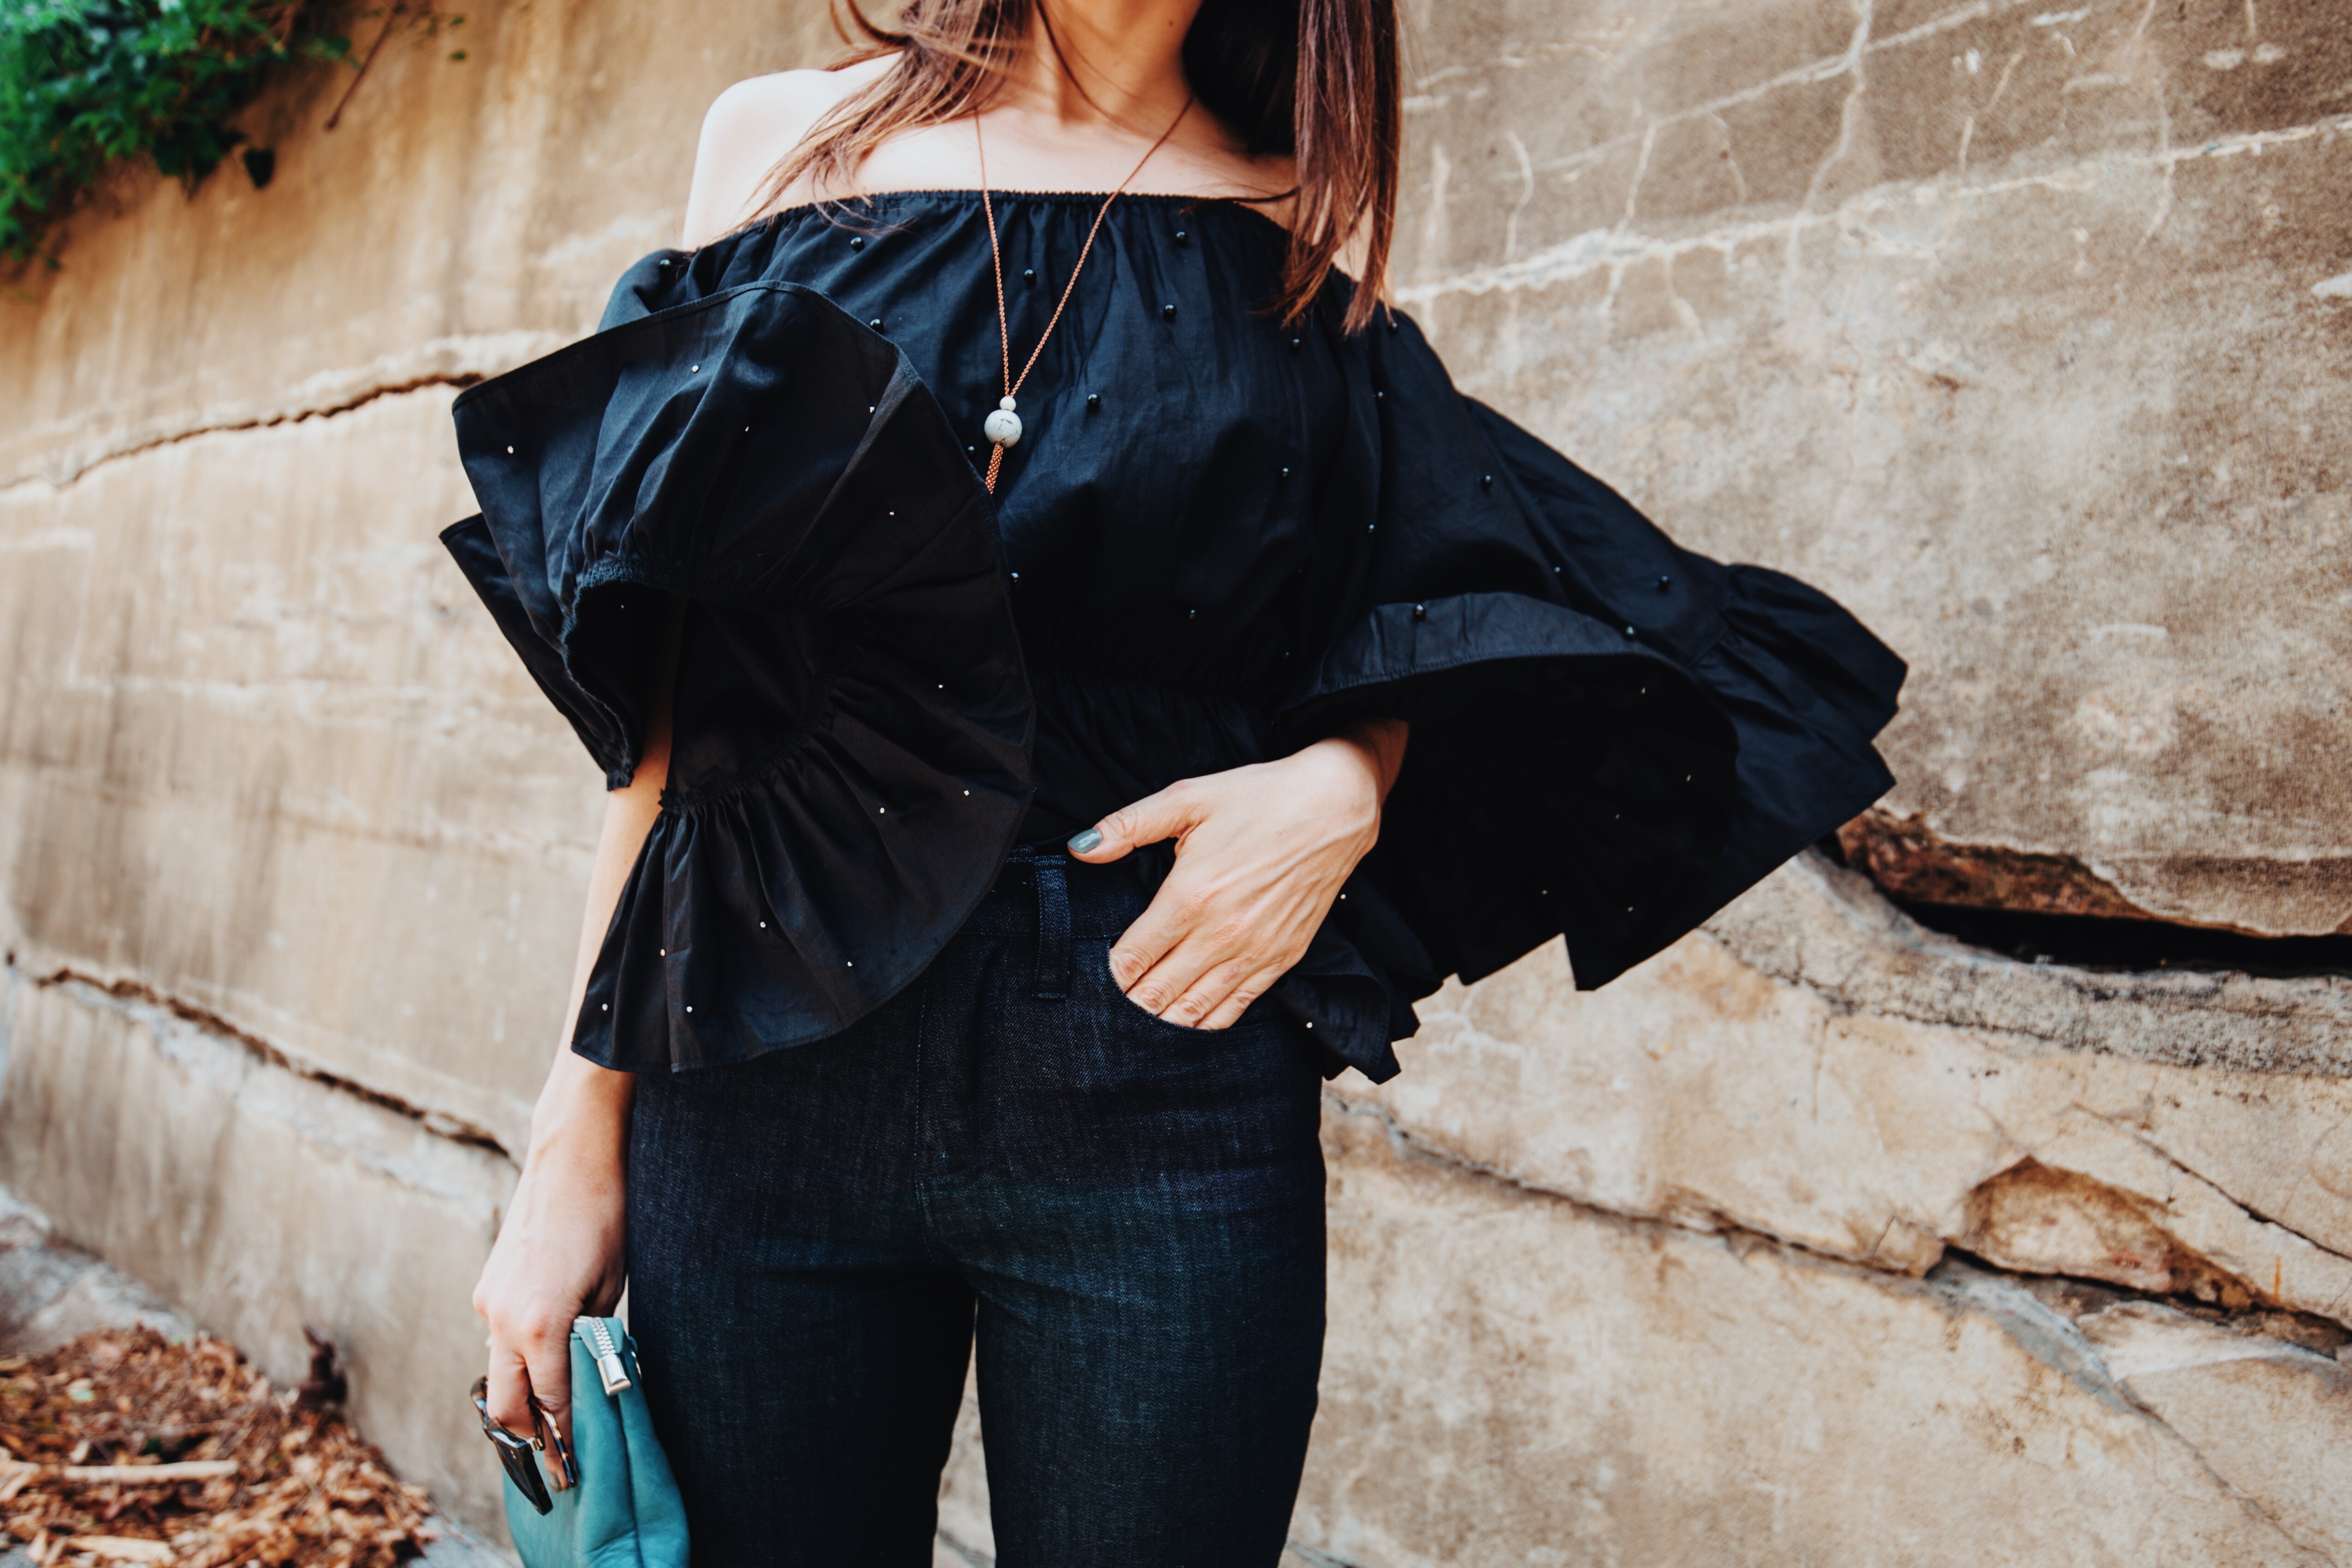
 Hi lady loves! I have a fresh-off-the machine dress to share with you today. It was a happy experiment. I wasn’t sure I would be in love with it since it feels like a pretty major deviation from my usual style (whatever that is) but I’ve worn it on two separate occasions already this week so I know what we have is real…
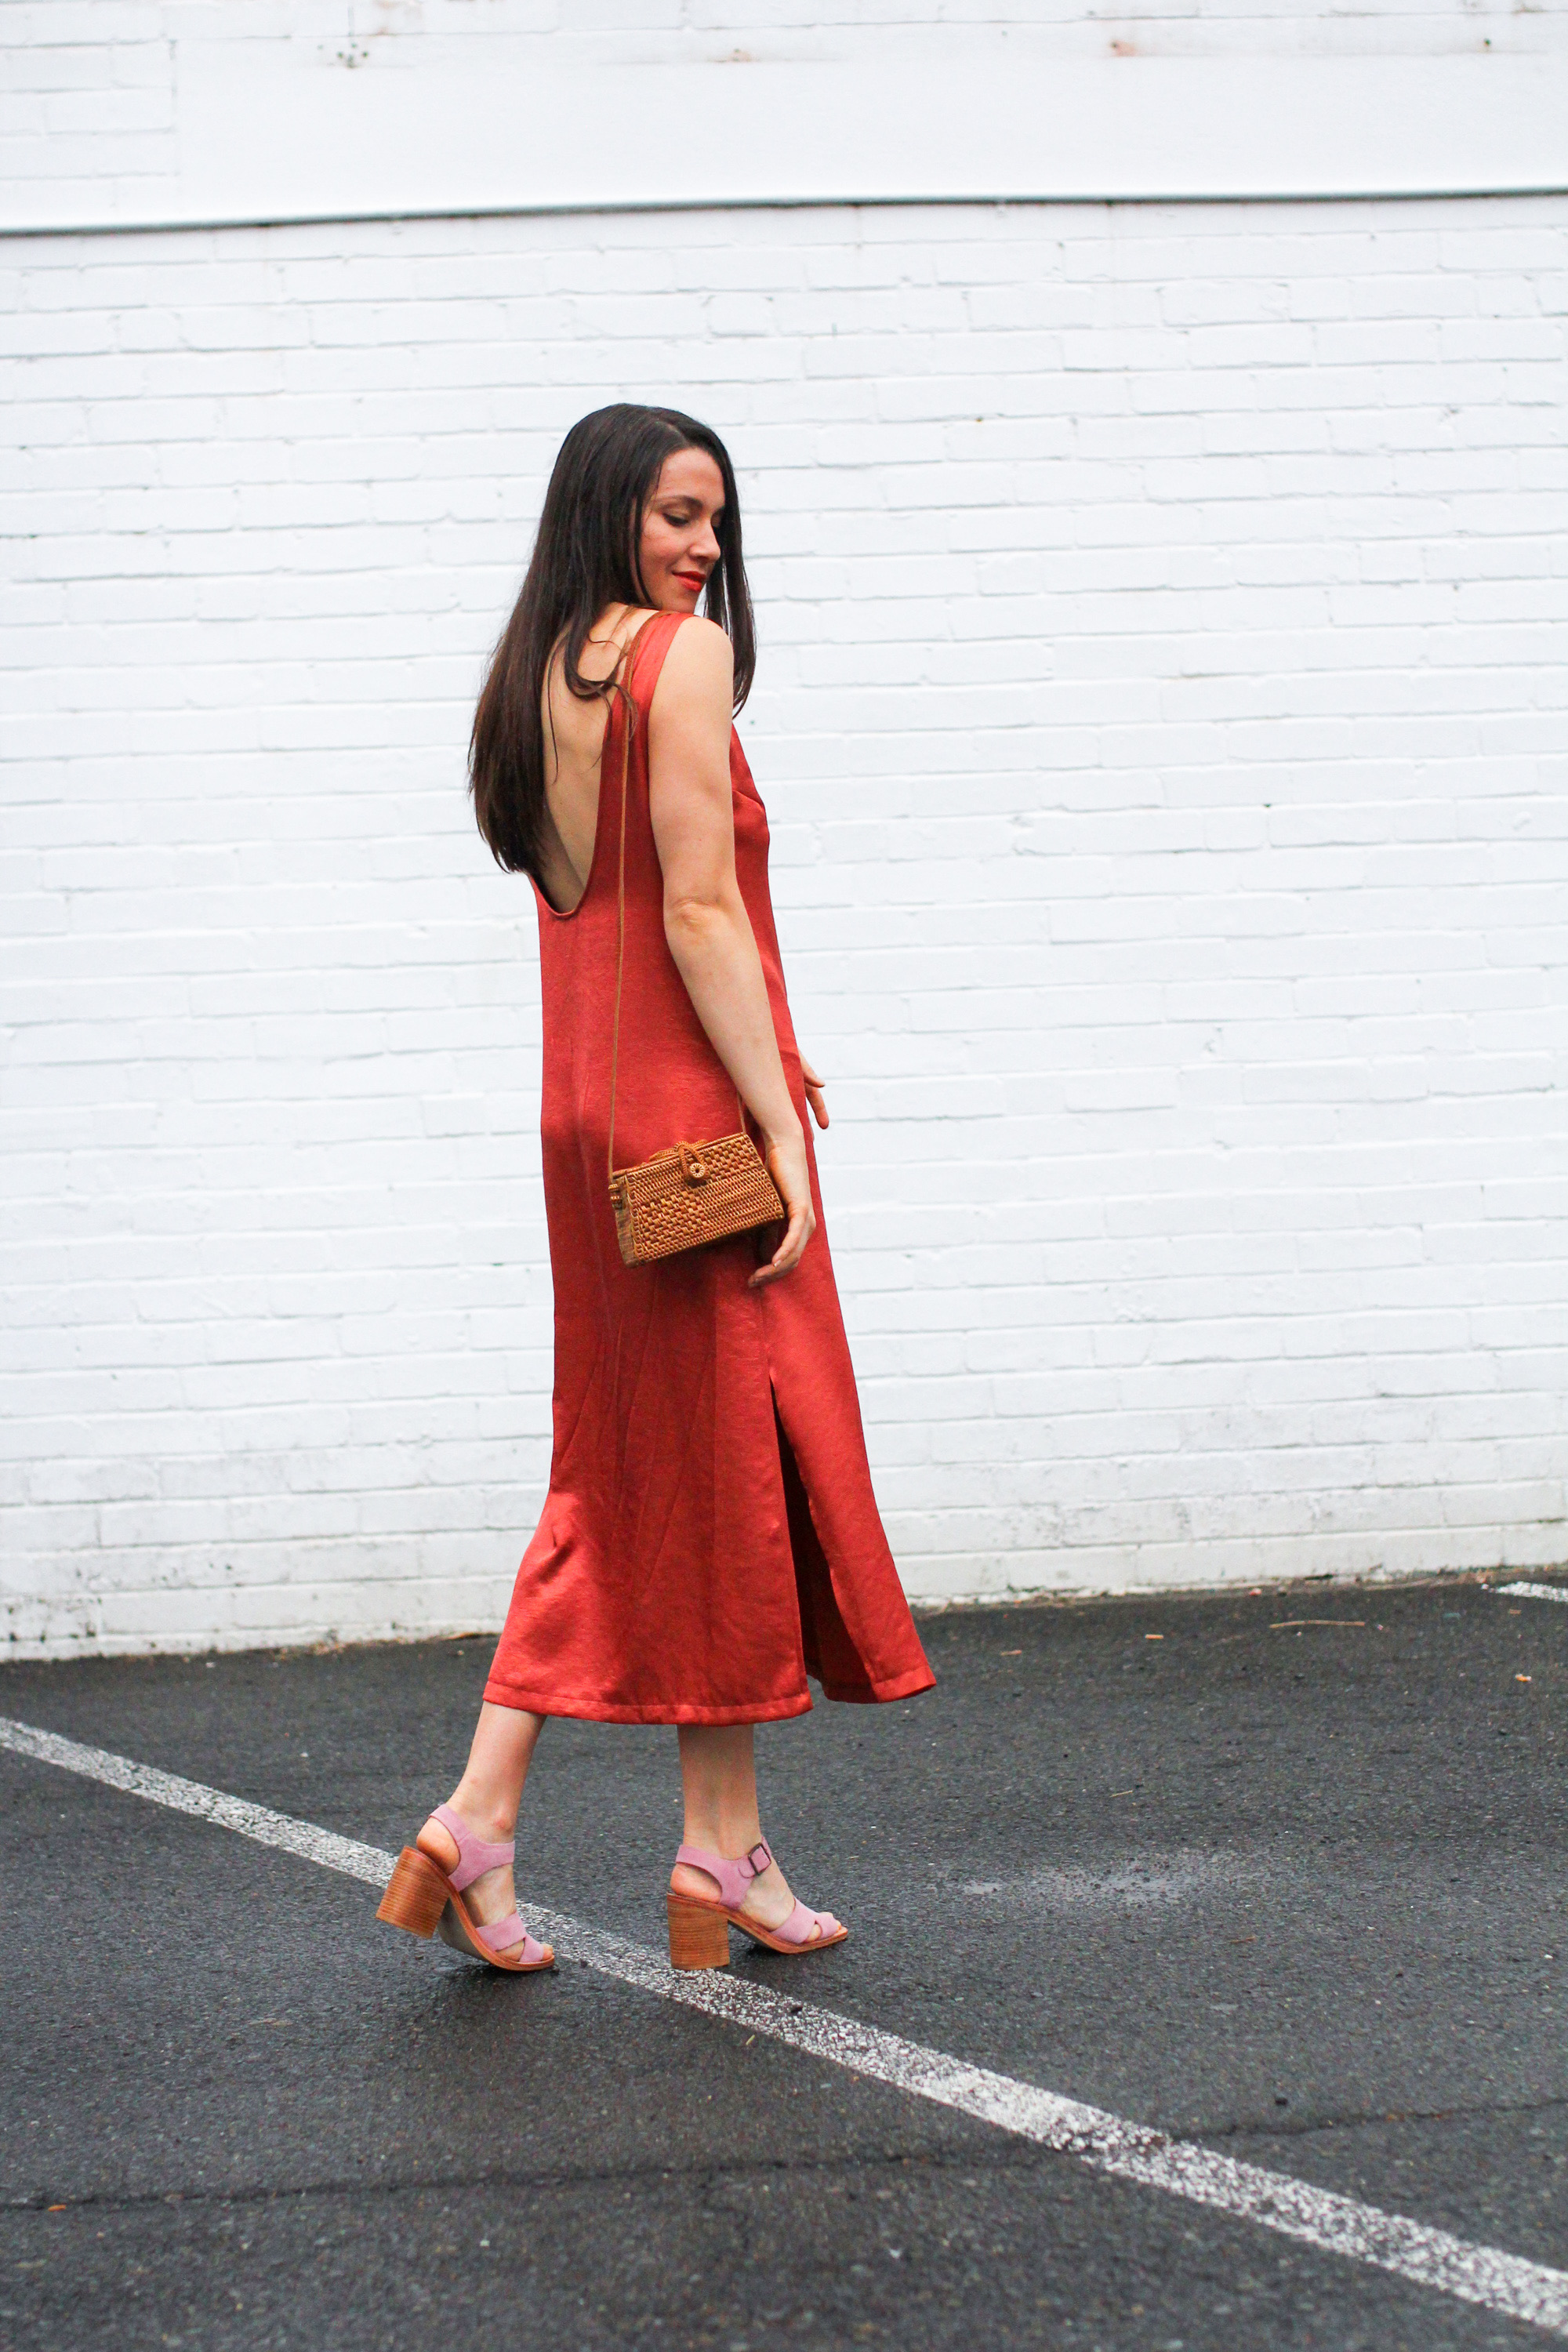
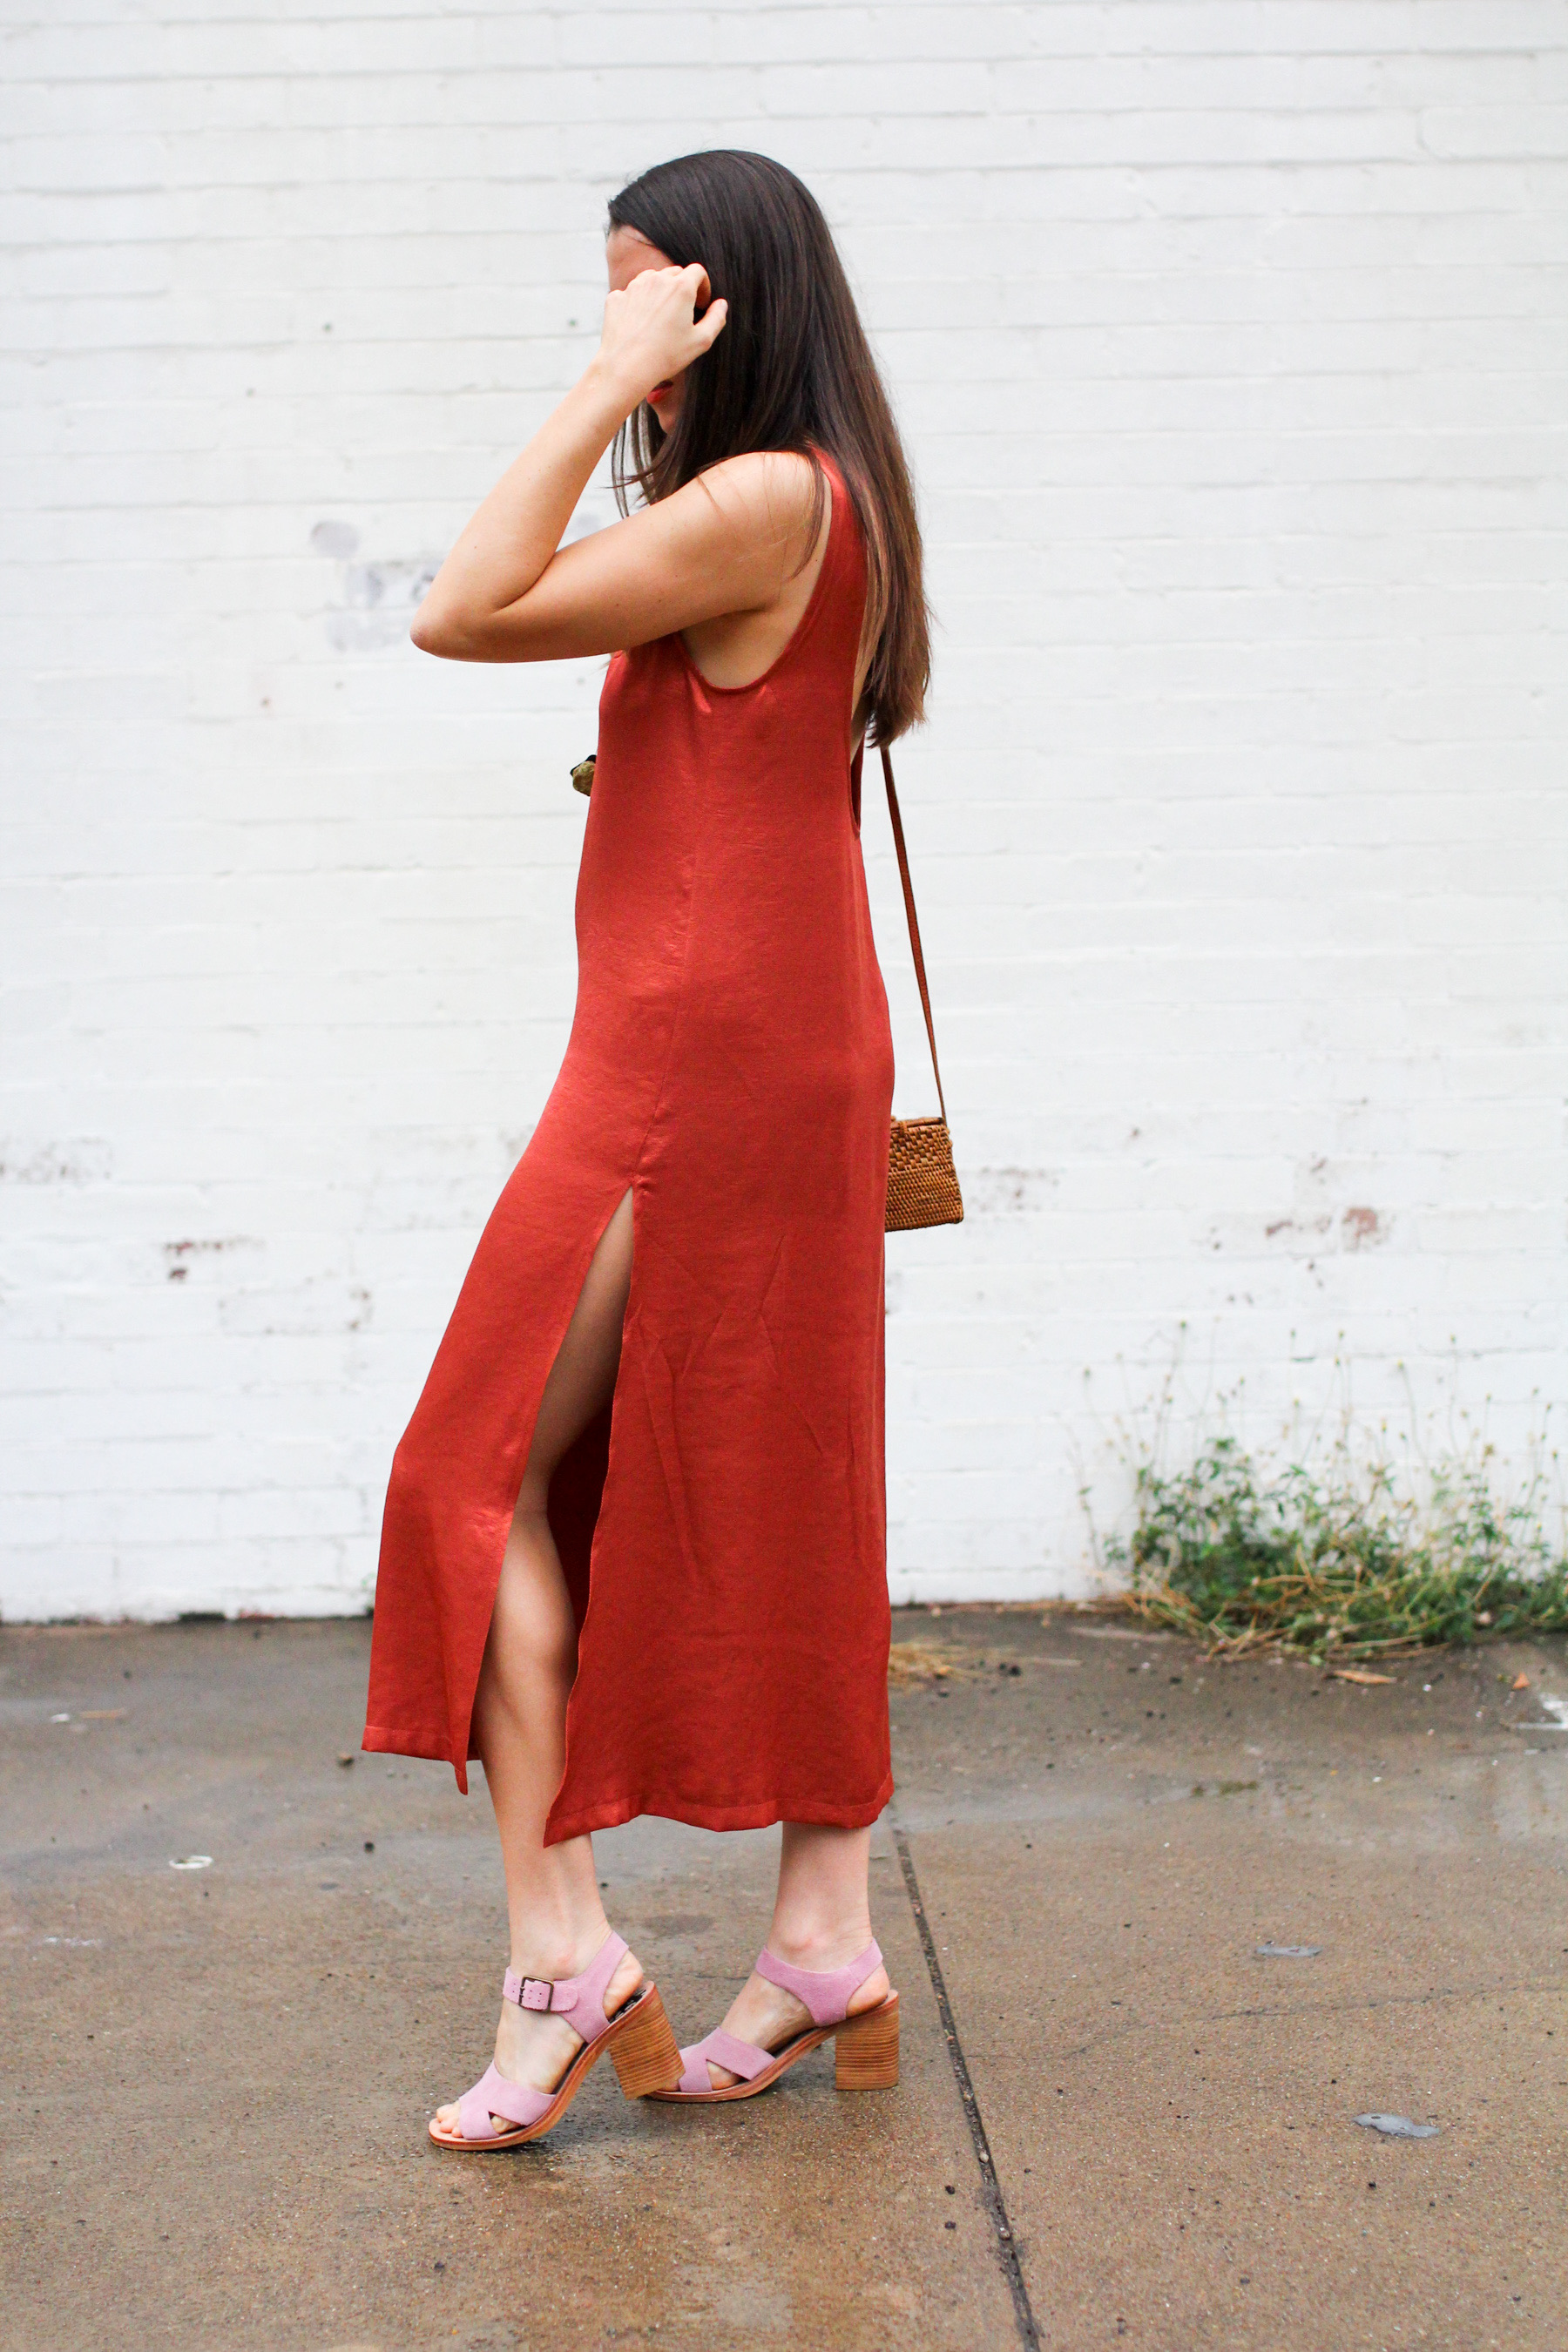
 Pattern-wise, this dress is loosely based on a RTW piece, which I do buy every now and then. A healthy hand-made wardrobe can be supplemented with thoughtful RTW. I really believe that. The original dress is a plain-as denim shift with highish neck and a scooped out back and a hem that hits above the knee. It’s nothing fancy, but I’m in it 2 out of 7 days every week. So I did what any stealthy sewist would do and copied the pattern. Also it was ridiculously priced for what it is, but now it’s justified because I can replicate it forever and ever.
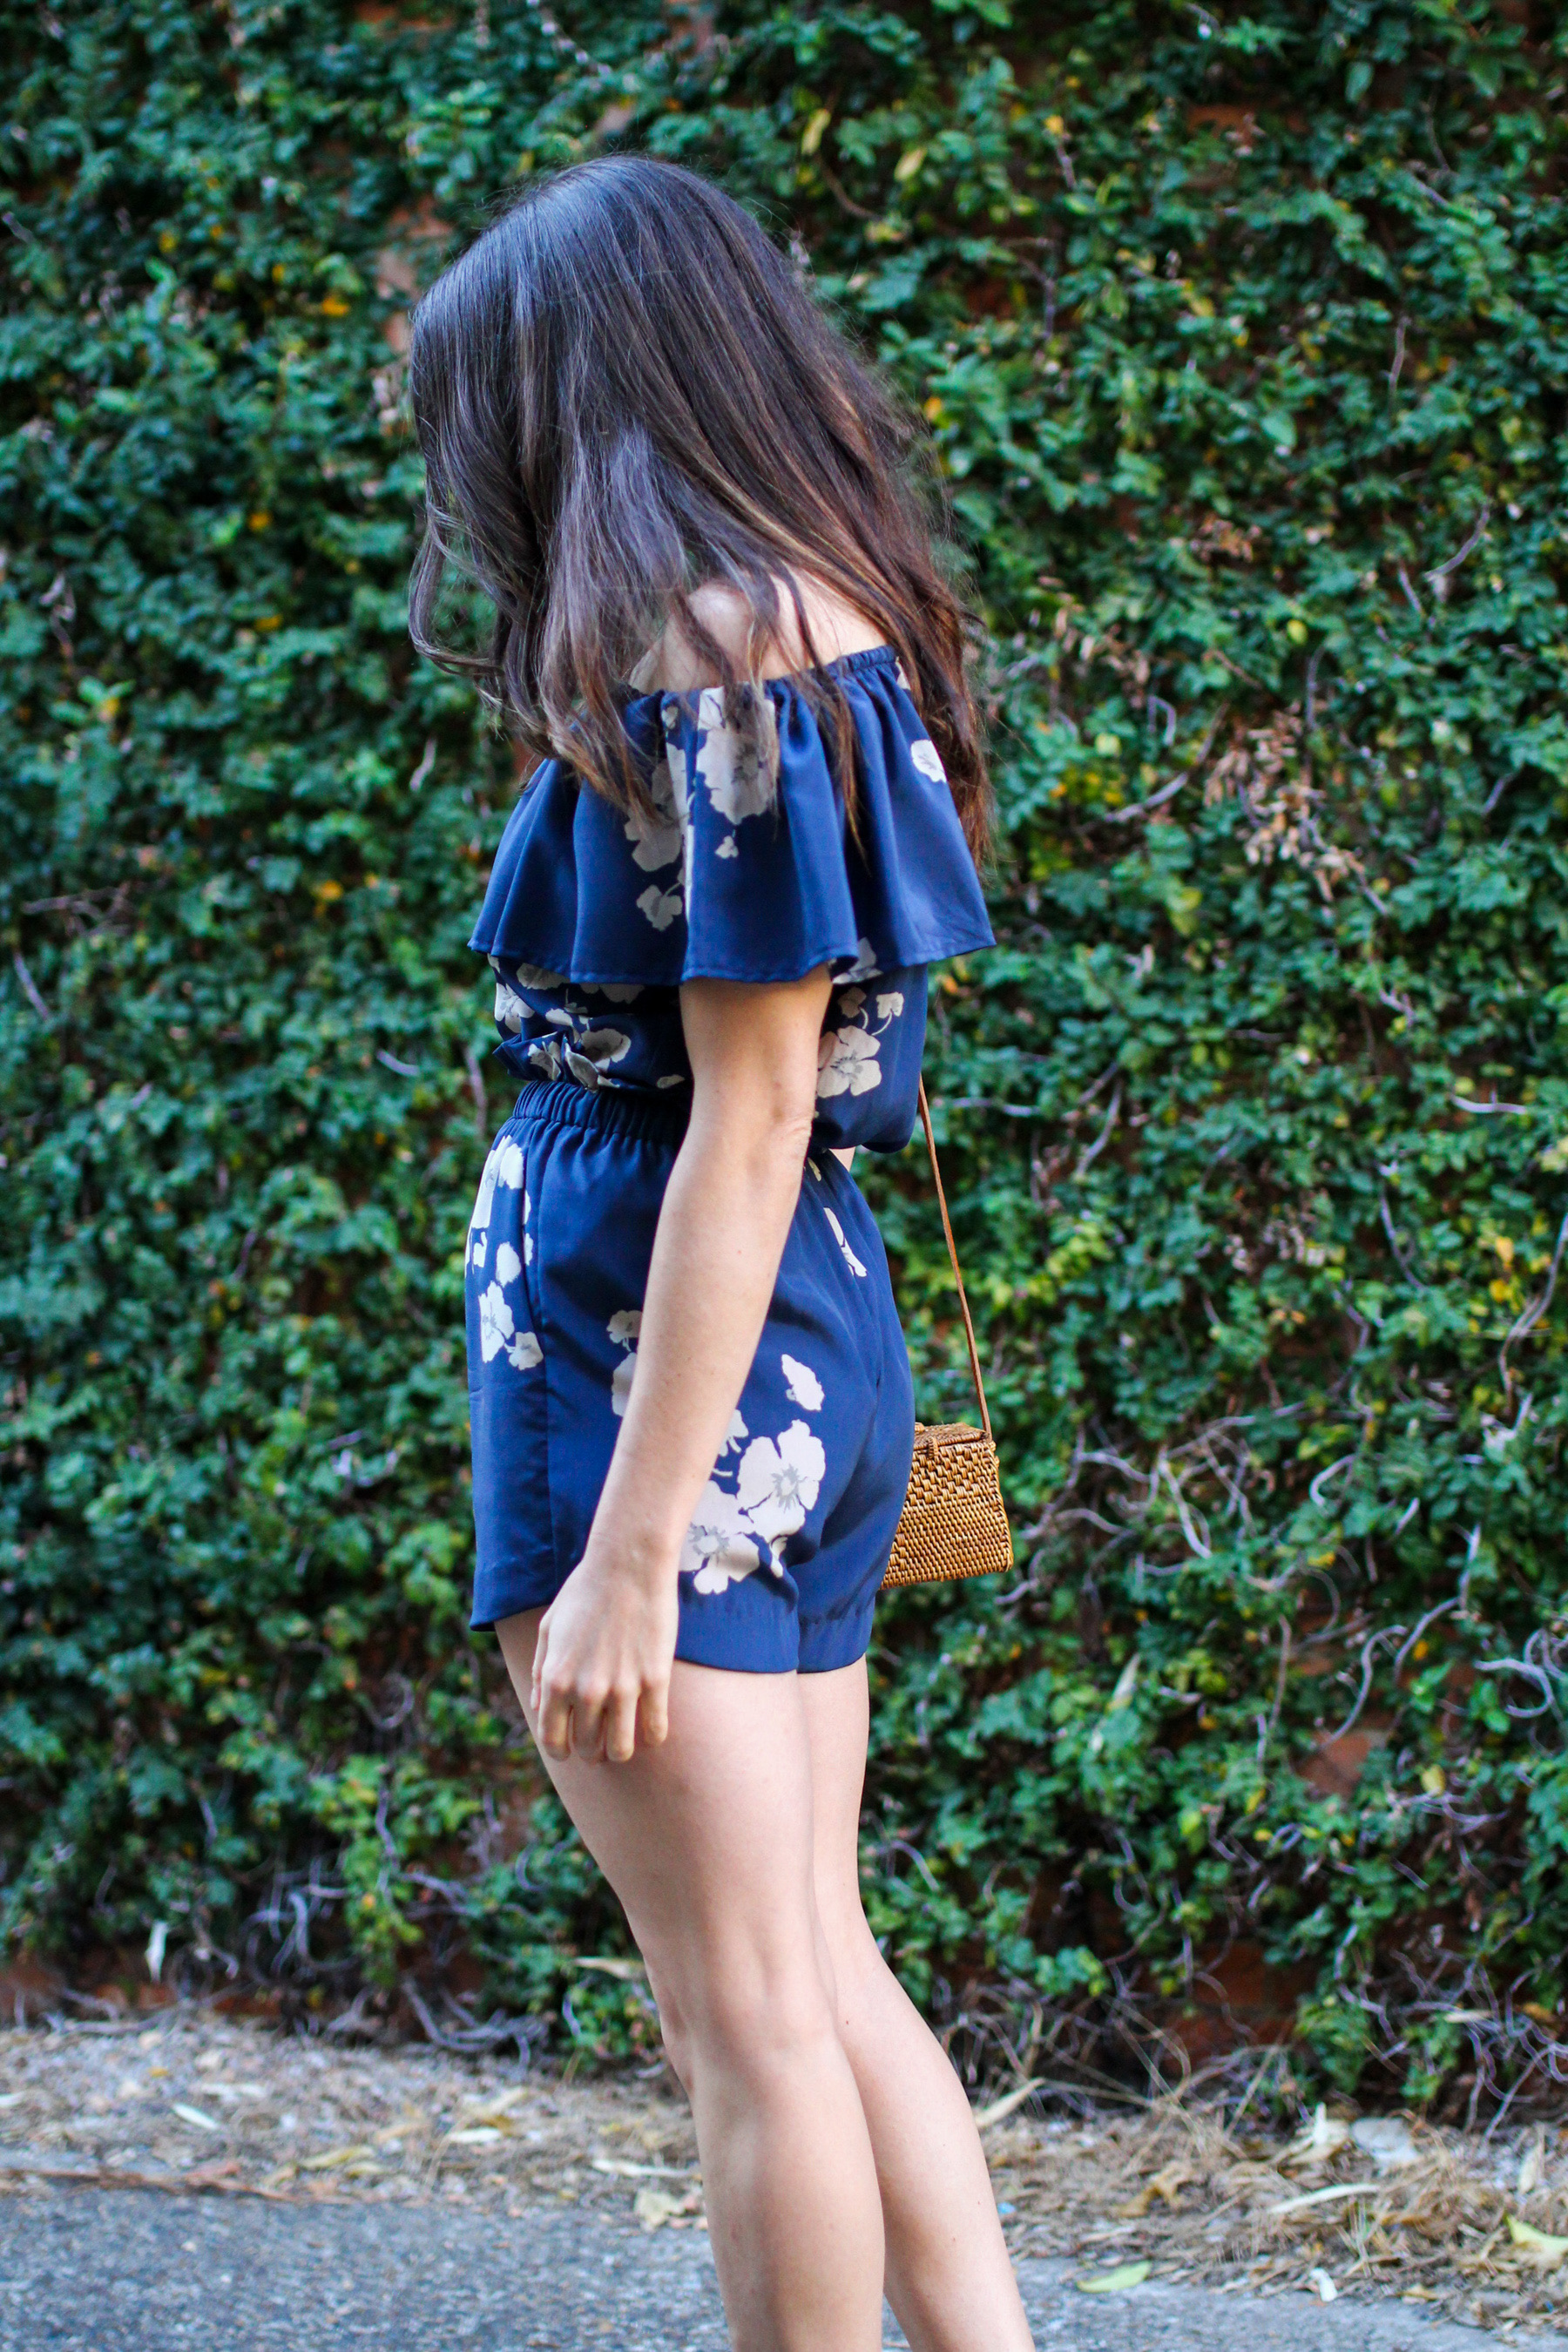
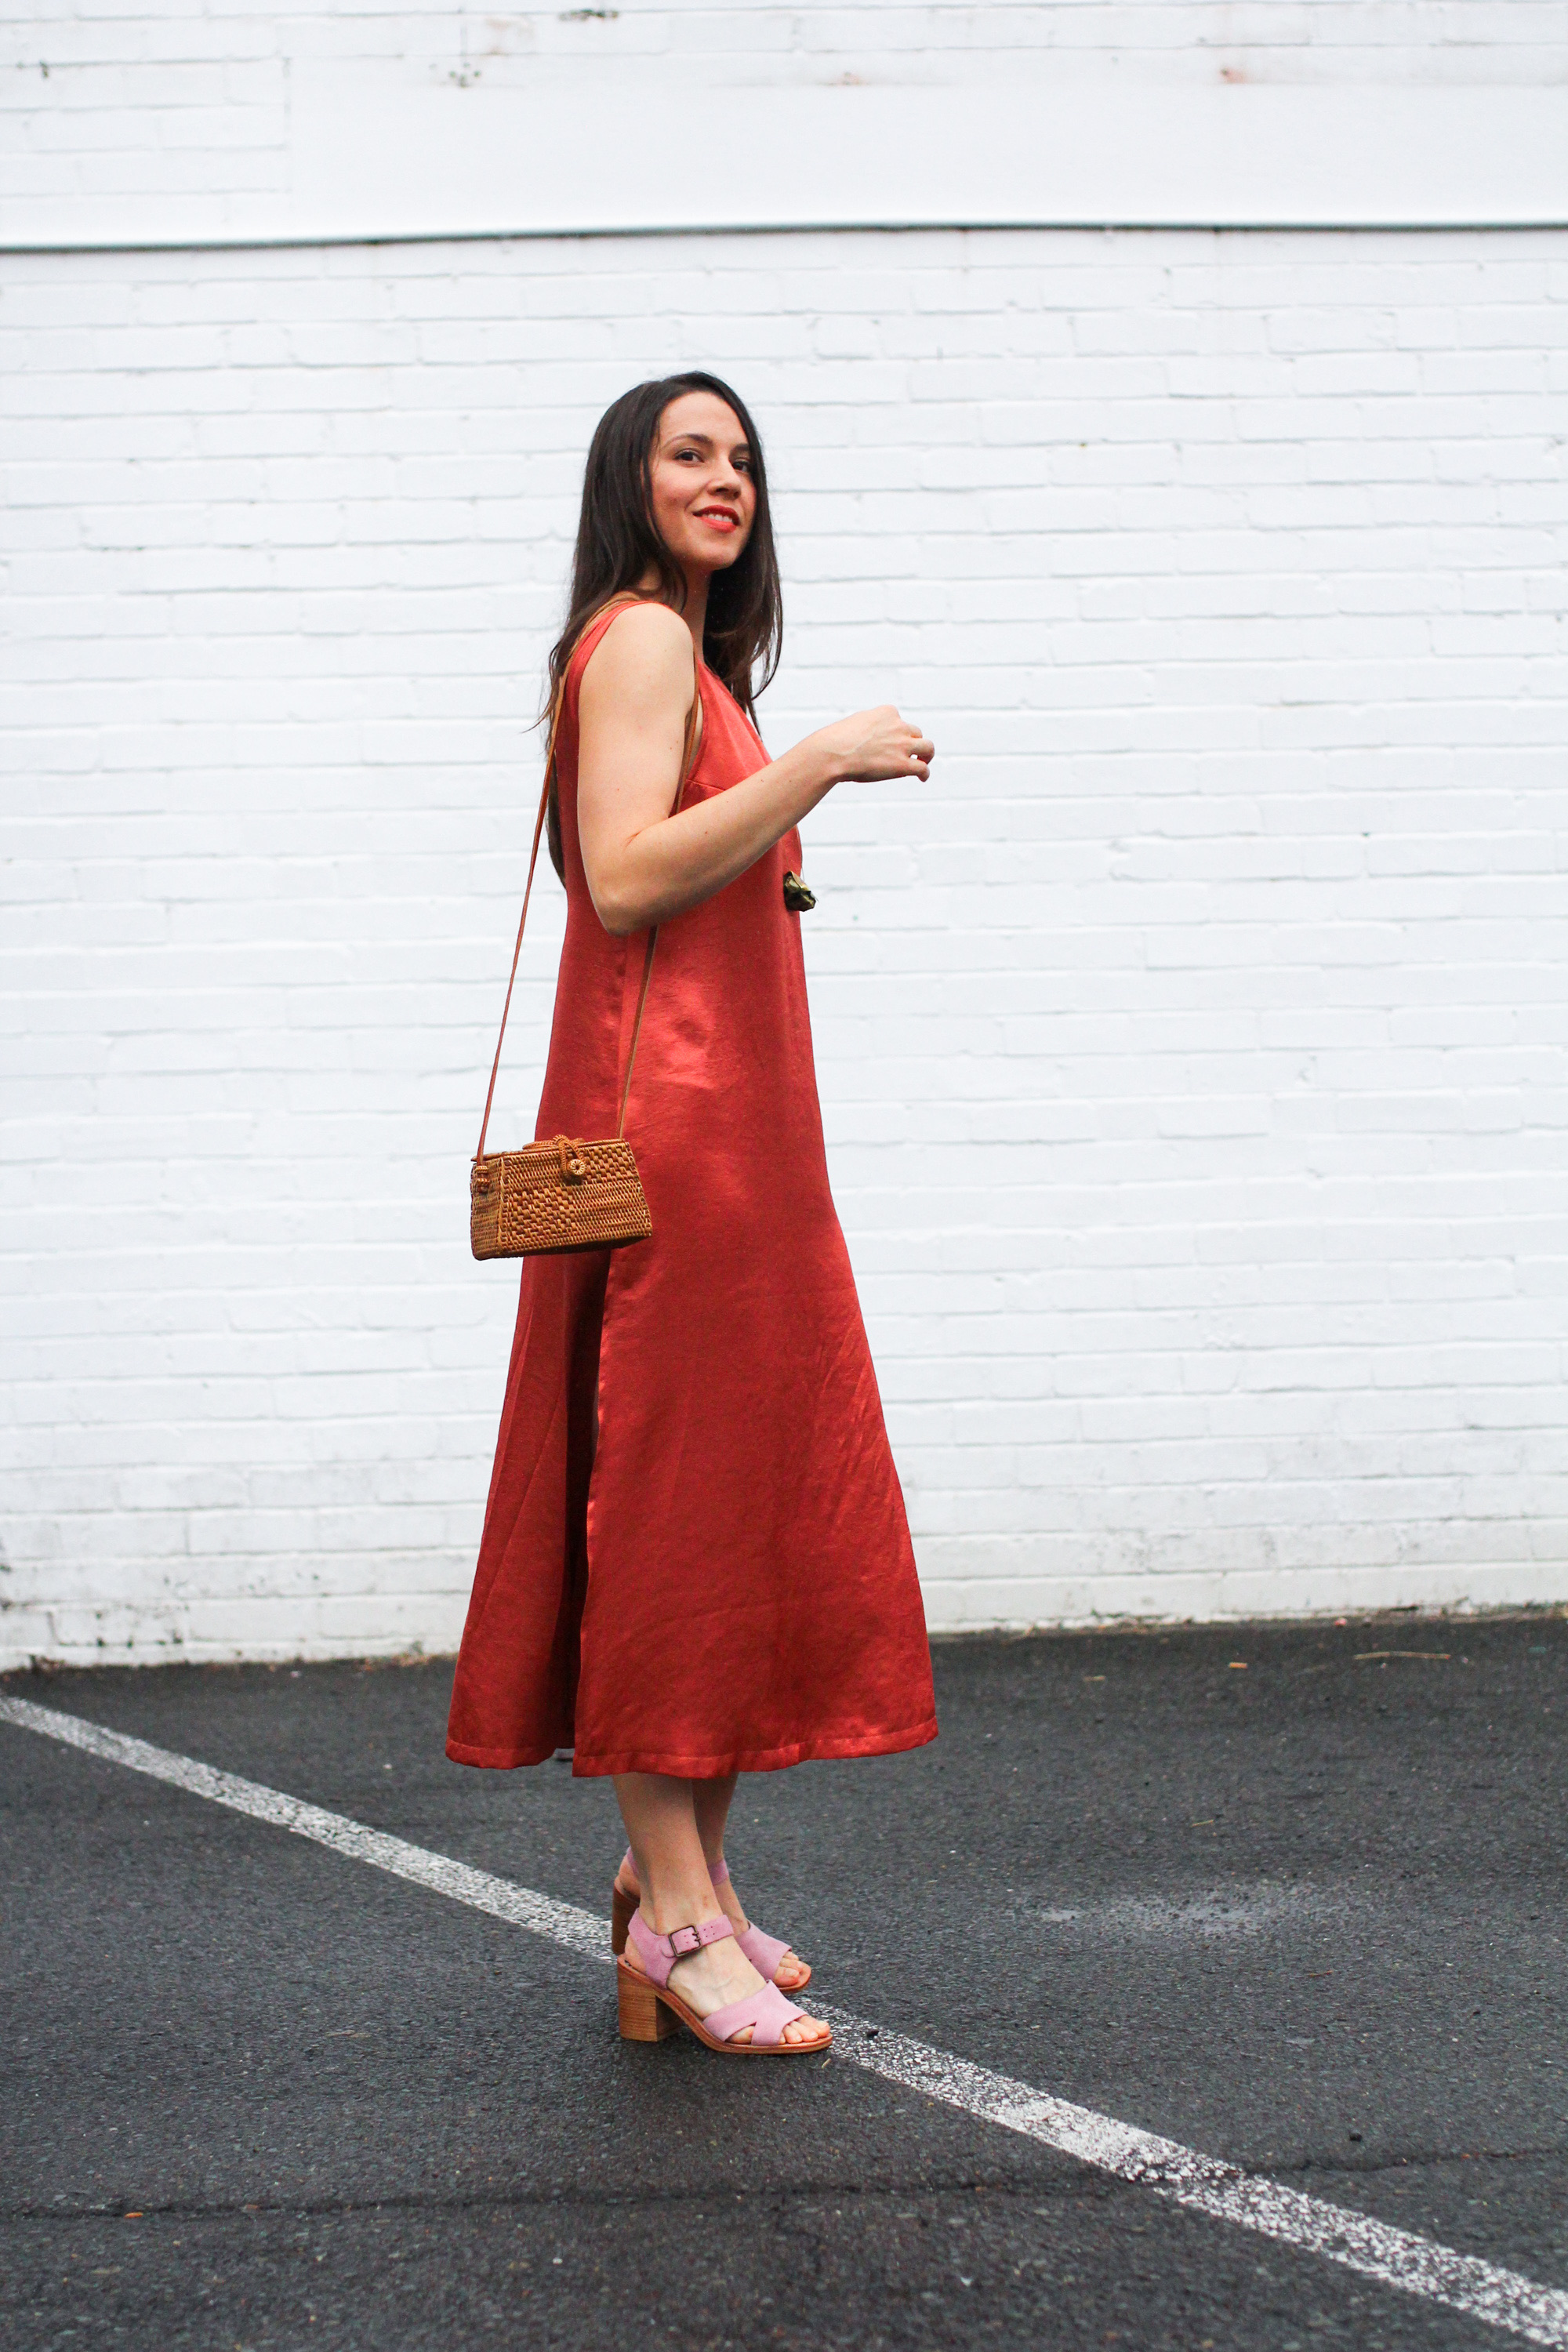 To get from that dress to this one, I kept the original neckline and back and extended the side seams straight down and out. I wasn’t originally going to give it a split up the sides but when I tried it on mid-sewing without the split there was too much sackness going on and it needed something extra. Skin, mostly. And I think that is what I’m loving about the style and why it feels so feminine to wear is it’s a little bit shapeless, a little bit demure and then BAM, leg.
 Now if you wanted to make something similar I realise this is all a bit unhelpful. Fret not. Before I decided to base this dress on a RTW piece, which was more laziness than anything, I was going to start from scratch and modify a pattern to get to the same dress. The
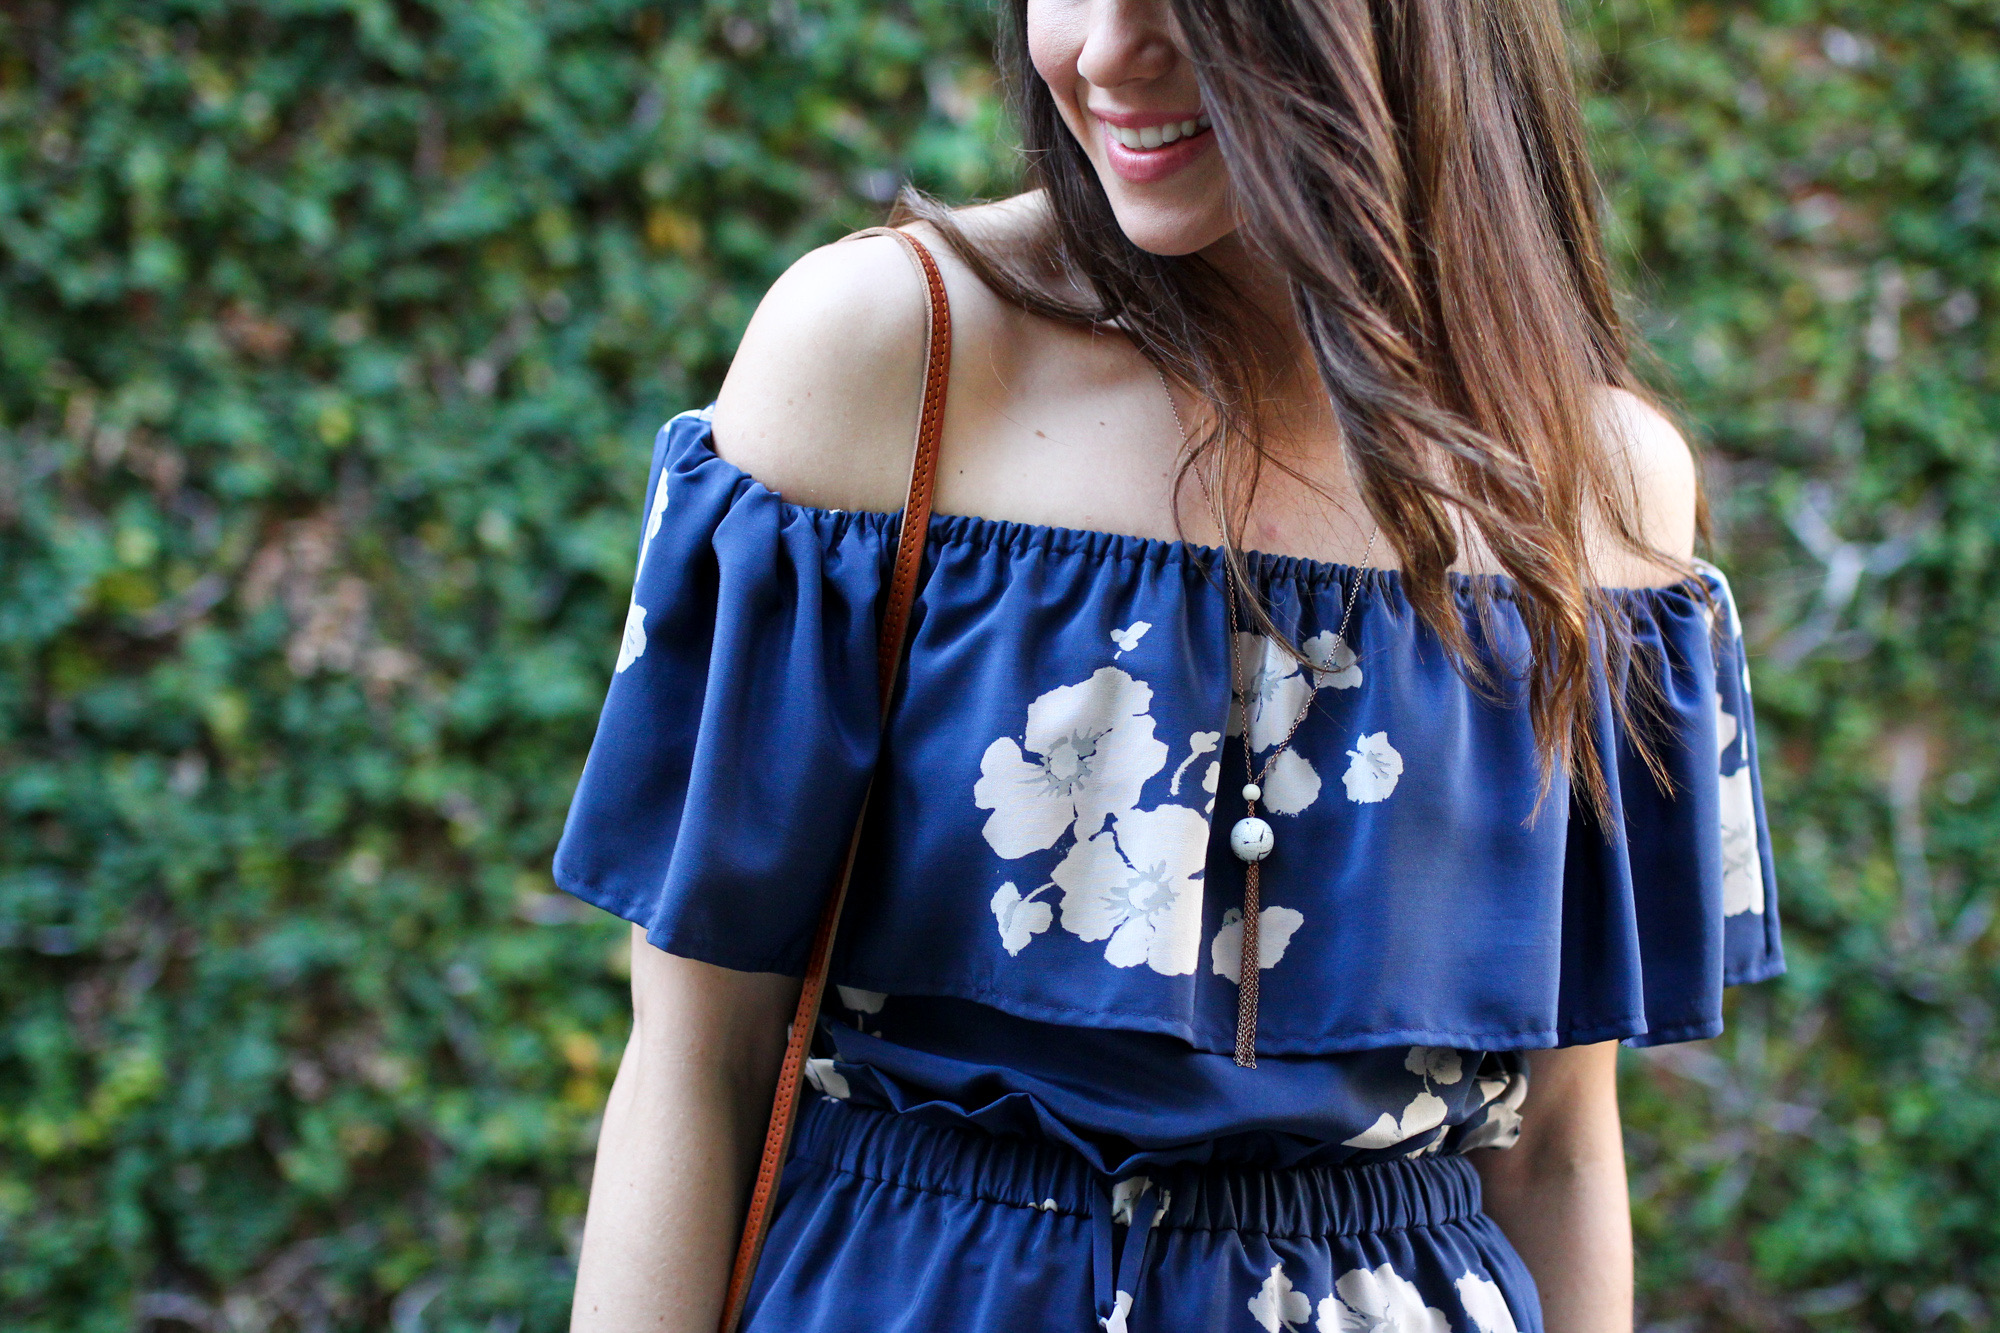
  How did we get this far without talking about the fabric? Synthetic. All the way. No idea what is in it but it pressed well, and holds a crease, as you can see. I found her at
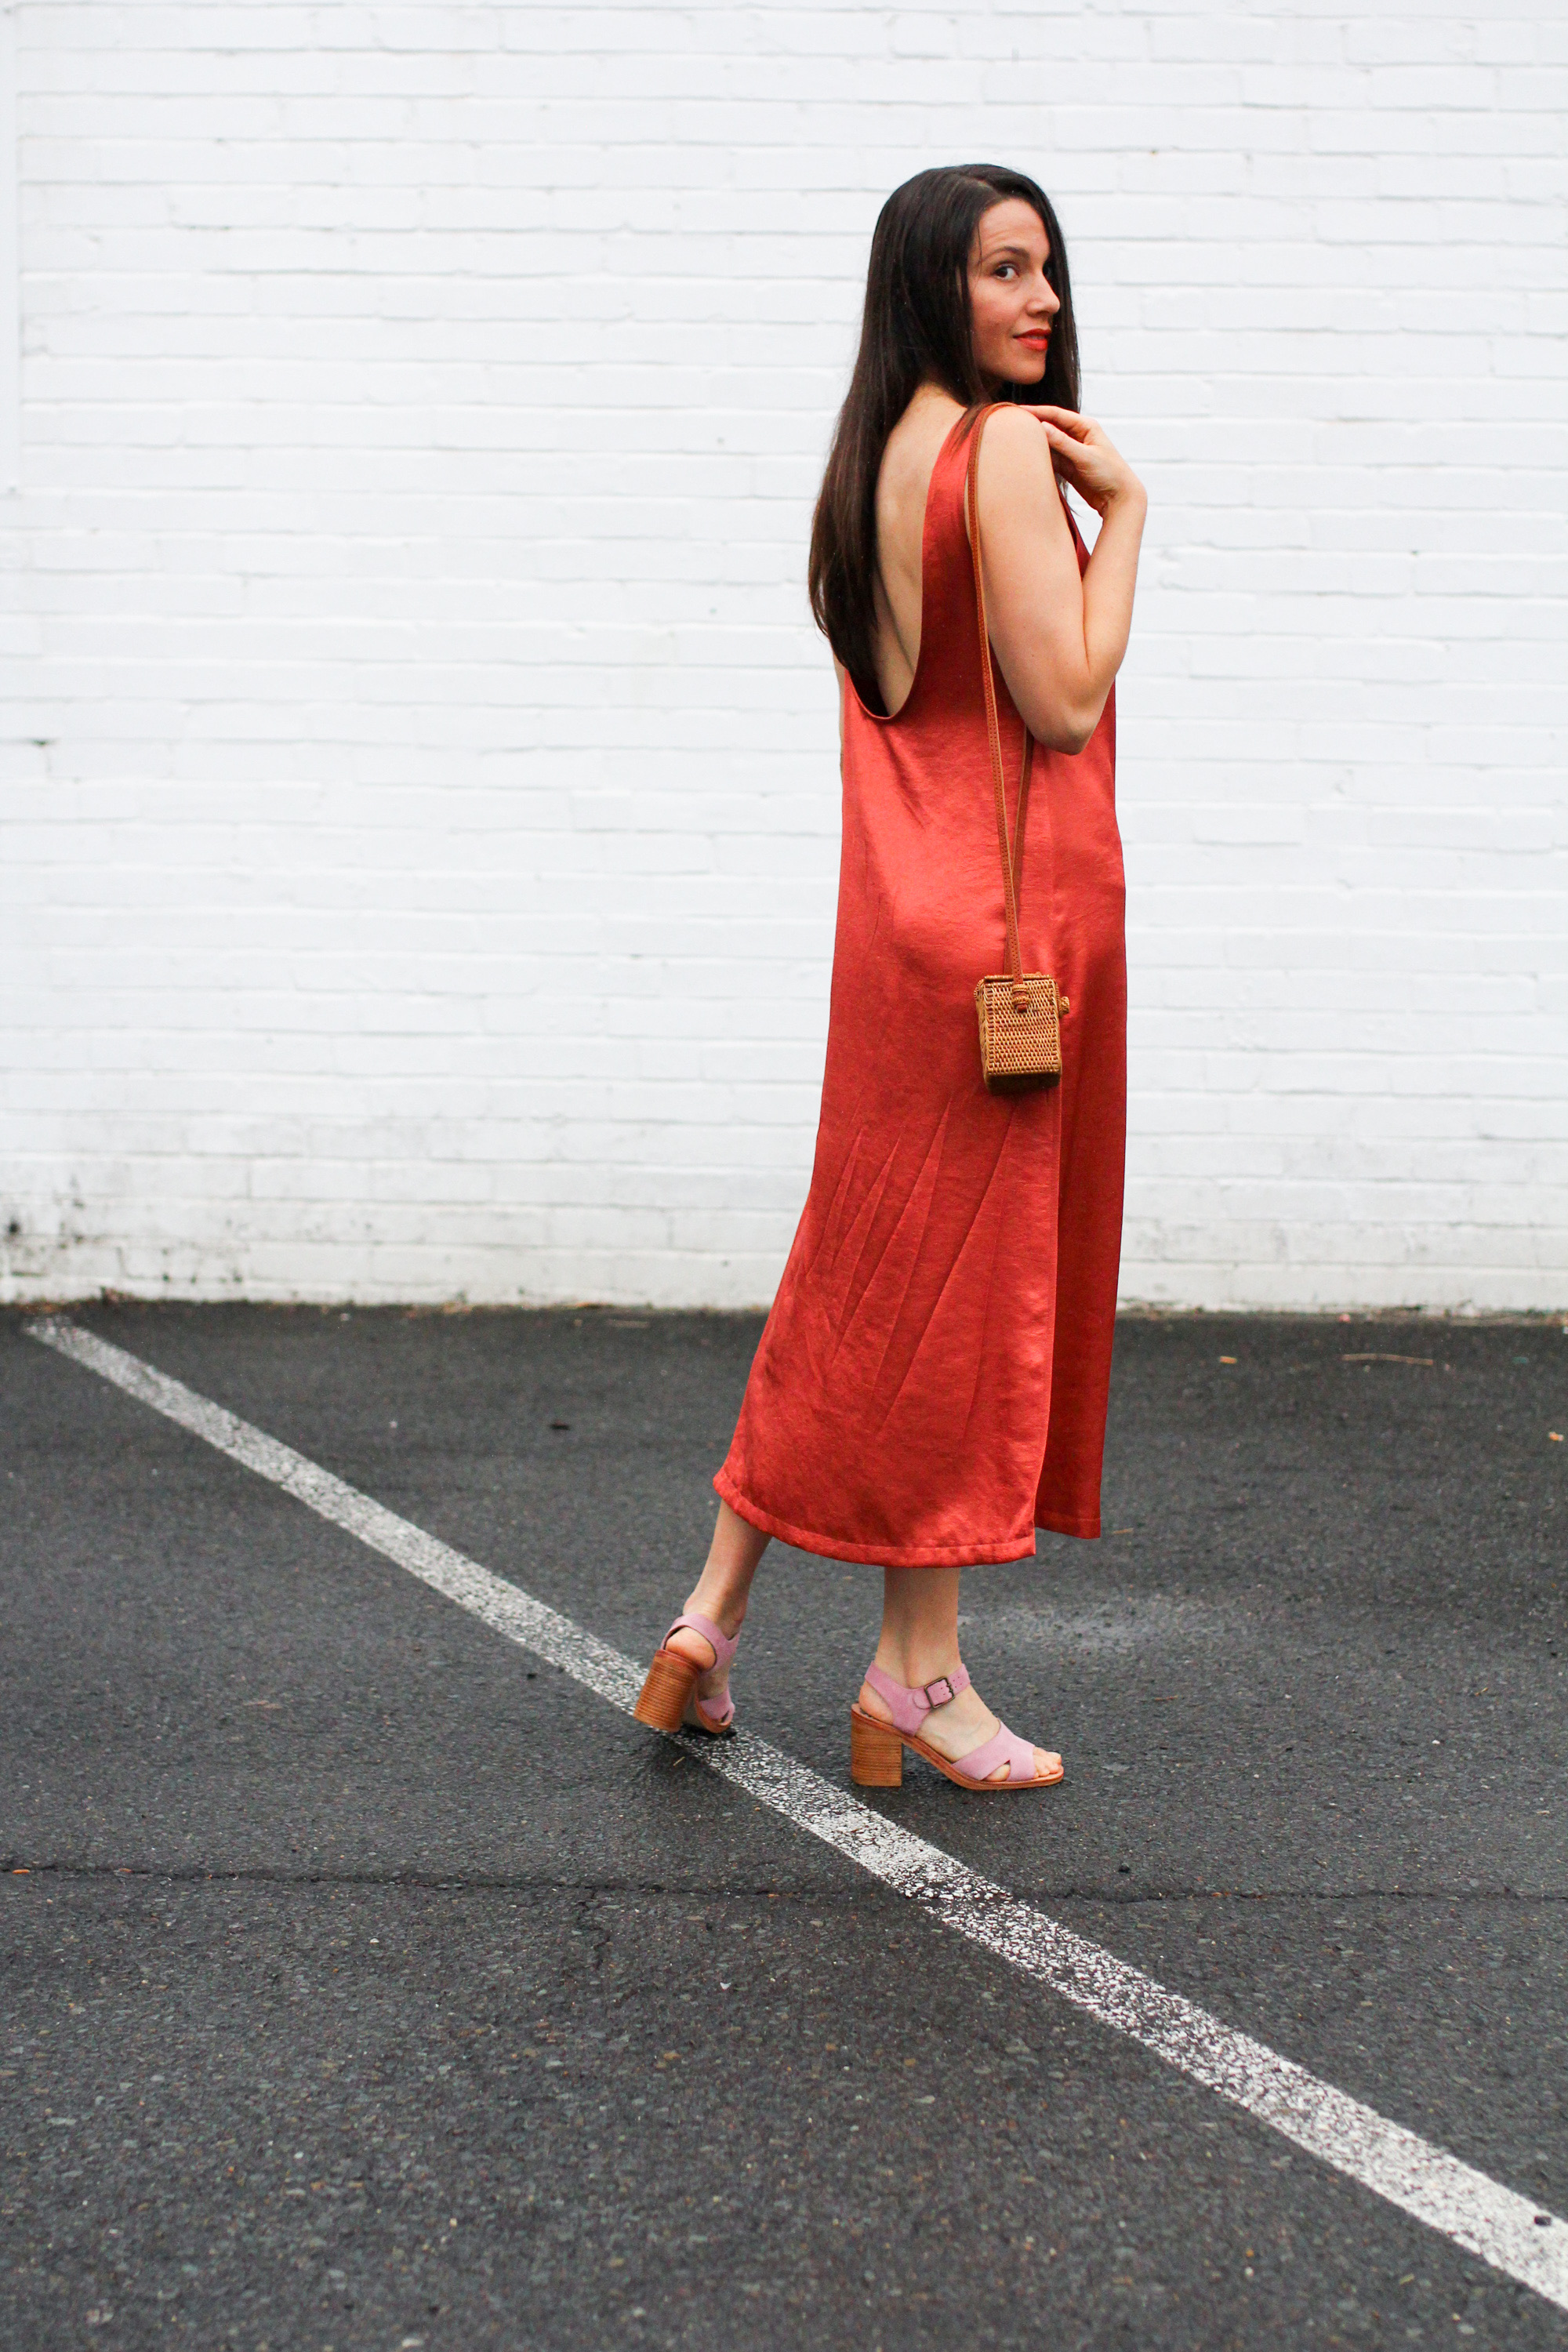
 The
The  The top is
 I’ve only sewn up two patterns from
  What makes a beautiful pattern? Or better still, a sew-again pattern? Good drafting and fit always. They tend to determine whether a hand-made garment becomes a much-loved garment and if it gets worn at all, regularly or demoted. Personally I feel it’s the smaller details that really make a piece sing; a facing here, a french seam there. We all have our favourite pattern companies too, the ones you know you can rely on to leave you satisfied.
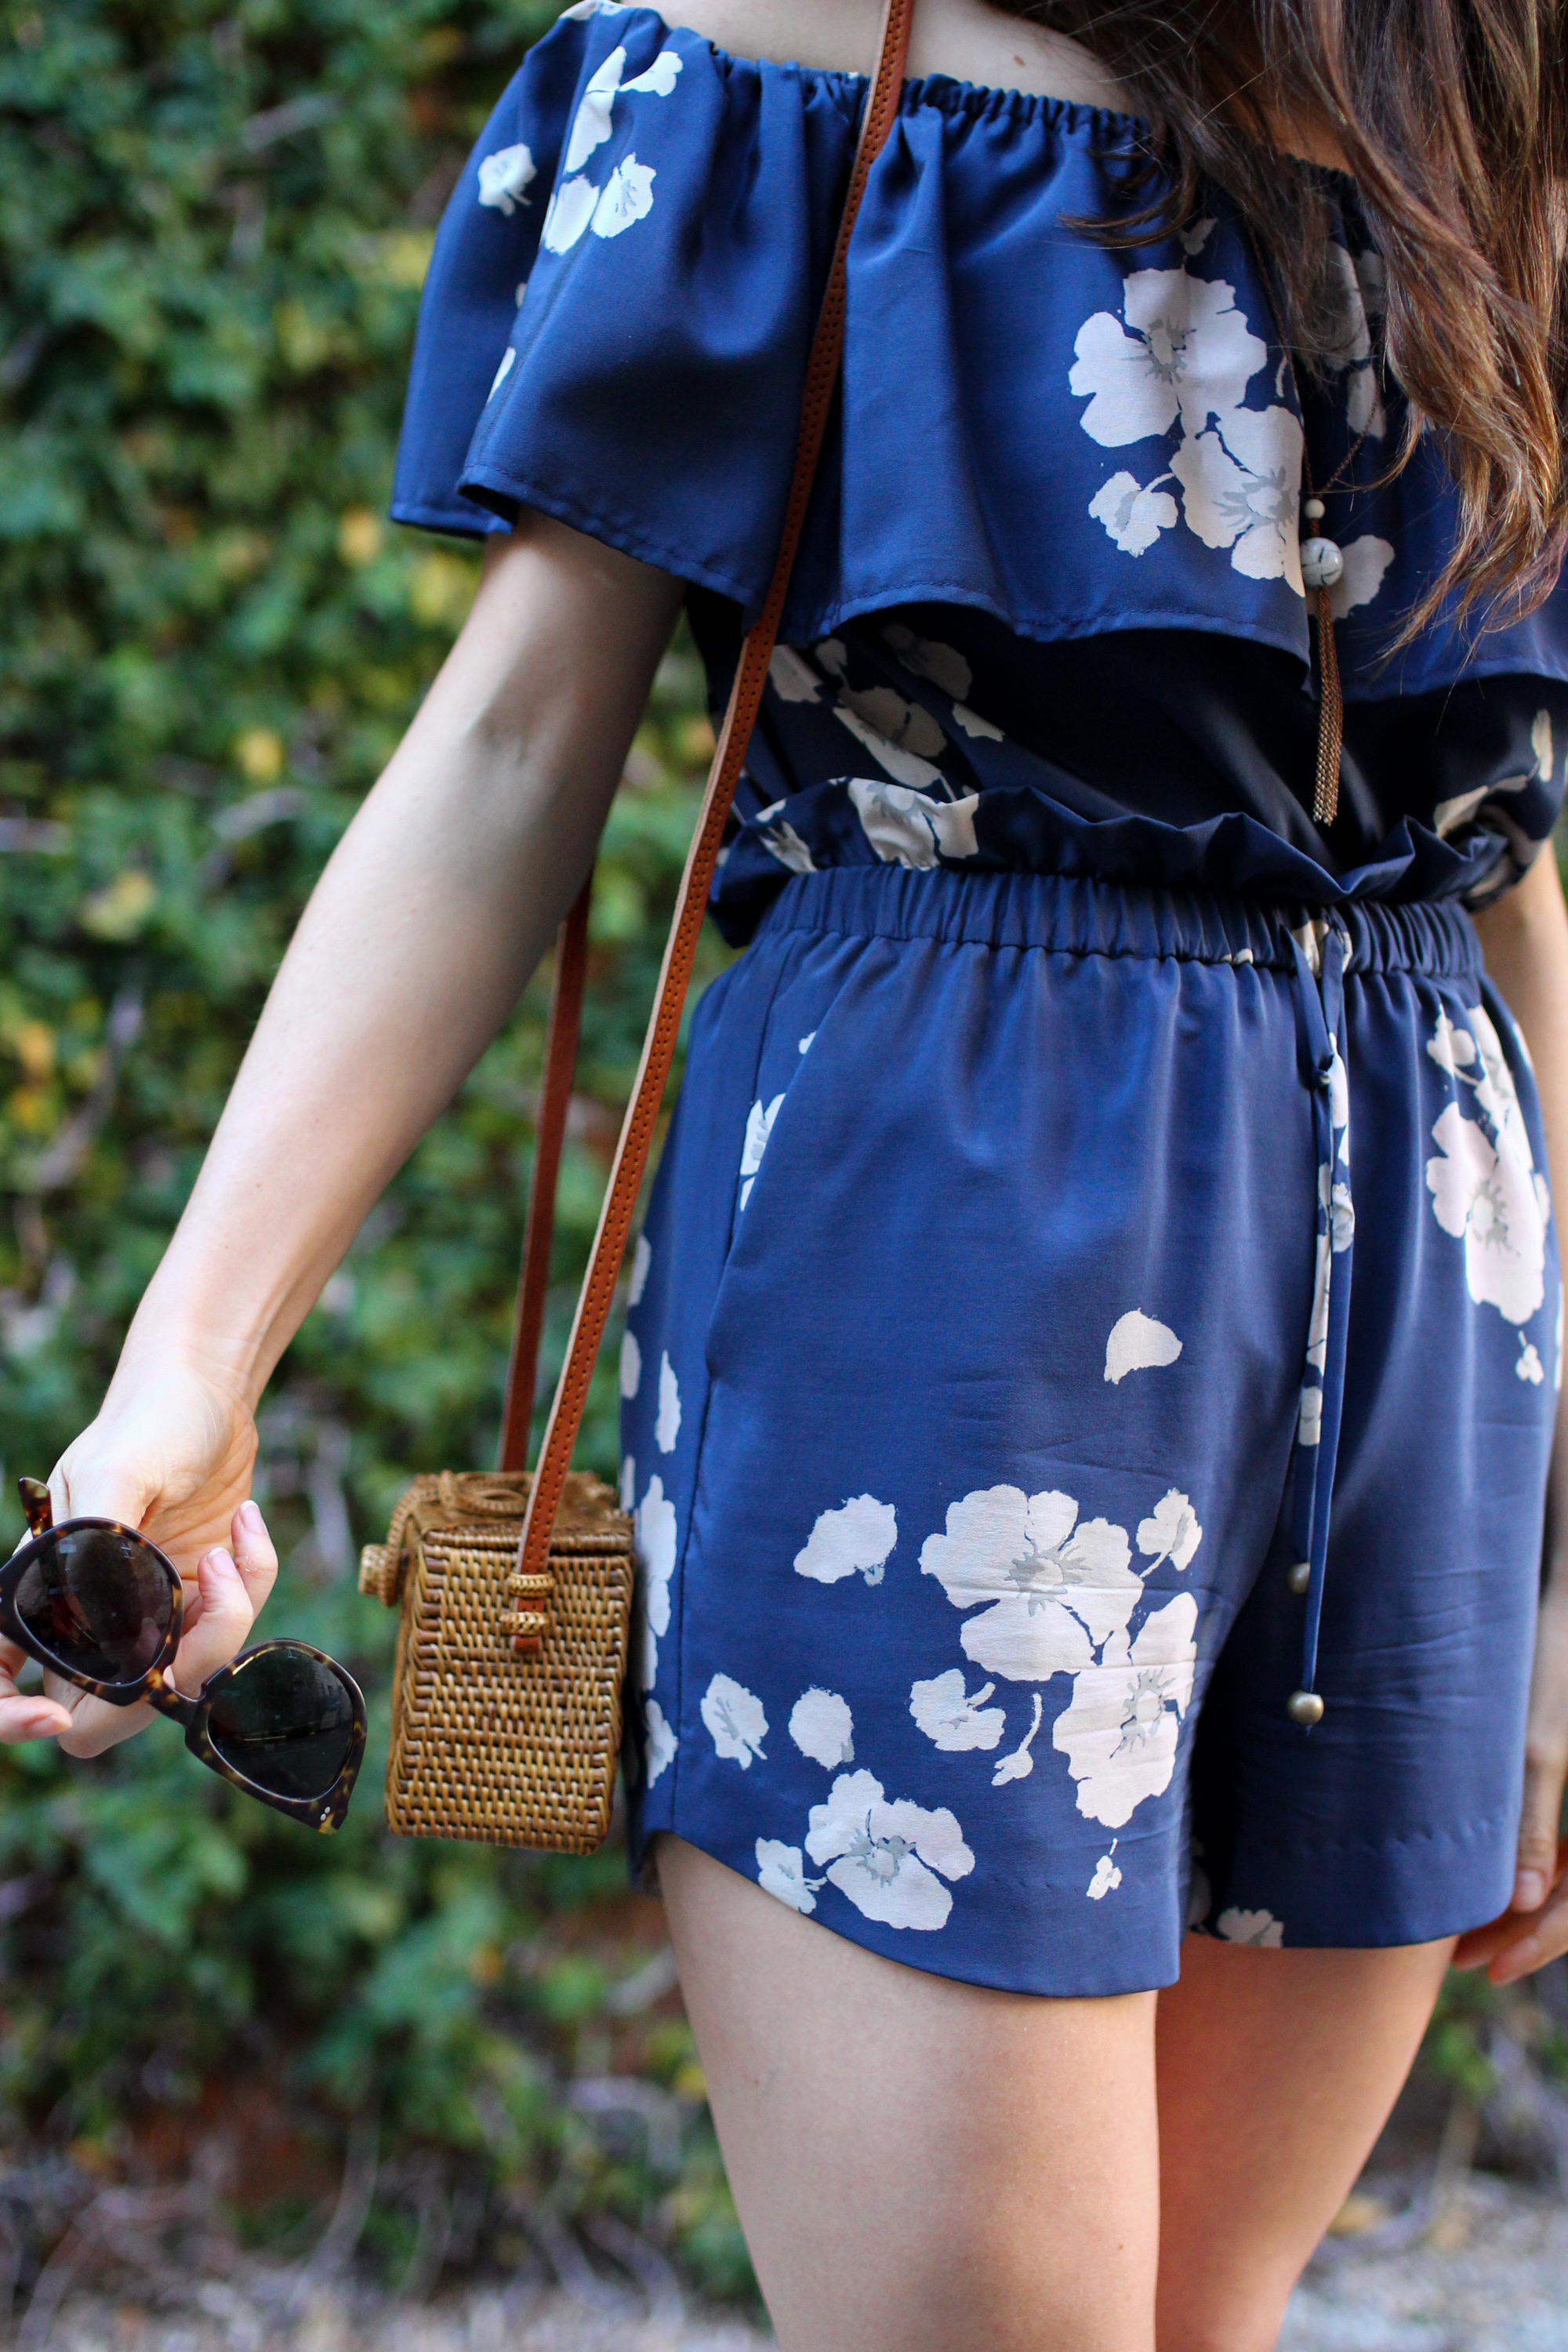
 Well, last week was a week of firsts…hand-made jeans: check. First online class: check. Wait, what? So if I’ve been a little quiet on social media in the last month it’s because I’ve been beavering away planning, sewing, filming and putting together an online sewing class for this
 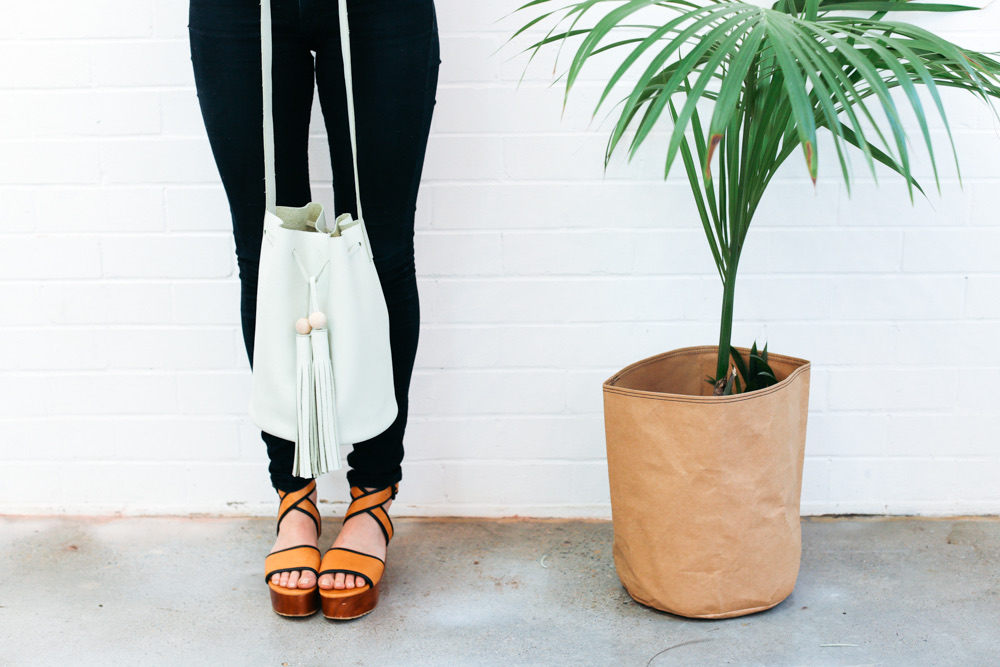 This all came about quite serendipitously. I was approached by
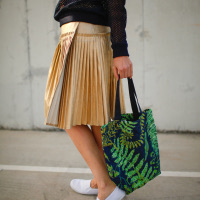
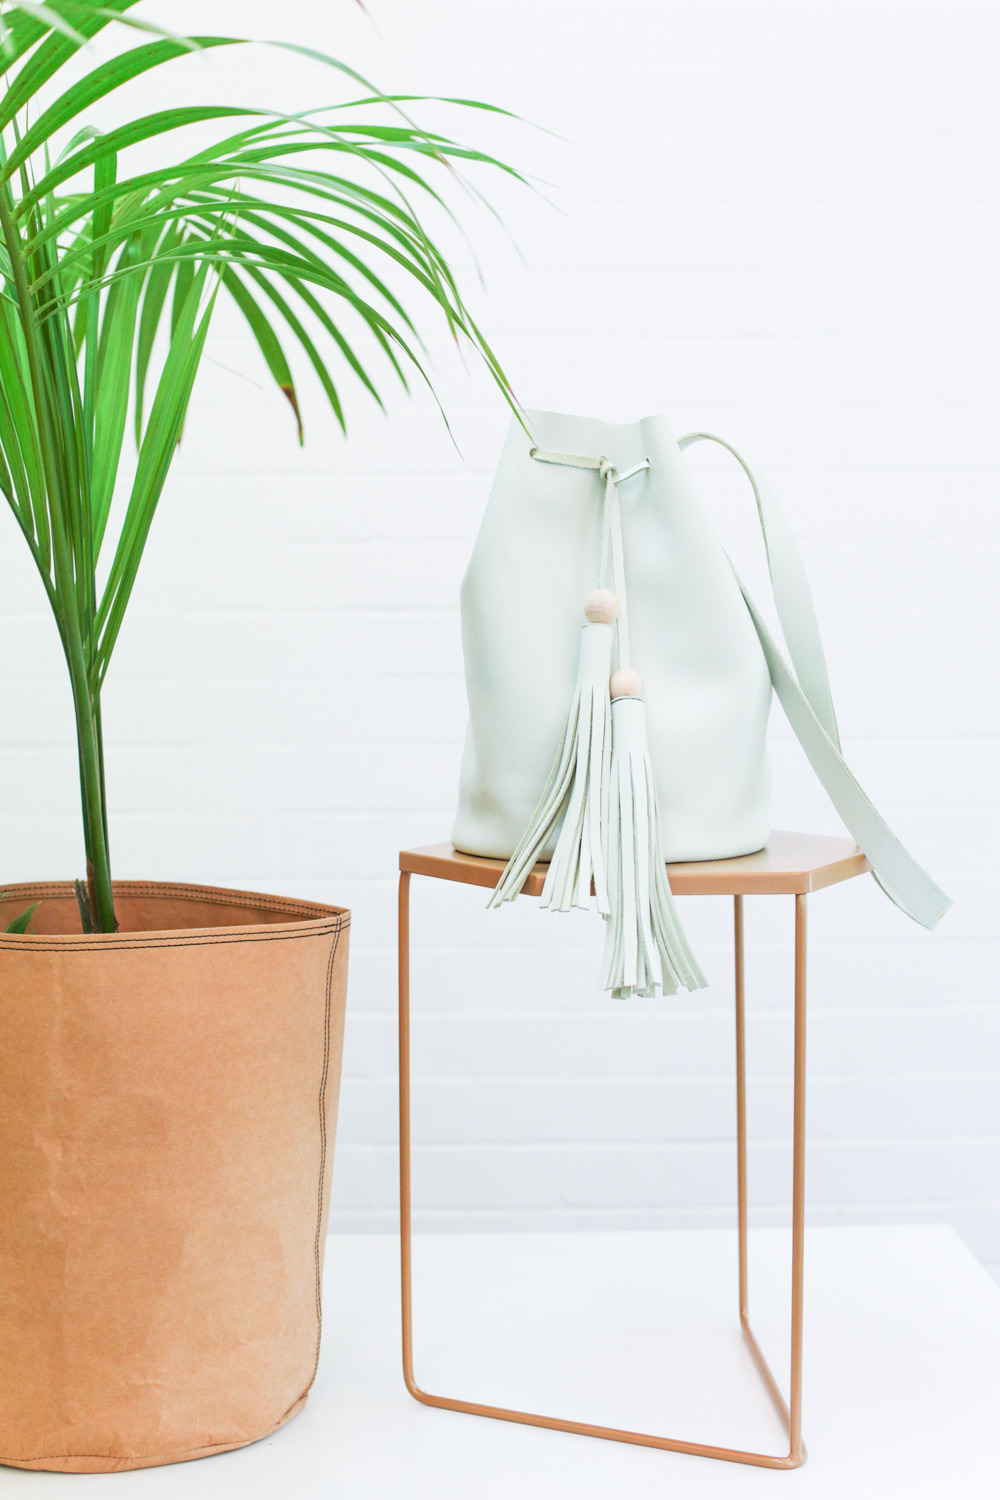
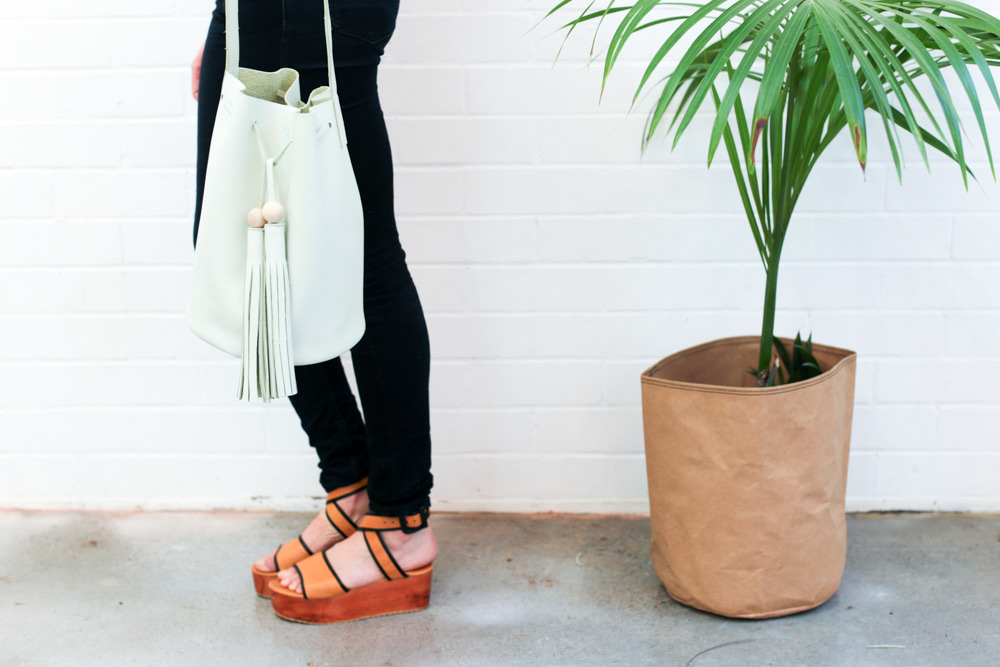
 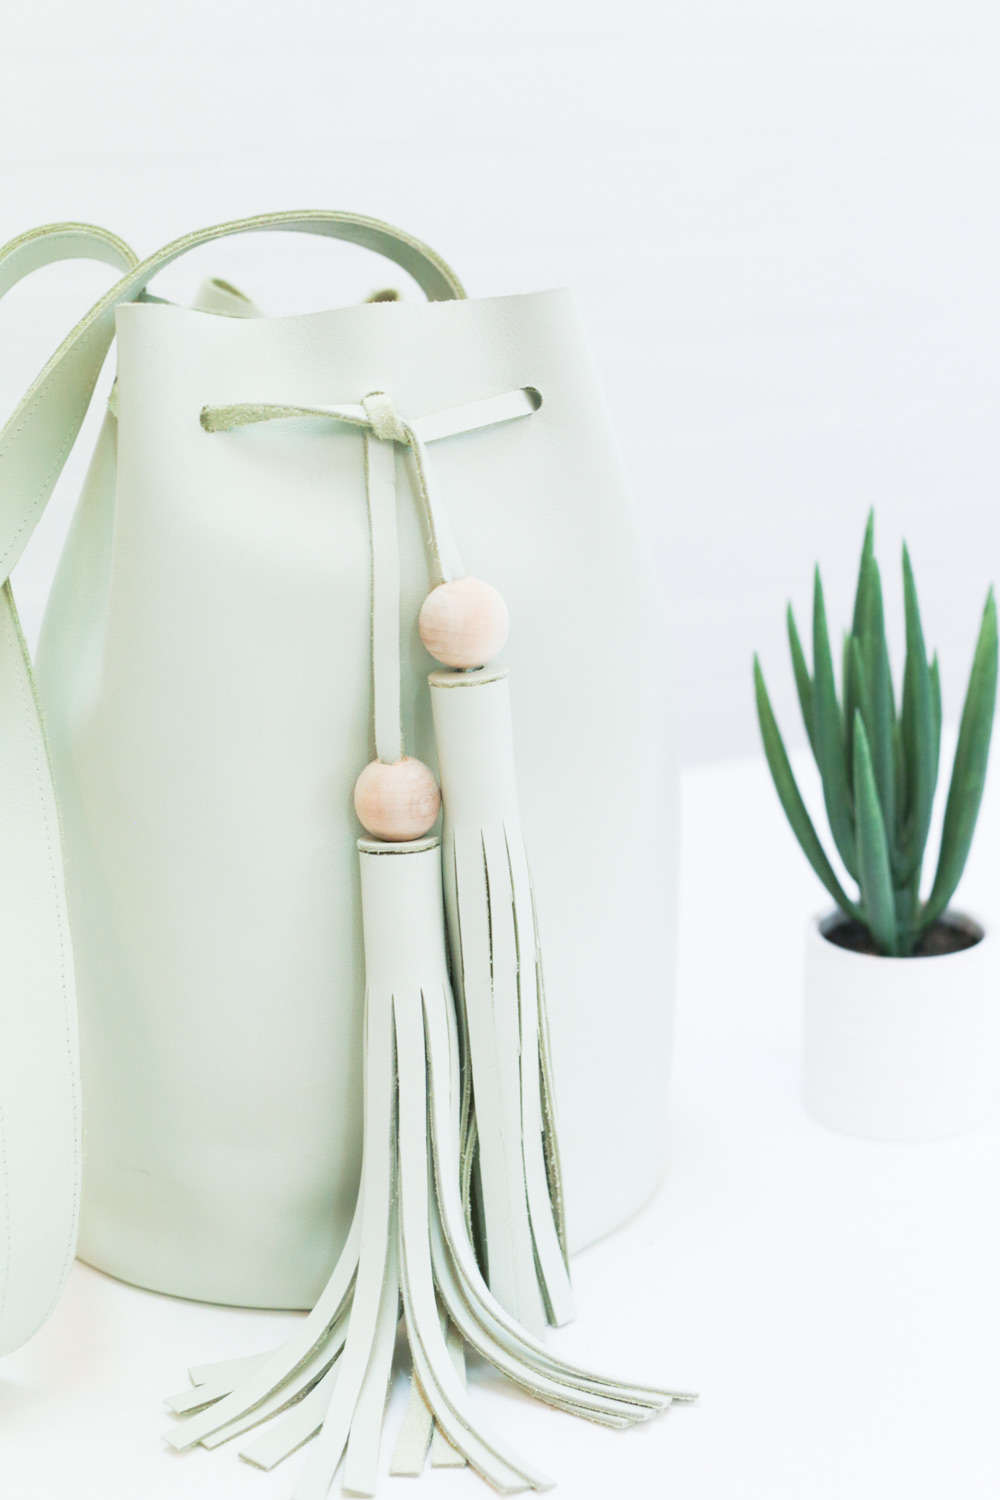 One would dare say leather bucket bags are trending right now and to be honest, for quite a while I was going to buy one. But then I thought, how hard could it be? It’s just a rectangle plus a circle with straps and a cord. I drafted up a template. Bought a beautiful hide, some basic leather working tools, did some research and got to it! Argh, of course there were hurdles along the way. And then the filming… my god. As a mostly-introvert, speaking my thoughts aloud on camera for 8 + hours (and having to make sense and not do weird faces) was intense. Oh and the part where I punch a hole in the exact place I tell everyone not to punch it. Le sigh. But the result: pure leather bucket bag deliciousness and a
 In the class you will learn:
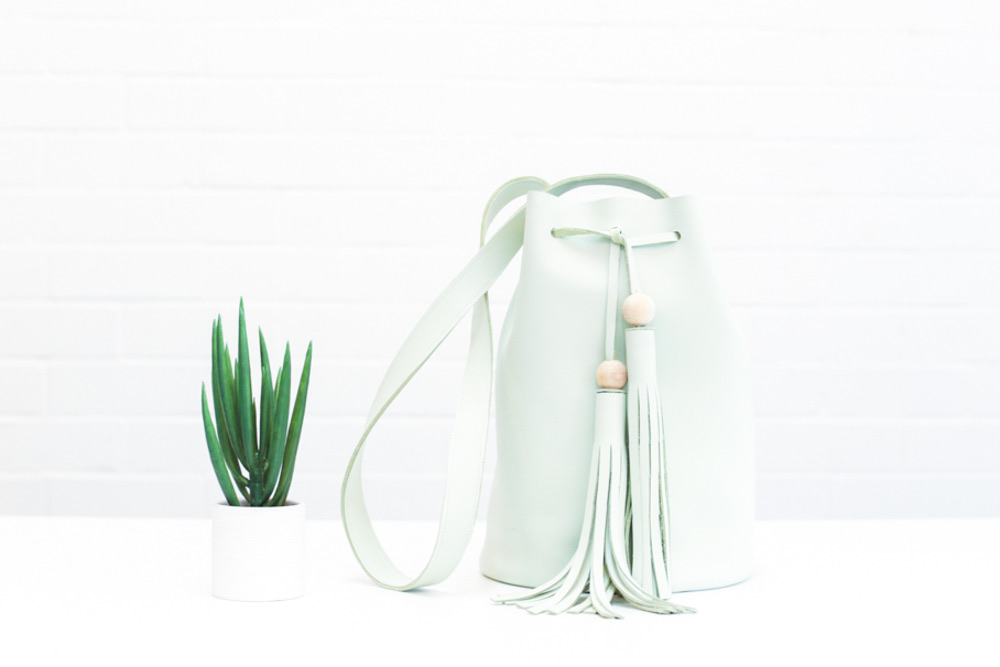 Of course I would be honoured / love you (maybe forever) to enrol in my
 Hullo! Today is the final stop on the
  If you’re curious or tempted to sew jeans, it is really worth having a go. Actually, I don’t think this can be considered having a ‘go’; with
 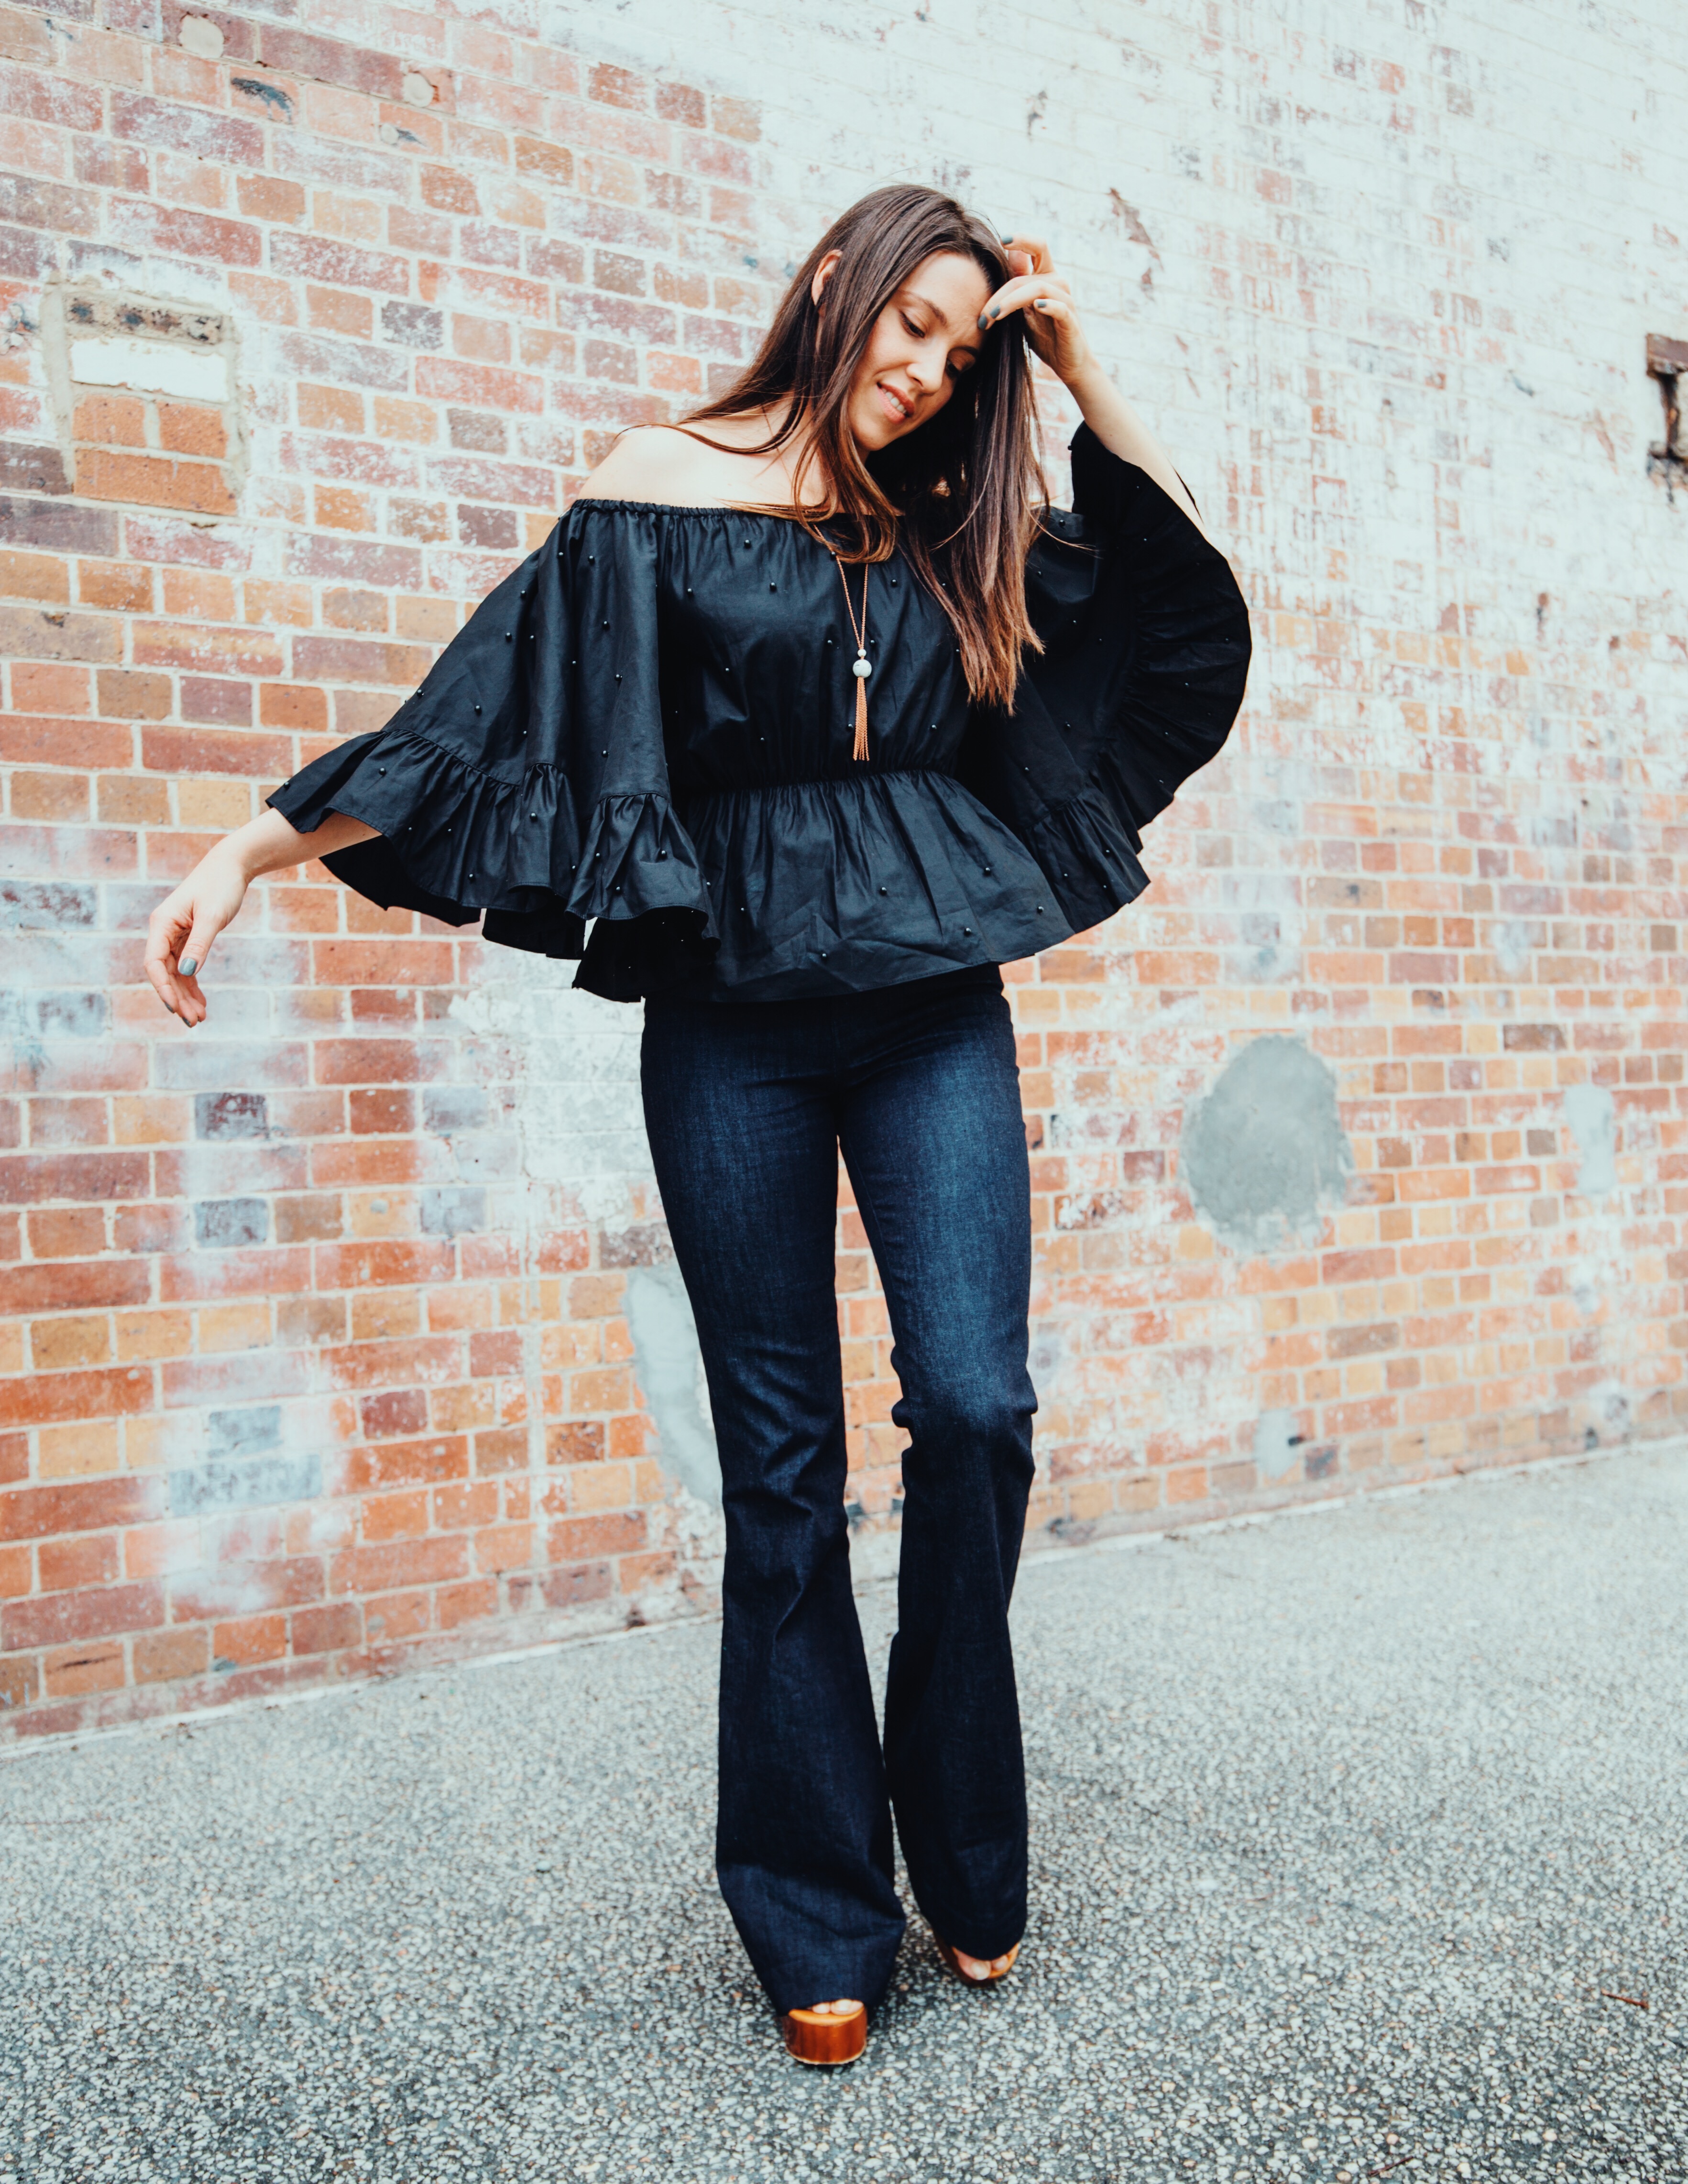 Specifically I was worried about sizing. Anyone who’s ever bought a pair of jeans that were a ‘great’ fit in store only to have them bag-out after a few wears, knows, it’s a grief that runs deep. This happened to me again and again until I figured out that a pair of jeans needs to be borderline too tight in the change-room, to be a perfect fit once they relax. This is a terrible idea if the jeans have no stretch. However, I was feeling confident that the denim I was using for my
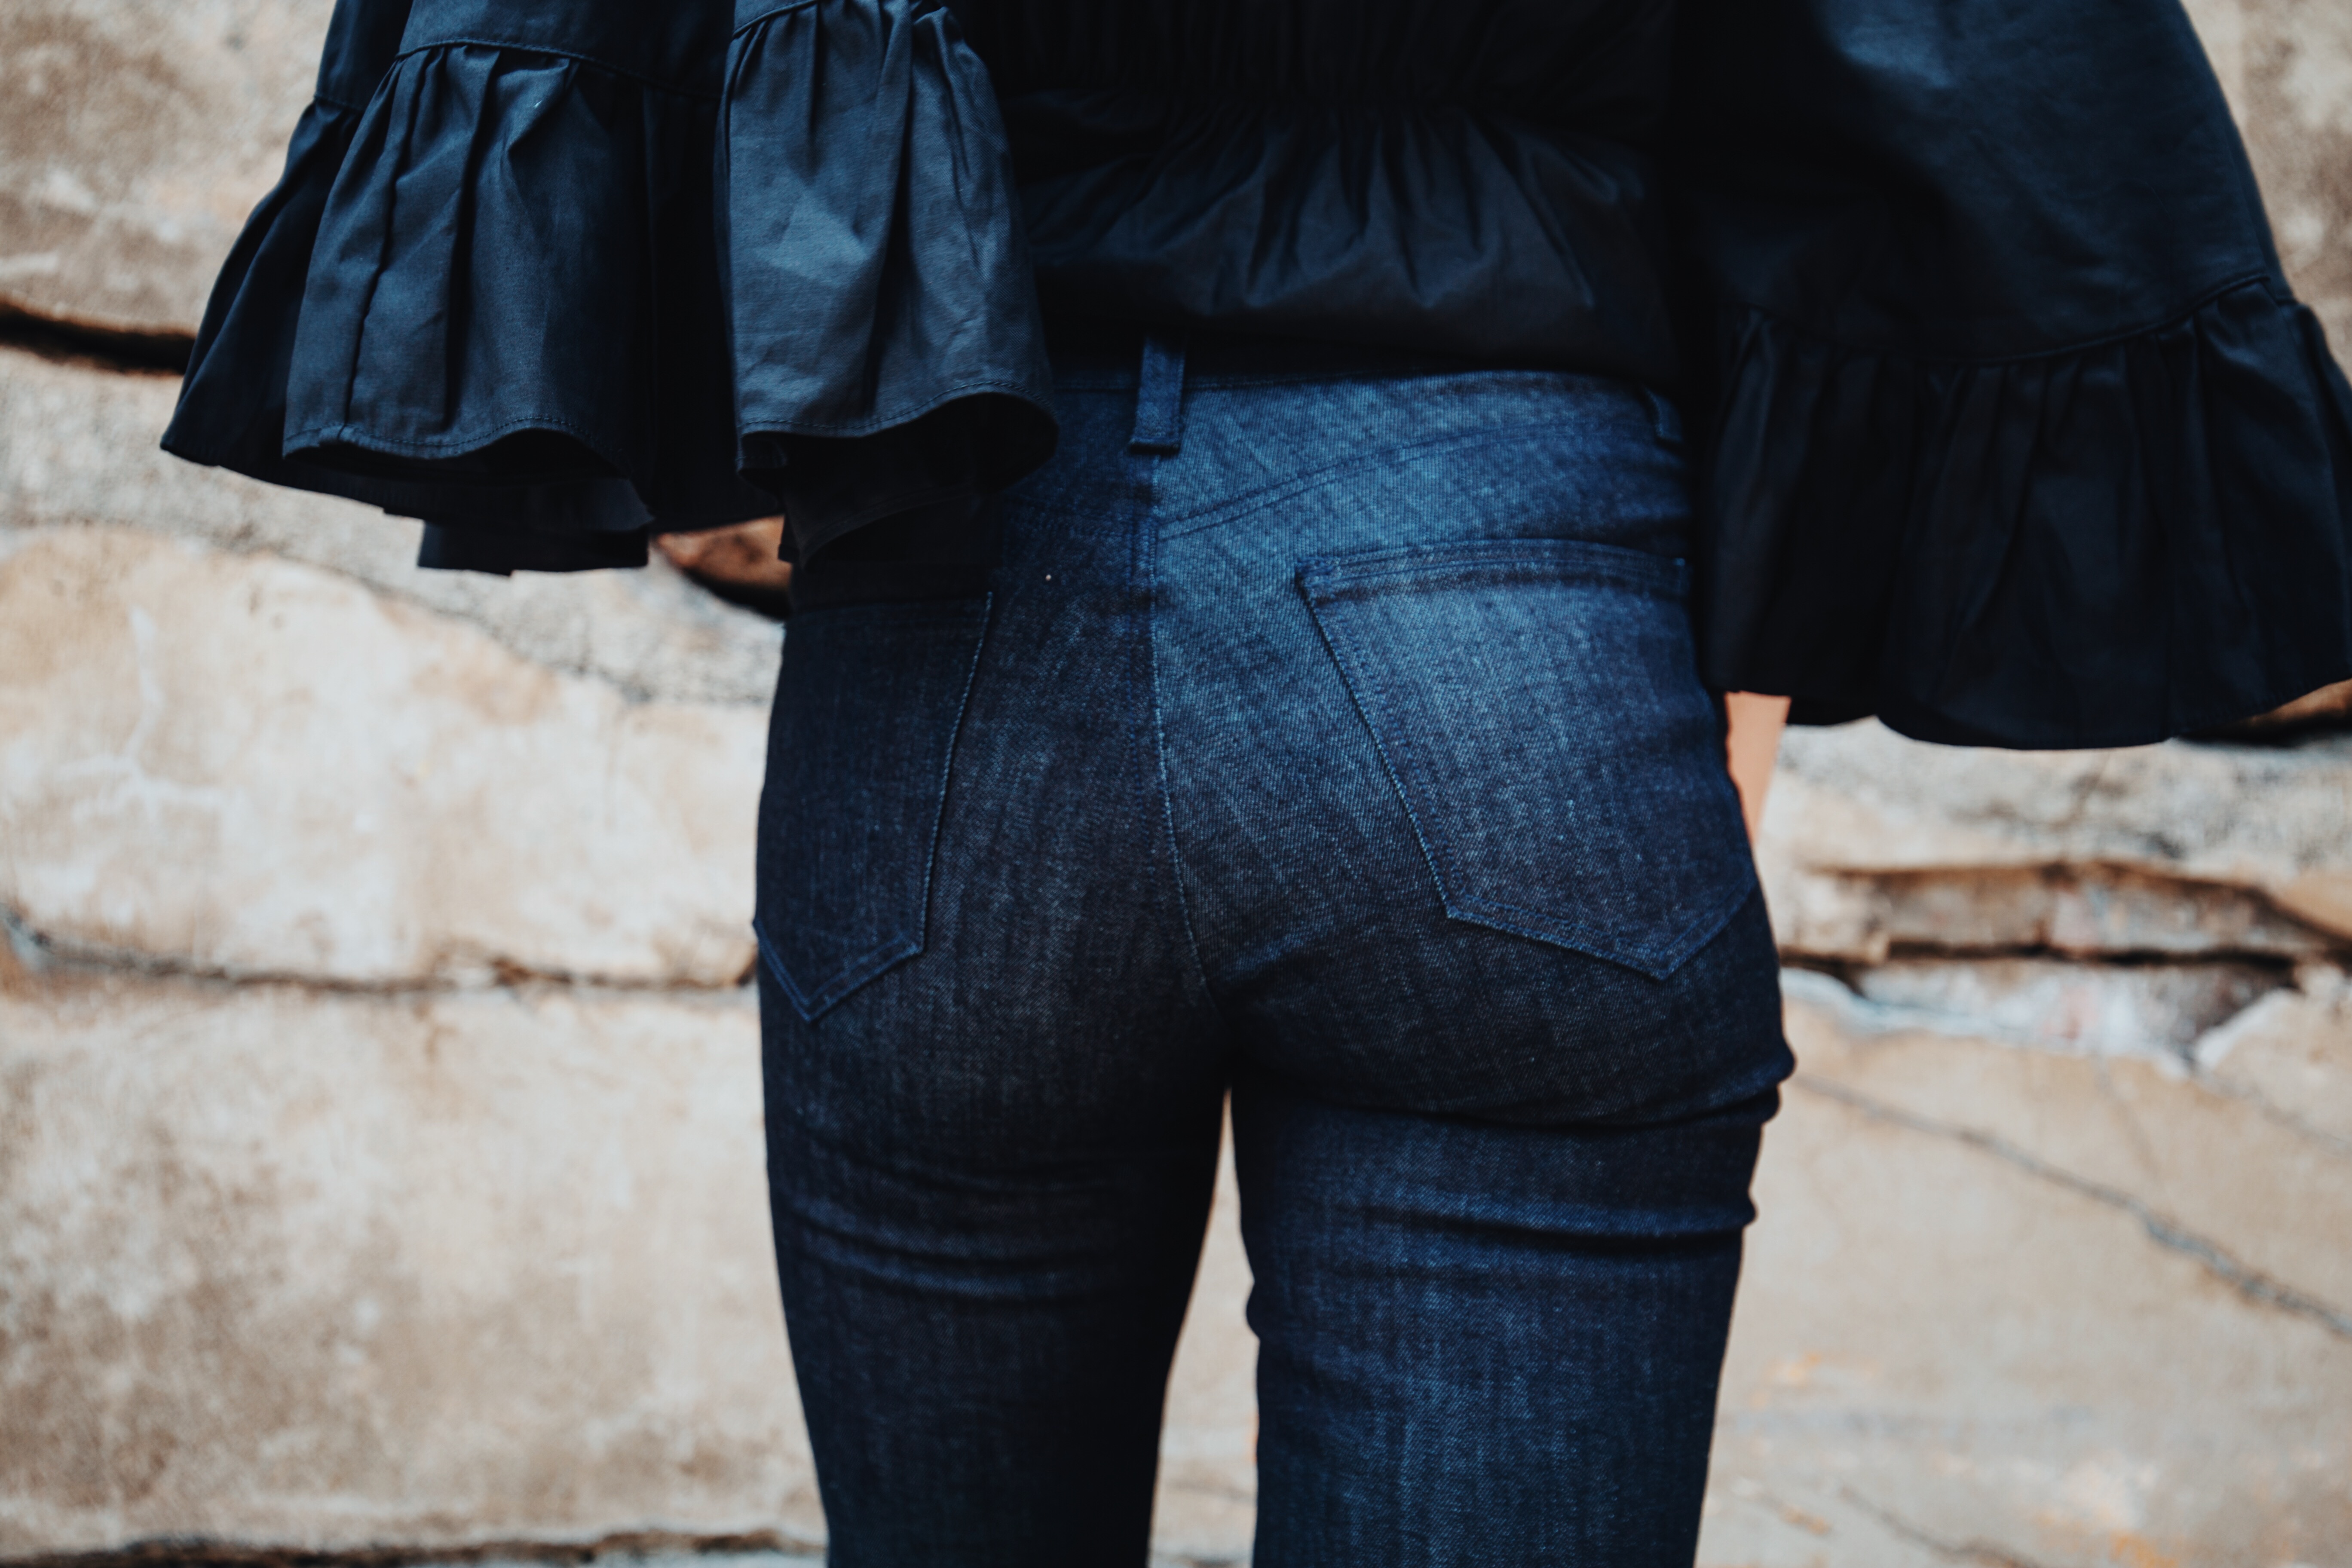 This is where the ingenious instructions made it even easier to get the fit right. By having you baste the side seams together, once all the main parts, back yoke, fly, front pockets, are complete, there’s no ‘I think they will still fit like this after I put the fly in’. It’s a guarantee! Instead of a 5/8″ seam I basted my side seams together with a 7/8″ seam. I’m guessing that taking this much off actually put them at the equivalent of a 27 which, combined with the seat depth of the 28, was just right. But having taken so much out of the sides, looking at the above photo I feel I could have moved the pockets closer to the centre back seam. When it came to attaching the waistband, I re-marked it with the size 27 markings and basted it first to make sure I could eat lunch. I can. I know ‘perfect’ is a dirty word that we sewists don’t flash around willy nilly but when the fit is wriggle-in, jump up and down, get-into-dem-jeans-dance p.e.r.f.e.c.t, you’re allowed to scream it from the mountain tops!
 One thing I really enjoy about the sewing process is making design decisions. Which colour buttons? Contrast hem? I love putting thought into this stuff! But it can be kind of paralysing. That’s when we pass responsibility over to Instagram. I was actually looking forward to sewing a “basic” for once because I thought it meant time-out from decision making. I mean, jeans are jeans. There’s just a button and some top-stitching, right? Err, no. It went more like this…silver or copper button? Rivets or no rivets? Neutral or gold top-stitching? Plain or embellished pockets? Wait, what sort of pockets, welts? It was popping a cork on a red I didn’t even know I had! I knew I wanted a dark blue denim and preferred neutral / invisible top stitching, like
 Usually an up-coming fly section is enough to induce mild fight or flight. But the instructions for inserting the fly here were uh-mazing. And yes you were all right, top stitching IS fun, even without an edge-stitch foot. Having the Baste + Gather Facebook group available is invaluable, especially when you panic over why your zip is 3″ longer than in the pictures (you shorten it later). There were only two sections in the entire thing I couldn’t figure out. One, was how to remove the extra teeth from the zipper using the pliers. I tried. My burly dad tried. In the end I just grabbed a quick-unpick and sliced off the extra teeth, solved! The other was transferring the fly top stitching guide lines to the fabric. I’m still not sure what method everyone else was using but I couldn’t see how I would get the chalk pen to go through my easy-trace onto the jeans below. So I traced over the lines in chalk pen, flipped it off and then rubbed off the markings onto the jean and went back over it. Genius! Or maybe we were supposed to do that.
 There were so many tips and tricks I learned along the way. Things I would never think of doing. Having now sewn the Birkins, these are a few that really made a difference to the sewing process and my enjoyment levels:
 Get your copy of the pattern
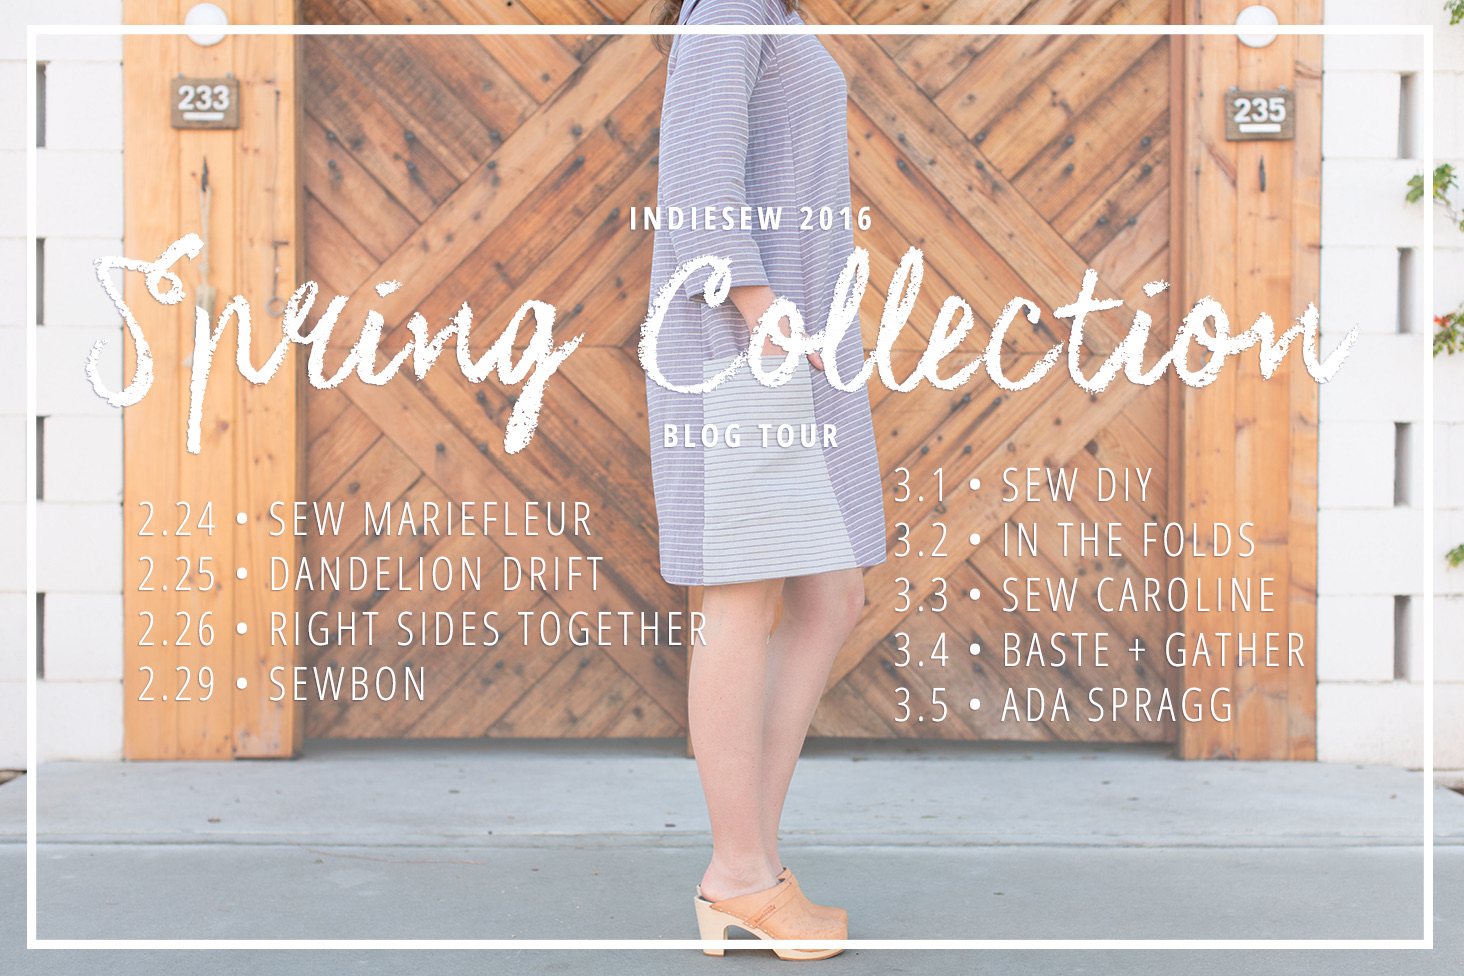


 Bloglovin
 Feedburner
 Feedly
 Kollabora
 In Your Inbox