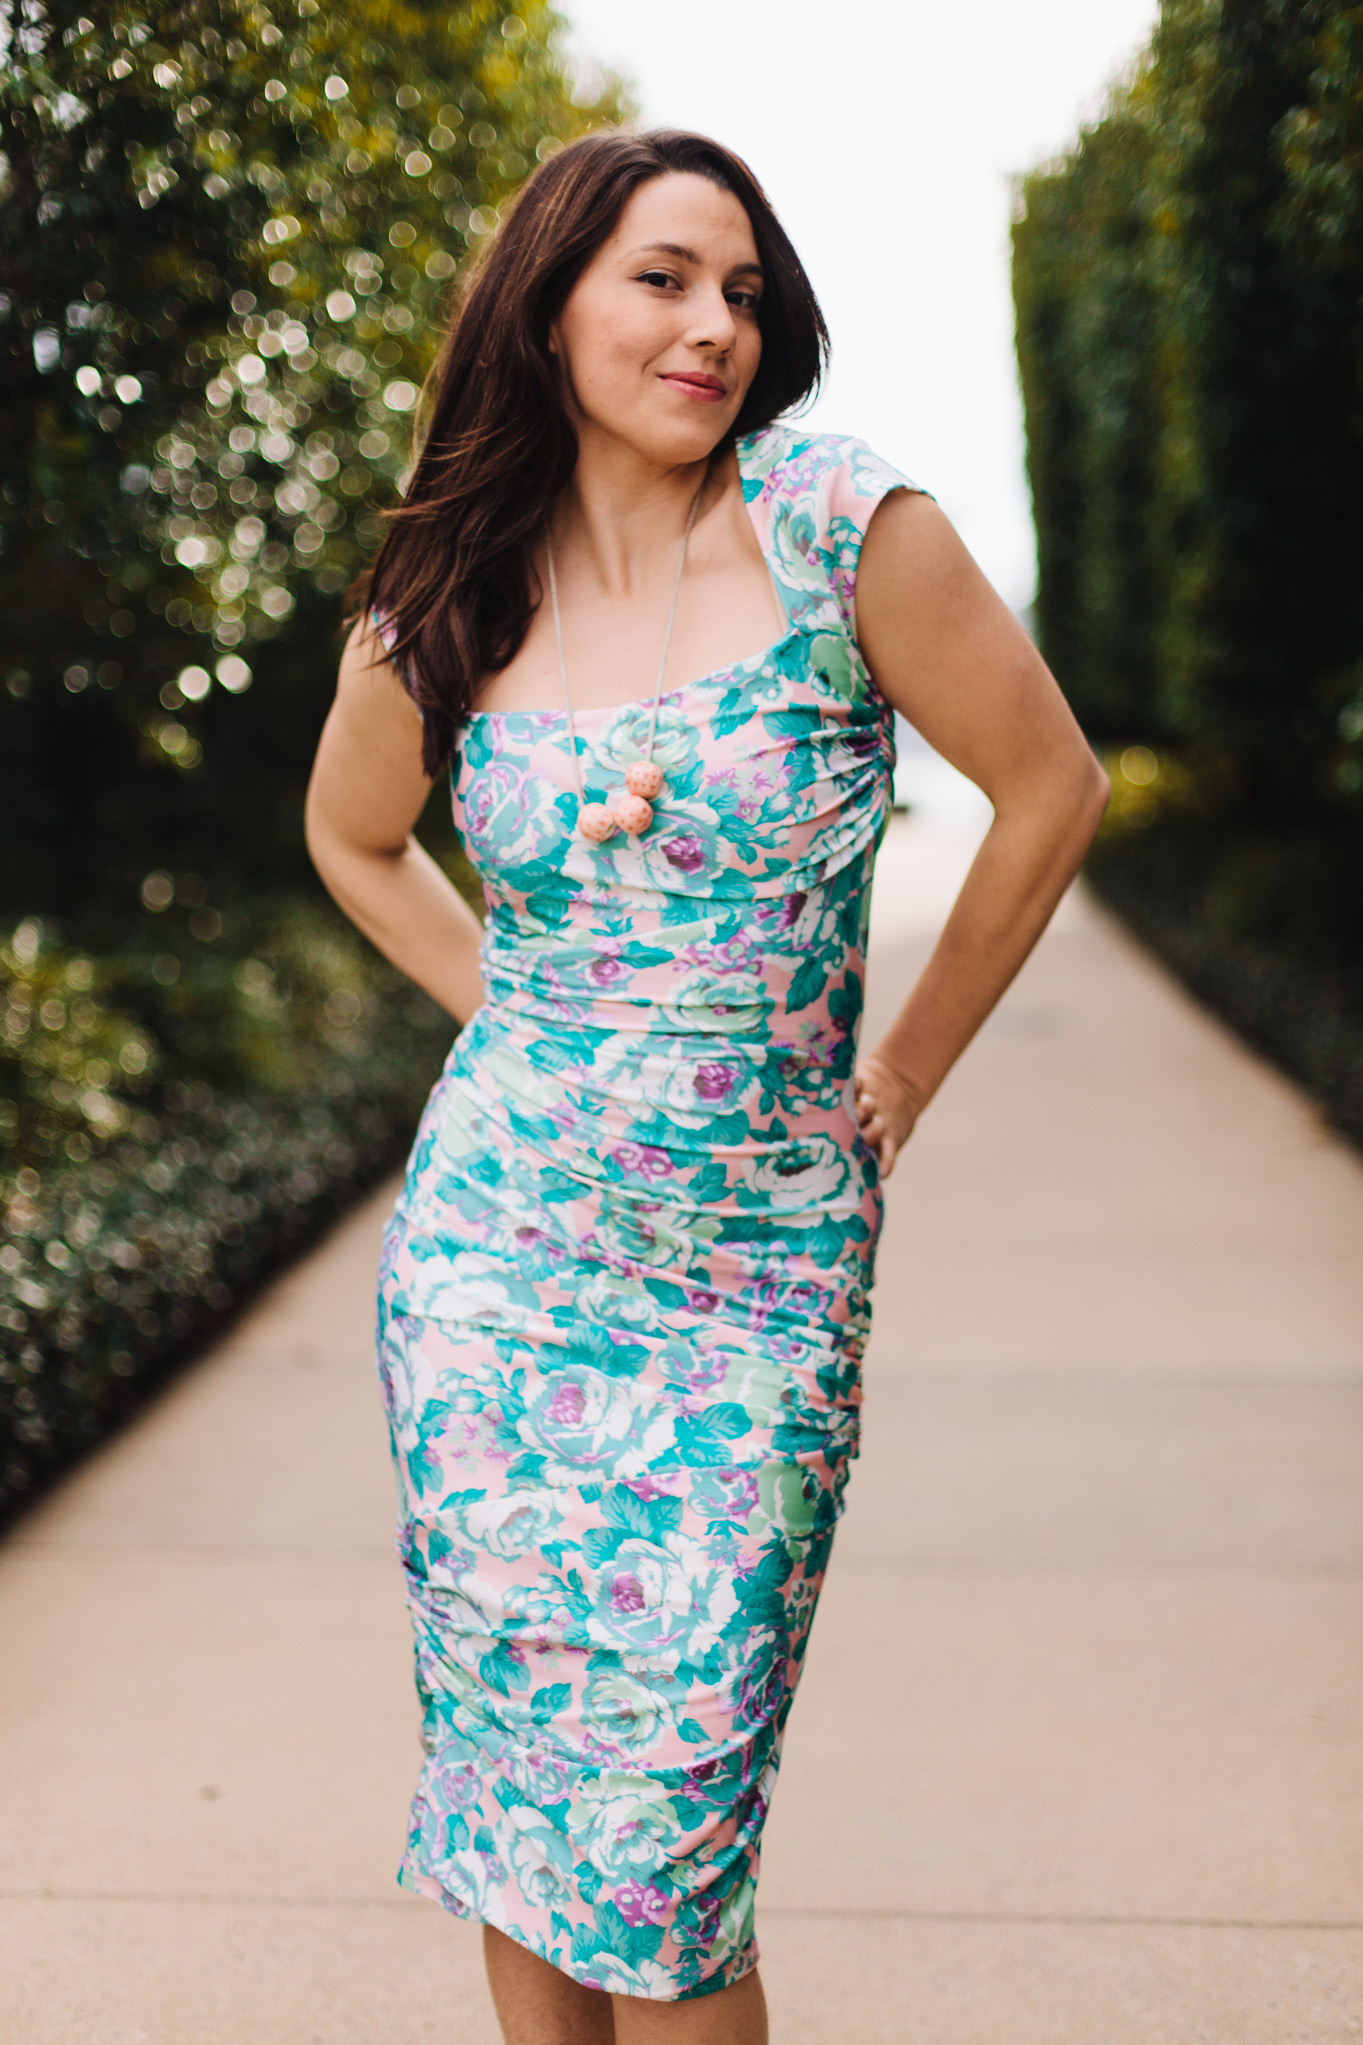
 I know, I know! A second posted project in as many weeks. Cannot quite believe it myself but there you have it. Momentum is a beautiful thing. For you today, I’m so excited to share my version of the Alice Top (and dress), a recent pattern release from Tessuti, which you may have already seen gracing your Instagram feed recently, maybe yes? Firstly, I love love LOVE it. Second, it wasn’t part of any official sewing queue. It was a pure impulse saw-pattern-had-glorious-vision type project, which are the most fun and often turn out the best, don’t they? Something about freeing yourself from your own sewing shackles. Fly my pretty, fly!
  I’ve been trying to remember what came first: the pattern or the inspiration. And I think it was one of those situations where you keep seeing a particular style around and then suddenly there’s a pattern released for it. In this case, a whole influx of tops with beautiful woven embellishments like this one and this one. To be honest, it’s not a style that I normally go for and I don’t want to put little Alice in a box but she definitely has the potential for some folksy, peasant-y, free-lovey vibes. Which, I am not opposed to, no no…just haven’t dipped my toe in the boho-pool yet.
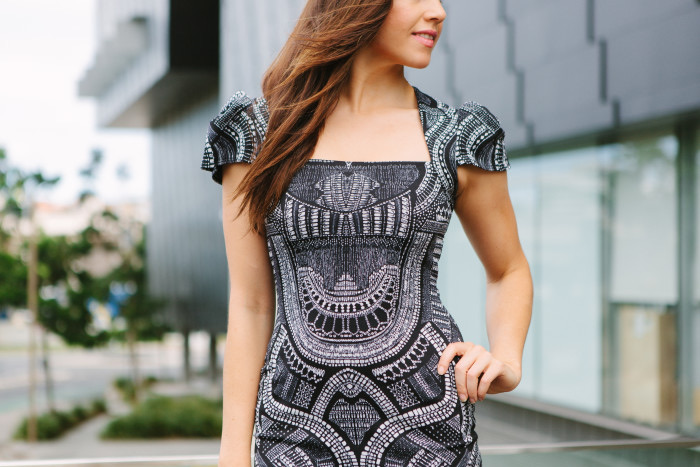
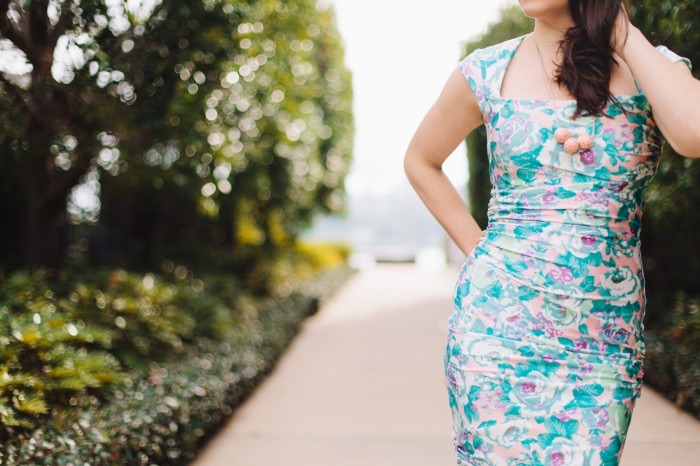
 It all comes down to fabric selection anyway. And playing with fabrics is SO much fun here! The Alice top is divided into yoke, sleeve and bodice sections and could not be more perfect for using up small remnants of extra special fabrics. You know, the ones you only purchased a little of (because they wouldn’t take a trade for your first born) or you loved so much that there’s hardly any left but you’ve kept every last scrap anyway. Those fabrics that are crazy-embellished or heavily woven or embroidered and would make more of a statement in small doses. Hey, even those two cushions that you only recently purchased for your lounge…those would make a killer Alice top!
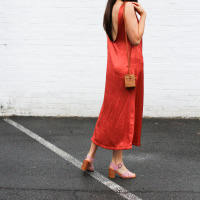
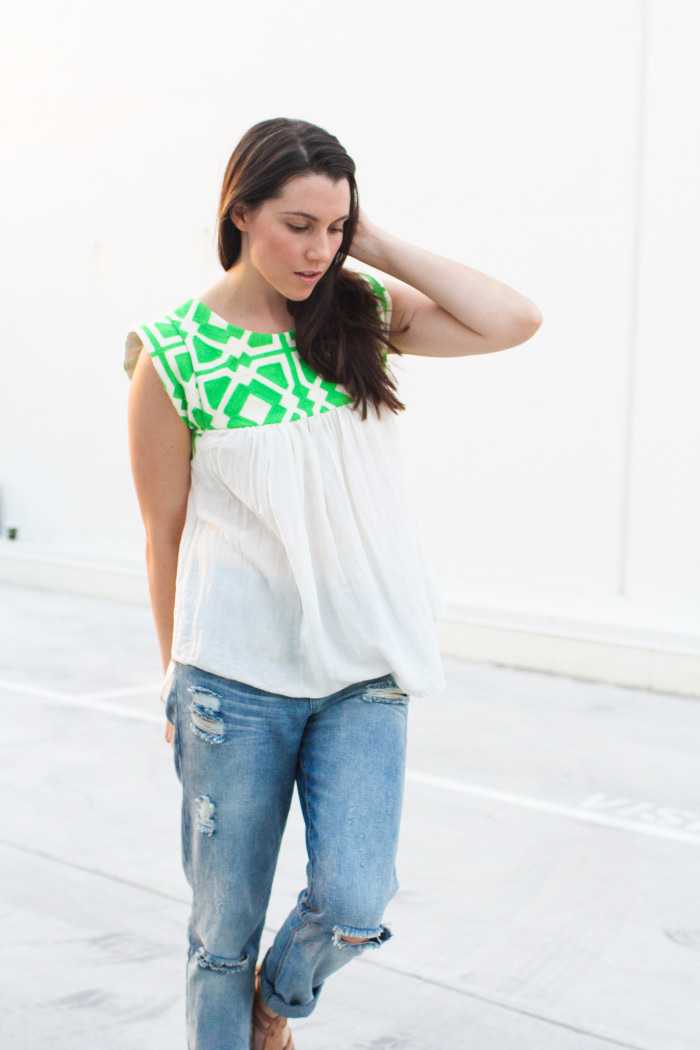
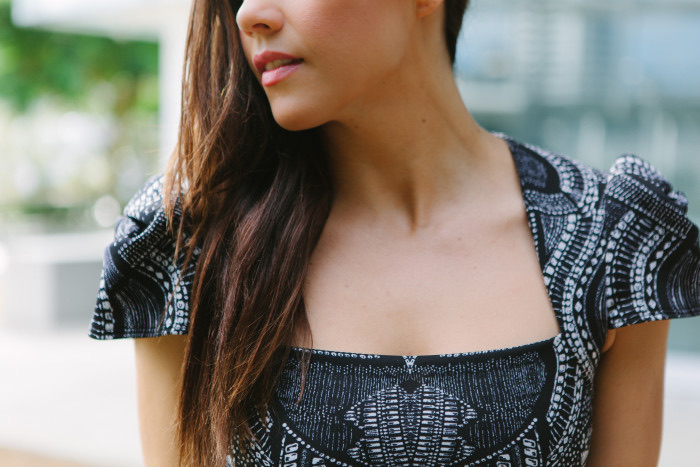
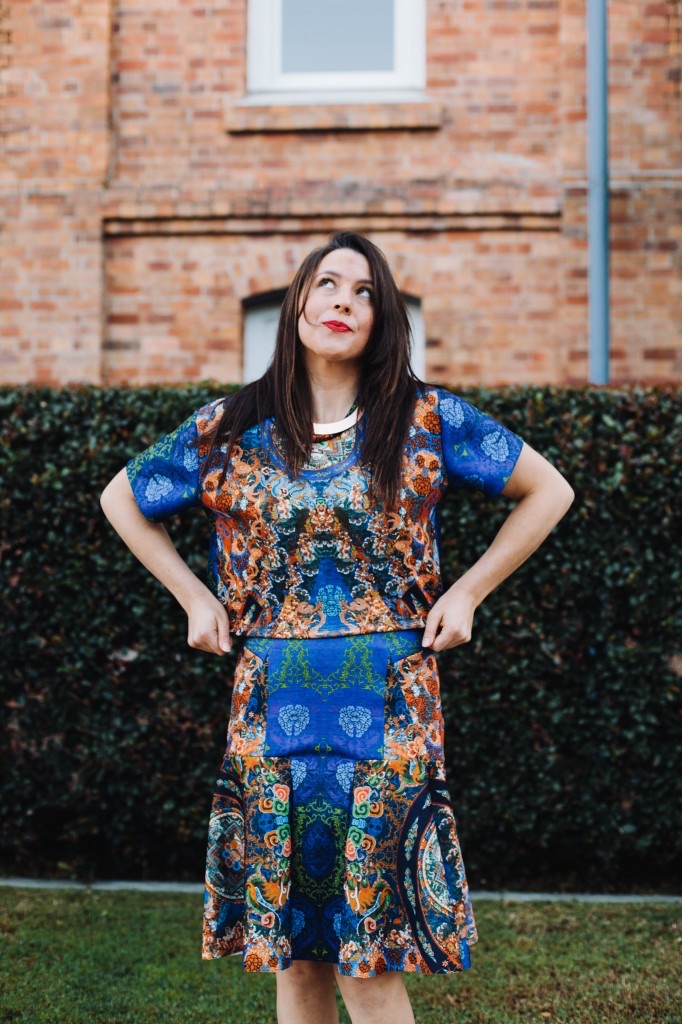
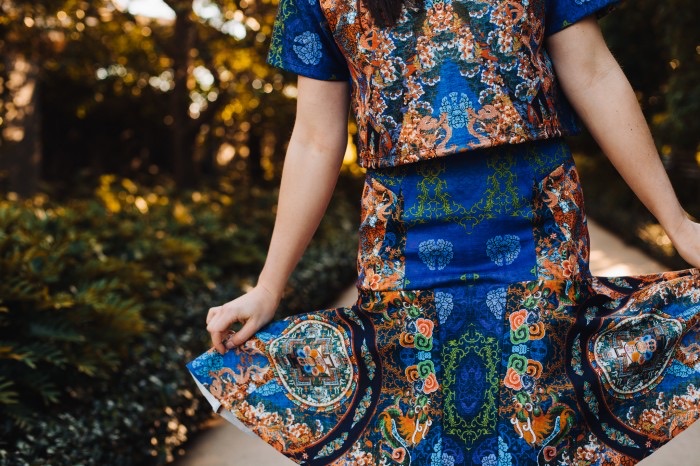
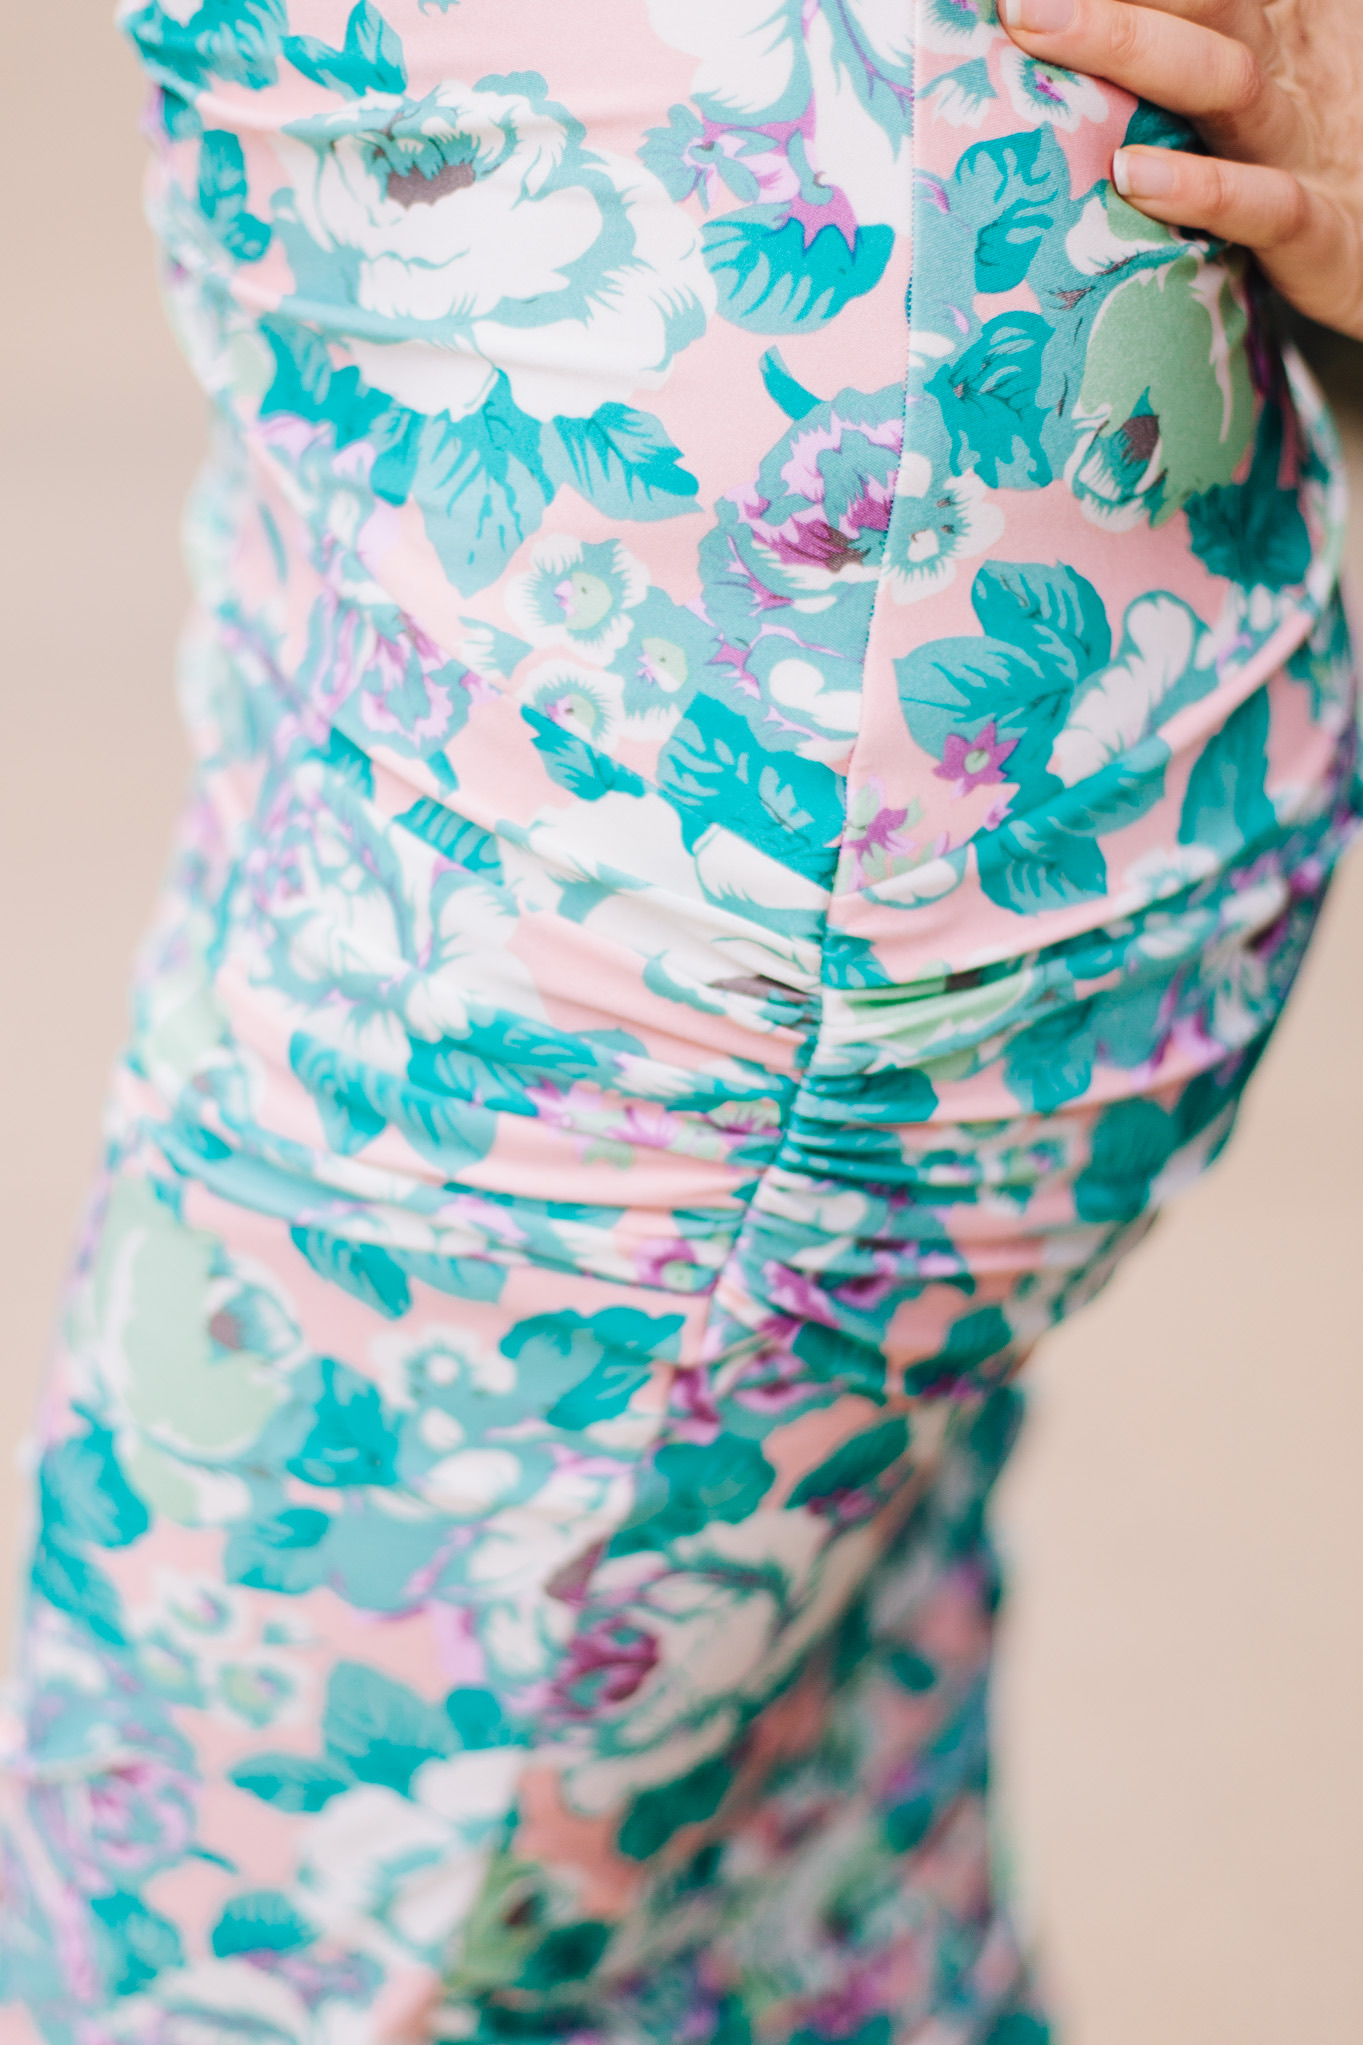
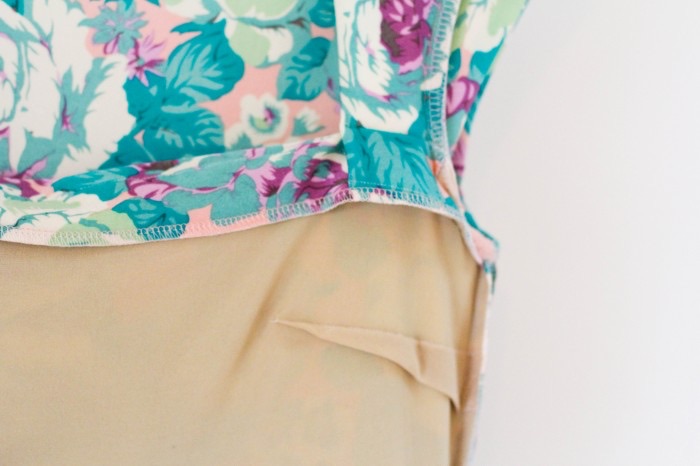
 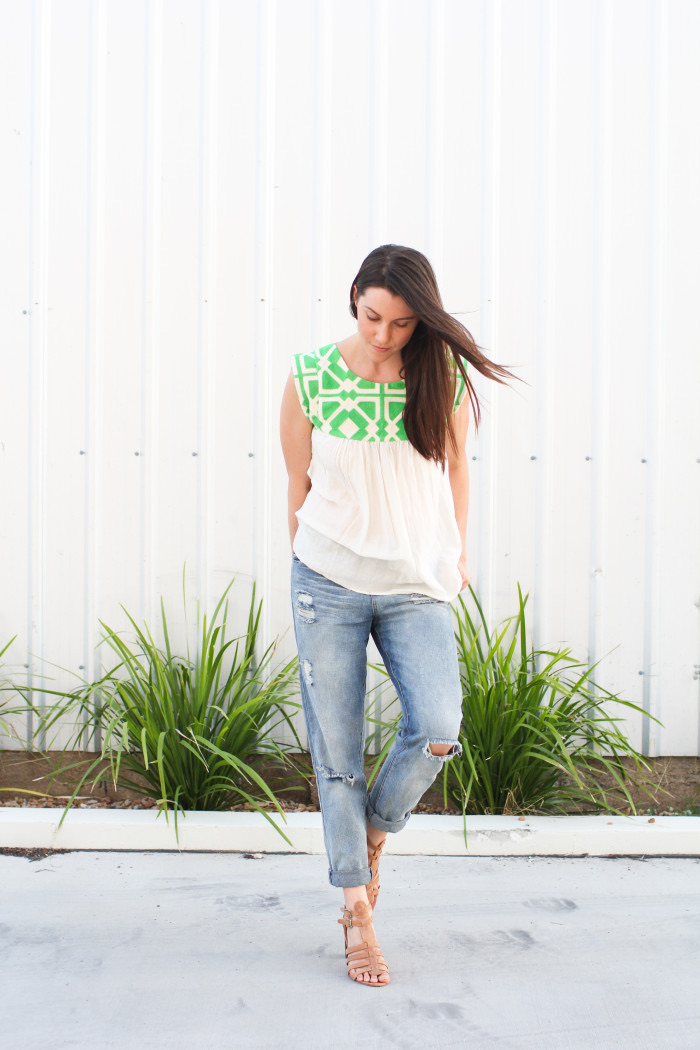 Yes, it’s true, I’m wearing cushion covers. Give it time, it’s going to be big. The rest of the top came from elsewhere too; I literally cut the gathered skirt straight off a silk/ cotton RTW dress. Which makes the whole thing re-fashioned, which makes me very happy. And not just because it appeals deeply to my smug environmentalist within. But also you would never guess to look at it! This is probably a good point to talk about fabric selection for the gathered part of your Alice top. I had originally bought some lightweight linen for the gathered bodice and washed it several times to try and soften it, but even so, the gathers would have been quite stiff. Because of the style of the top, you have the gathers sitting right on the fullest point of your bust. I’m open to extra bust volume, really, I am. But here, you’ve already got a loose boxy shape so you may want to consider a fabric that will gather softly and ‘flow’ ‘cascade’ and ‘shimmy’ down your front, instead of puff out. Silk / cotton voile good. Stiff starchy linen bad.
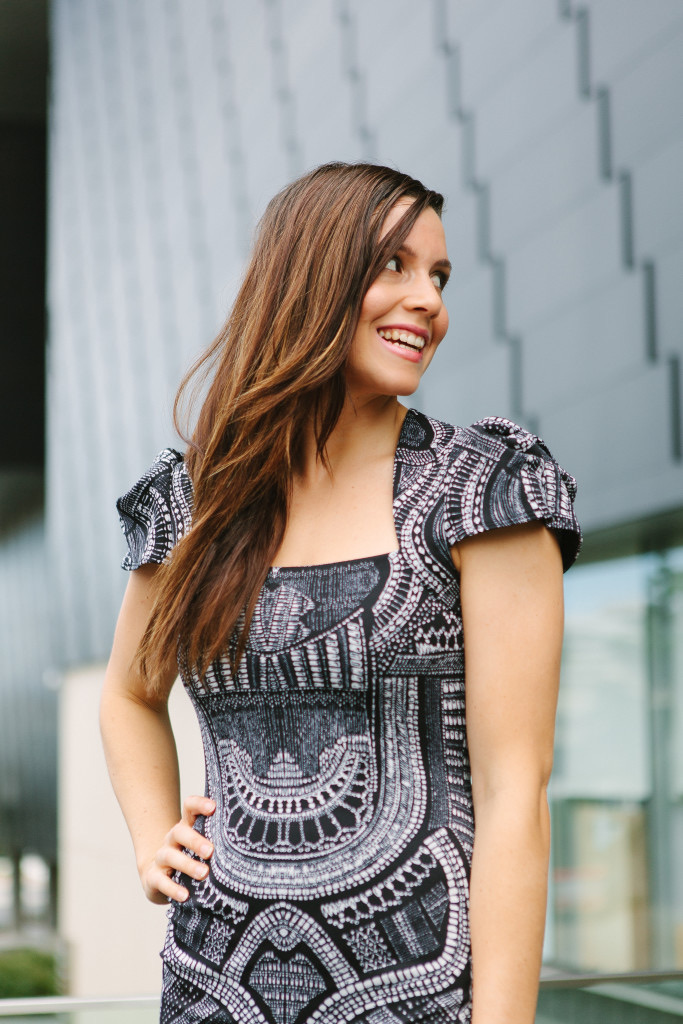
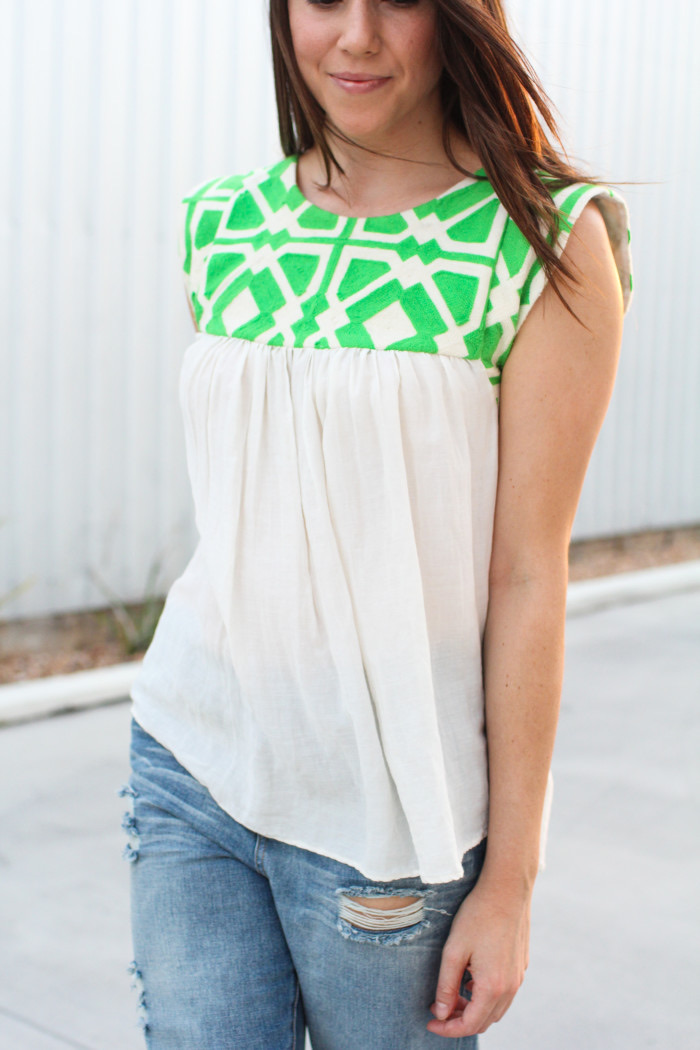 A word on sizing. After a bit of pre-sewing investigation, it seemed the general feeling was you could size down and still end up with a good fit. So, I measured the small, but made the extra small and the fit is perfect, still plenty of room under the arms, across the back etc. As per usual, with my previous makes from Tessuti patterns here and here, the instructions were great to follow and it sewed up beautifully. Actually, I was surprised by how quick it was overall. Okay, so maybe the lower half that I borrowed was already gathered and side-seamed and had this nice scooped high-low hem sewn for me. But still! The yoke and sleeve area are both lined and under-stitched and they seemed to sew up quickly too.
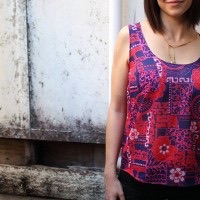
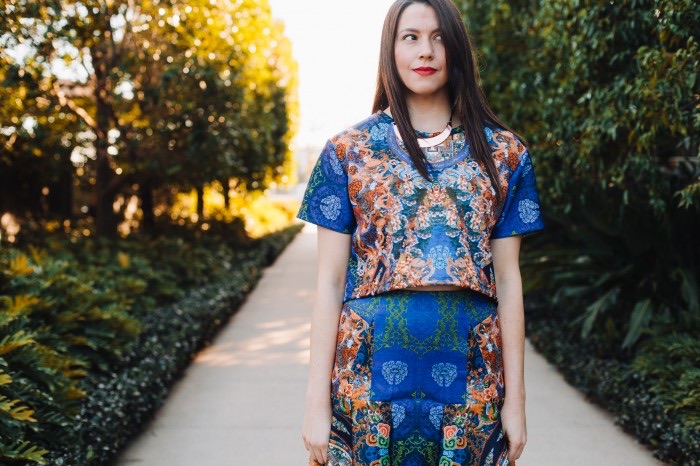
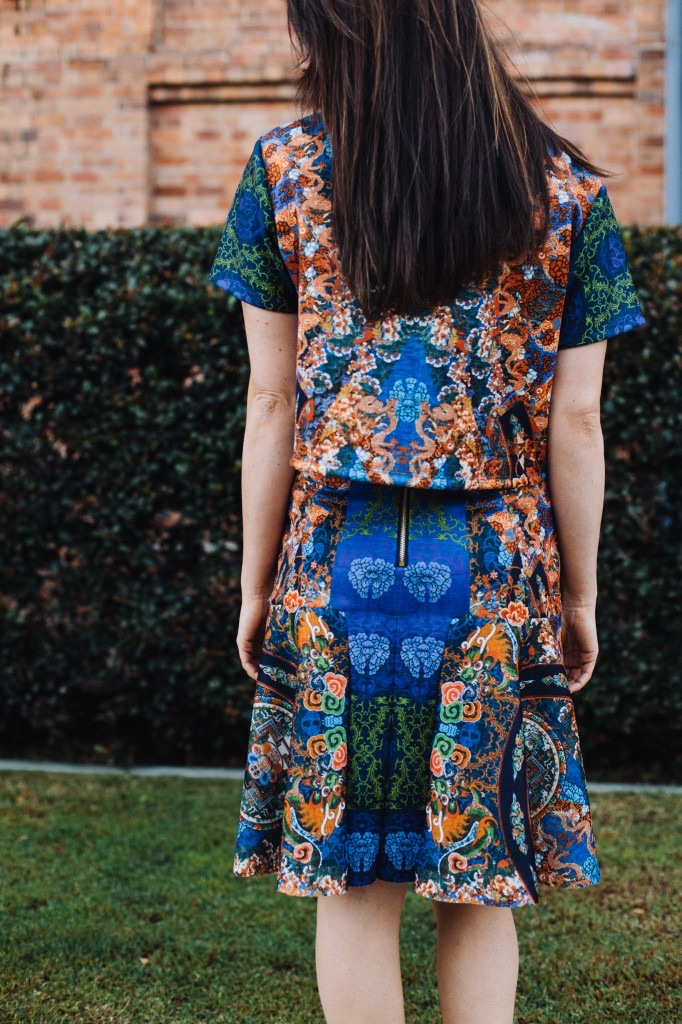
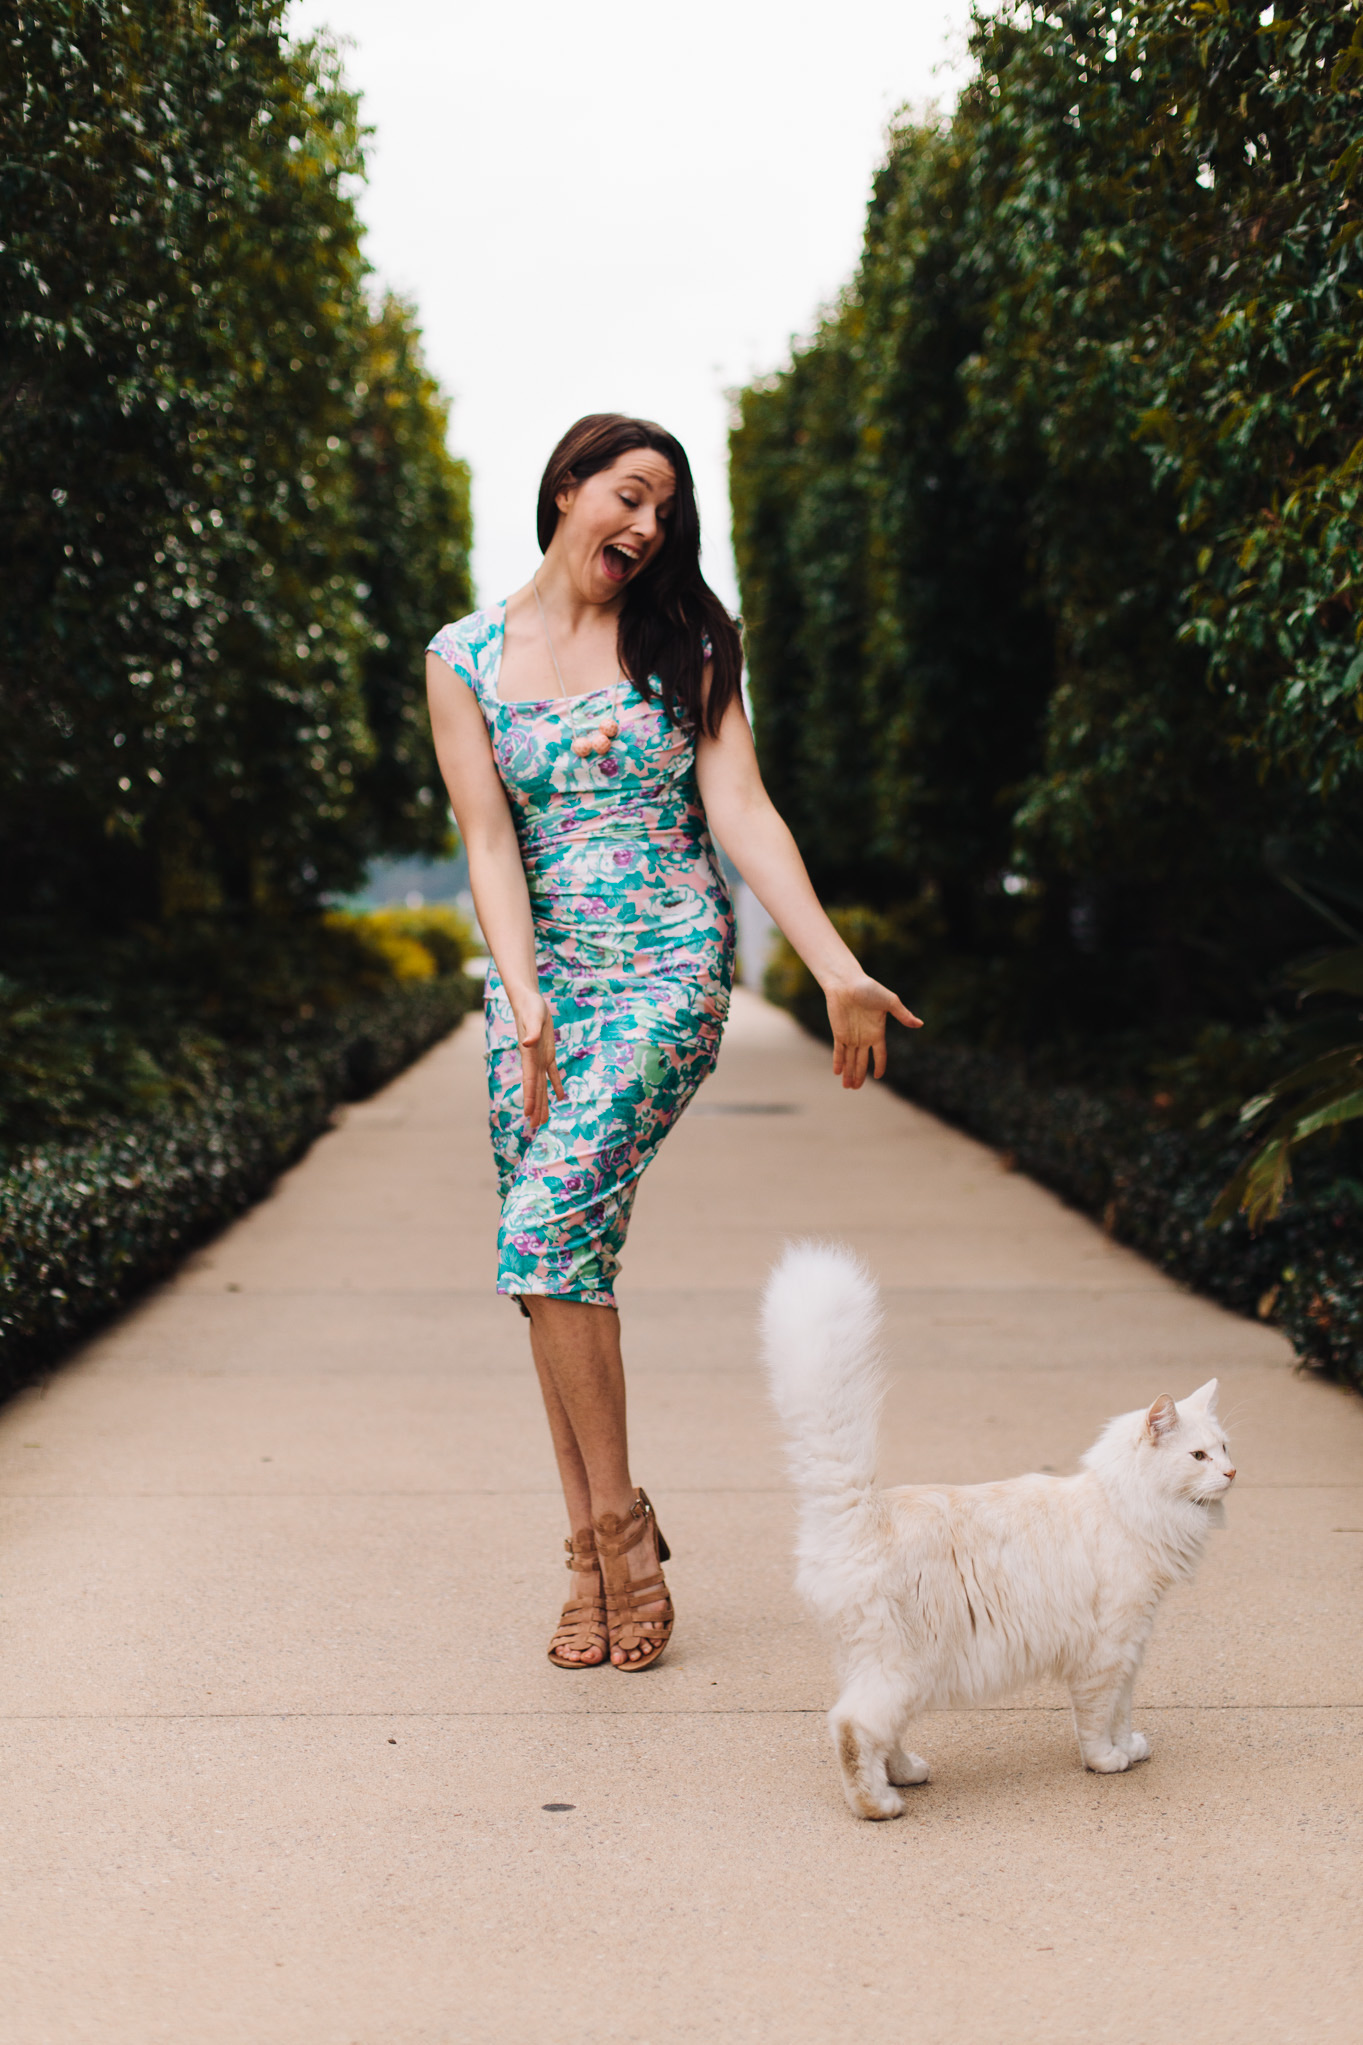
 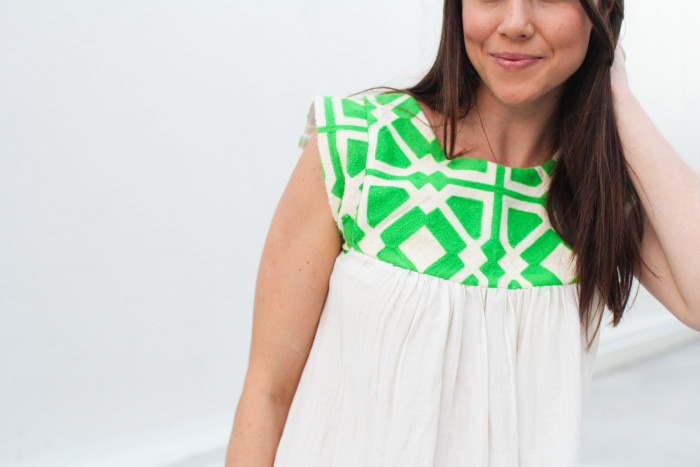 Oh my! I almost forgot to touch on the Green-Sleeve vs White Sleeve debate. Not quite on par with the Gold & White or Blue & Black debate, but still. During the making I got stuck not knowing whether to continue the green fabric across onto the sleeves or sub in some white sleeves for contrast. I posted a picture on Instagram with one of each and asked my most trusted advisers, you lot, for advice. Your responses kept me entertained for hours. Some solid points were made too. Team white said it was more ‘classic’ and ‘balanced’. Team green said it was more ‘fashion’ and less ‘folksy’ and that white was more ‘little girly’. Team green was infinitely meaner. In the end, I went with green and love the contrast between this structured shoulder section and soft and flowy down below. So, thanks, you’re the best.
 The lovely ladies at Tessuti have offered up a hard-copy of the Alice pattern to give-away to one of you! Maybe you have some home furnishings that you’d like to hack up too? To enter, leave a comment and I’ll draw a winner by random number on Friday. Open world-wide.
S.E.W.N.
10/03/2015
Alice Top + Give-away – Closed
24/02/2015
Happy New Year and a Galaxy Dress
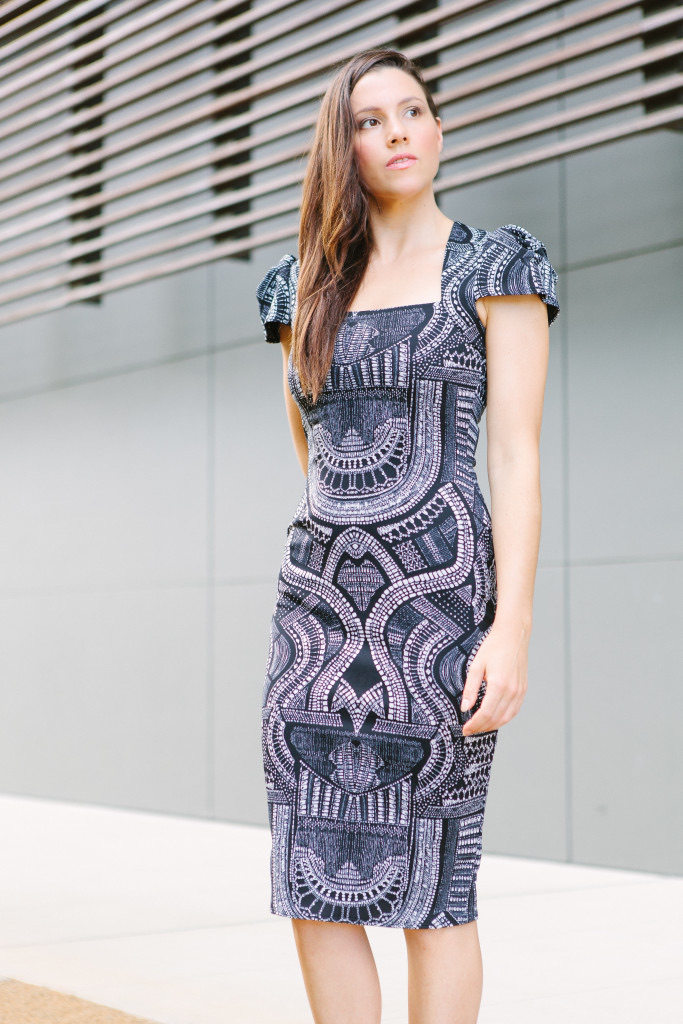 Well hi! Did the new year begin already? Its been a sluggish start and I admit I have a huge backlog of hand-made lovelies to share, starting with this one, a second Vogue 8280, my beloved, aka the Roland Mouret Galaxy Dress in a particularly galactic looking fabric. I can say straight up, that this project was a queue-spiter (aren’t all the best projects?!). I was part way through my first attempt at sewing a capsule wardrobe, for last Spring, which had started giving me the shits when I realised I’d bitten off way more than I could actually sew in a season. If there is one thing I do well it’s setting the bar un-reasonably high and getting upset when I can’t meet said expectations. Still, the Spring Wardrobe wasn’t a complete failure, I got about half of the things sewn, which I will share over the coming weeks. And I did also learn a lot about how I want sew and how much I can realistically produce in a season without the sew-jo taking a beating. It is not twelve items in three months, not it is not. More on this soon.
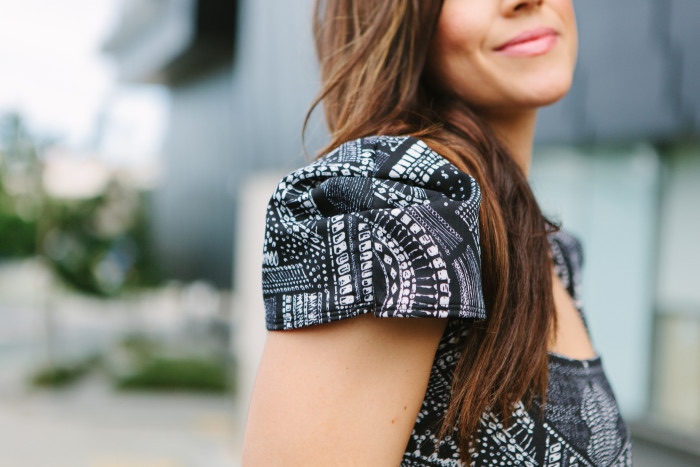 Now, the story of this fabulous frock is a great one! Sometime last Spring, I received a very lovely and random email from a woman in Australia, announcing she had set up an online store, Designer Fabrics Australia, to sell off her stash of beautiful gourmet fabrics acquired from around the world and could I please help her get the word out to the people of sew-landia! But of course. The timing really couldn’t have been more perfect with the Brisbane edition of sewing get-together, Frocktails, coming up and the fact that I was desperately needing a sewing pep-up in the face of Perceived Spring Wardrobe Failure. As all the best relationships start, Liz sent me some fabric and I vowed to love and hold it forever more / make it into something spectacular. Which was not hard considering it’s freaking intergalactic, geometric SCUBA! Because of the nature of selling ones stash, the pieces listed at Designer Fabrics Australia are mostly once-off cuts, with enough meterage to make a garment but no more once its gone, so if you see something you like you have to pounce. Alas, there is no more of this particular fabric but there are new pretties listed weekly by designers such as Anna Sui, Oscar De La Renta, Isabel Marant and friends.
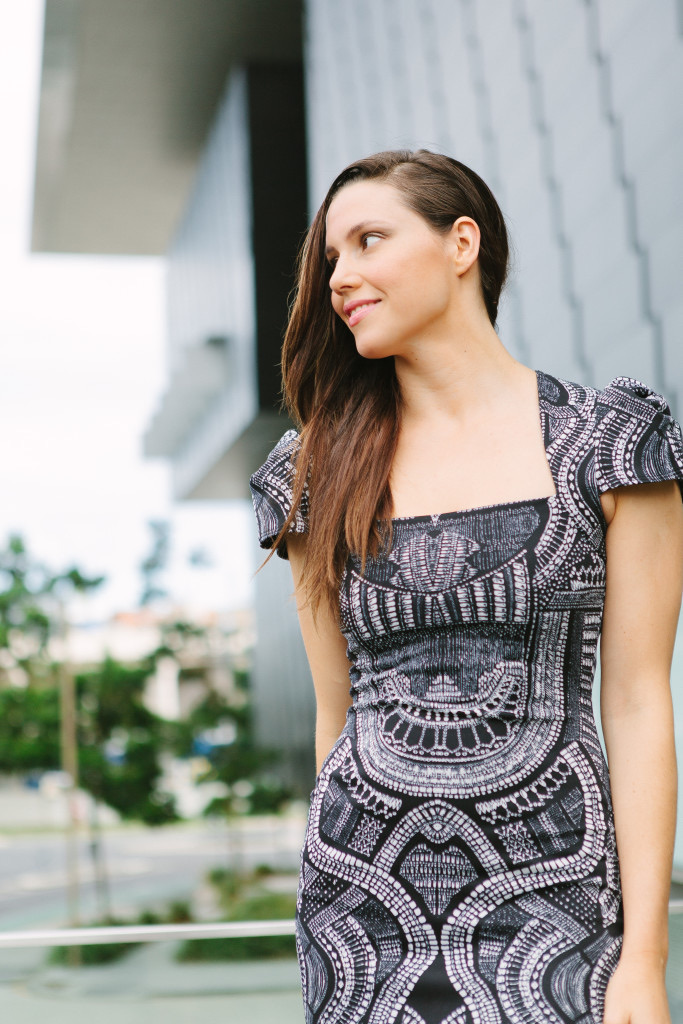 Scuba, aka, Neoprene, faux wetsuit material is pretty exciting stuff to sew with. It’s thick, but not too thick, stable and co-operative (I feel like a dirty one-liner belongs here but I’m all out of sass today) much like a ponte knit. If you want to know more, I preached its joys with my previous scuba project here. And I knowwwww its a novelty and probably one of those trends we’re all going to look back and laugh at in the next few years still I have not had my scuba fill, it really is so fun to play with. Quite a few online fabric stores are stocking scuba, like Emma One Sock and Britex Fabrics among others. The thing I love is that it holds it shape perfectly and makes for super plumped up pleated sleeves like these ones. Volume Baby!
 The most exciting bit of all was getting to tap into my SEWERS INTUITION!My first Vogue 8280, I followed the instructions religiously as I tend to do with most things because I get scared to go off the path. But because I was feeling wild and unchained and using a stretch fabric I figured I would just size down to a 10, remove all the darts, join the bodice and the skirt, leave out a lining and eliminate a zipper. And tie it up with a bow, honey. It was all ‘I’ll just tape this here, pinch that out there, see if this will join up here’ and so so rough. I felt like I was on a reality sewing show. Will she make it? Will it work? There’s just so much potential for things to go wrong when you’re doing a hack-job. The whole time I felt like I was following the quiet guidance of that little inner sewing guru, the one who chimes in at helpful times with things like: ‘ Girl, do you REALLY want to place that uterus shaped print right THERE?’.
 Without a lining, the whole construction changed and the instructions became even more useless than they were to start with, although they were absolutely necessary for the sleeves, which have a little contraption underneath for extra puffed-up-ness. My first Vogue 8280 took the good part of a week. Condensed, it would still have been a day or two worth of sewing. Sub in scuba and it sewed up in an afternoon and a night and mostly on the overlocker. I then switched over to the coverstitch for the hem, sleeves and backline, which sped things up again. Anyway, suffice to say, there are days when you become your own sewing legend!
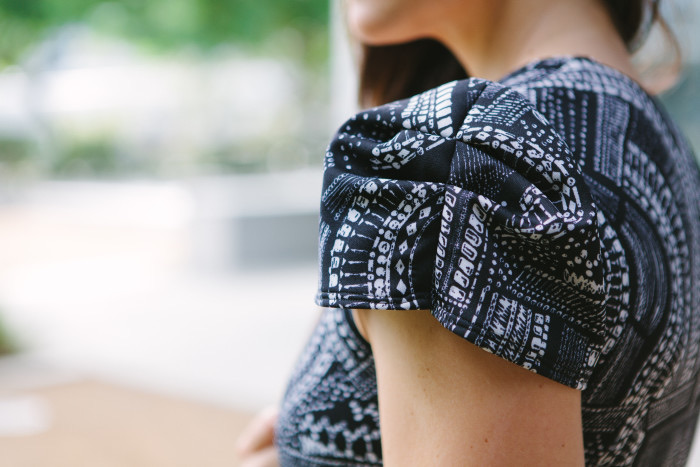
Photography By Daniel Maddock
25/09/2014
DIY Leggings + Wrap-front Blouse
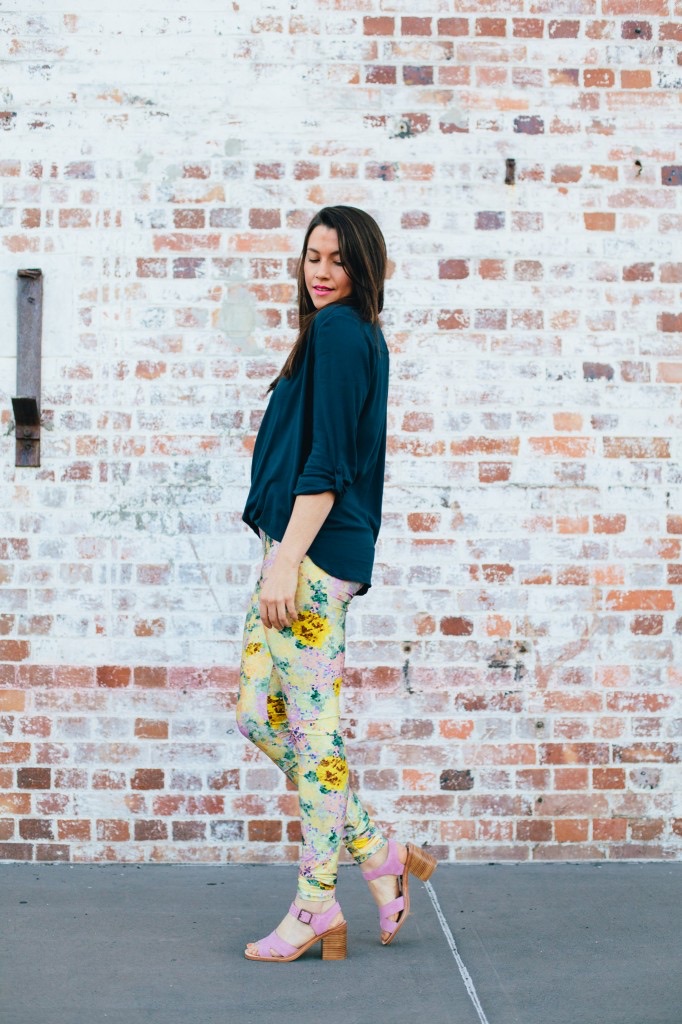 There’s nothing, I’ve decided, quite so annoying as being restricted in some way by the clothes you are wearing. Whether they be too tight, too short, too good or too silky, it’s all bad. Now, if you’ve been here for the ride thus far you may have noticed I have a small penchant for silky things, specifically, silks. But here’s the thing…many of my most favourite silk items hang, rarely worn, in near-mint condition in my closet. Which is a bit sad considering how much time and love got poured into them. I would like to wear them on a daily basis if it weren’t for fear of small people grime and the fact that I could still probably do with a bib when eating sometimes. When I petitioned (mostly against myself) to sew more ‘fiercely attractive mum-friendly clothes‘ this year, I didn’t know what that would look like. But I knew what was needed were things I could throw on, go about the day’s mostly un-glamorous activities, all the while looking put together, or at least like I’d changed out of pyjamas. Finally, with this legging and blouse combo, I feel I have arrived! At a craggy isthmus somewhere between BabeTown and MumTown.
 In hopes of reigning in the silk-monger within, I’ve been looking out for some happy replacement for silk; something drapey and nice against the skin, without the omg-dishwater-on-my (insert most-beloved item) factor. Step in Viscose, Rayon and whatever else is in this glorious man made fibre! I saw it, petted it, decided it was the softest, most buttery SOLID I ever laid eyes on and stowed it away for a worthy project…something like the wrap-style Dotty Blouse by Style Arc. You may have seen this deep cross-over silhouette doing the rounds, see here and here. I saw it, loved it and before I knew what was happening, the pattern was making it’s way to my house. McCalls have put out a similar blouse and Burdastyle released this cute variation but it was the line drawing of the Dotty that sold me.
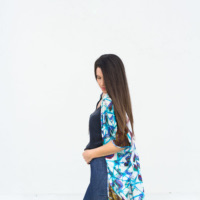
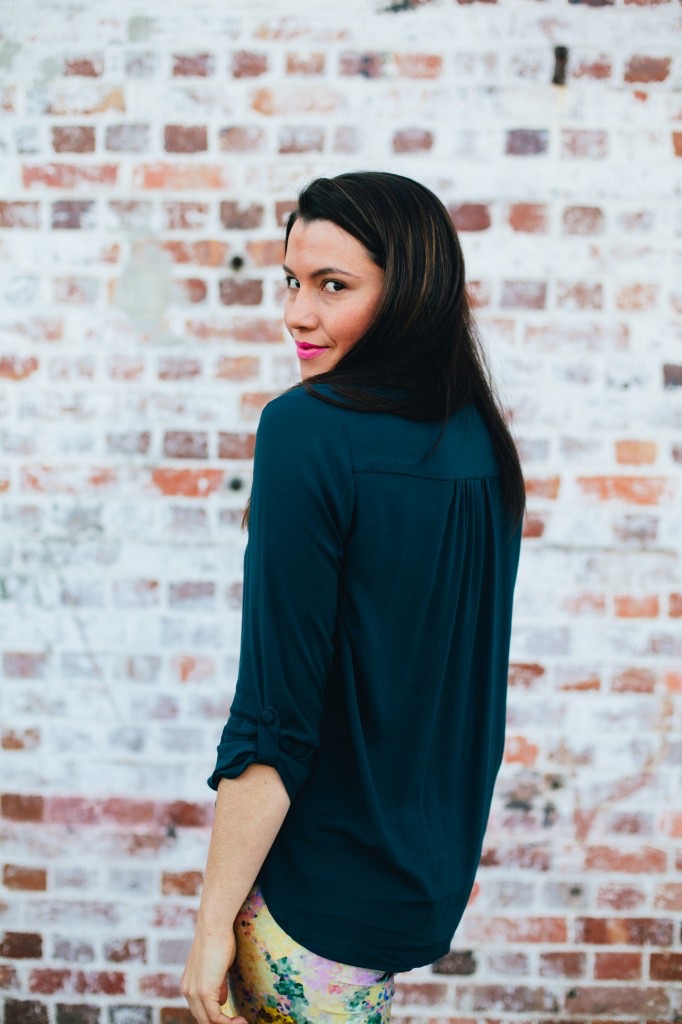 So much to love here! A double yoke, gathered back, good butt coverage and a cleverly designed front with the wrap section cut as one whole piece. The instructions imply you can sew a double yoke in your sleep and with my experience of double yokes being mostly of the breakfast variety, I decided to seek help. I followed this tutorial on the Style Arc site, up to the point where it became obvious that attaching a double yoke in a normal scenario, where the shirt front has two pieces (like a normal button up) is one thing. Attaching a yoke for a shirt where the front is made of one long joined piece of fabric, is something else all together. Also, the tutorial makes sense for a shirt that would eventually have a collar attached, in which case it is no problema to leave the neckline raw. But for the collar-less Dotty blouse, I realised that the neckline would have to be sewn shut at some stage in the yoke attaching otherwise it be left raw foreverrrr! To be honest I don’t really remember how it did it and wish I took better notes on the process but just know, it’s possible. Your double yoke will be okay. It will, however, take some manoeuvering that I cannot explain without wild hand gestures.
 This is actually my second version of the Dotty Blouse. I thought I should probably muslin it (see! I can be a responsible) before cutting into this fabric. The pattern recommends silk, crepe or a jersey knit. After muslin-ing it in a feather-weight cotton voile, I learned that lightweight and good drape are not one and the same. The recommendation for jersey knit should have been the give away that whatever fabric you choose, it has to hang-well (not the same as well-hung). In fact I don’t think it mentions light-weight anywhere. No it does not. I made that up. But having now sewn the Dotty up in something lightweight with no drape and something with lots of drape, the drapier fabric produced a front section that cascades instead of puffs out and an all round nicer looking top.
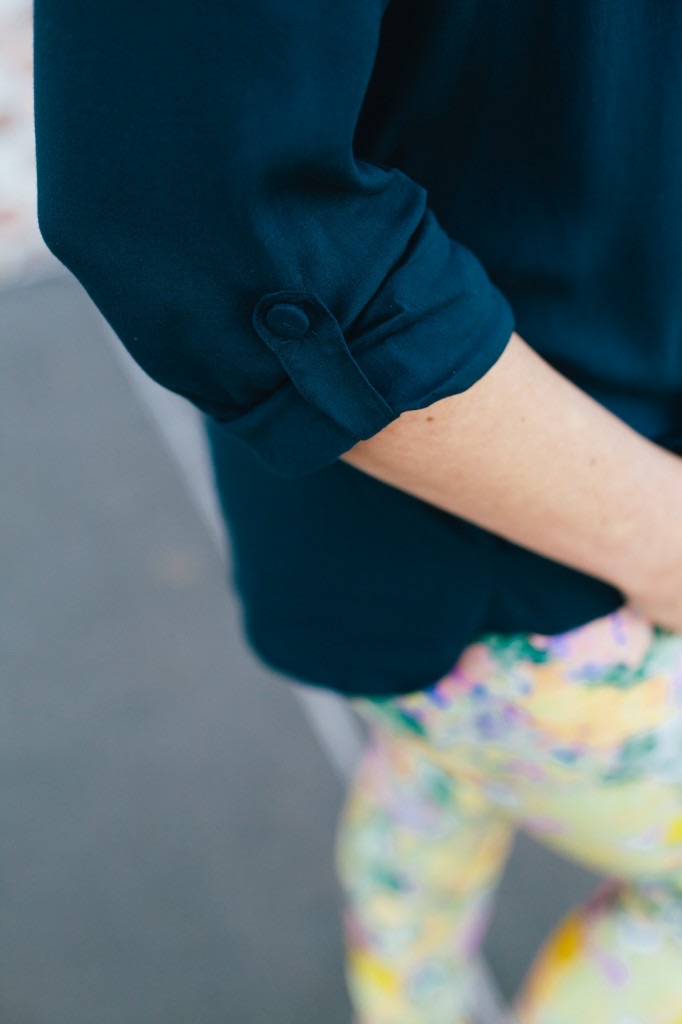 The sleeves are my favourite! The instructions are to gather them into narrow bands and left long. But I liked rolled up sleeves. I like their utilitarianism. Especially on a top with so much party in the front. Plus I thought that the addition of sleeve tabs could take this top some place special. So, after asking the deep questions about sleeves, I omitted the sleeve band, sewed a straight hem and ‘borrowed’ the sleeve tabs from another pattern. For the buttons, I covered some regular flat shirt buttons using a great little technique I learned here. I much prefer their compactness over the clunky store bought self cover buttons.
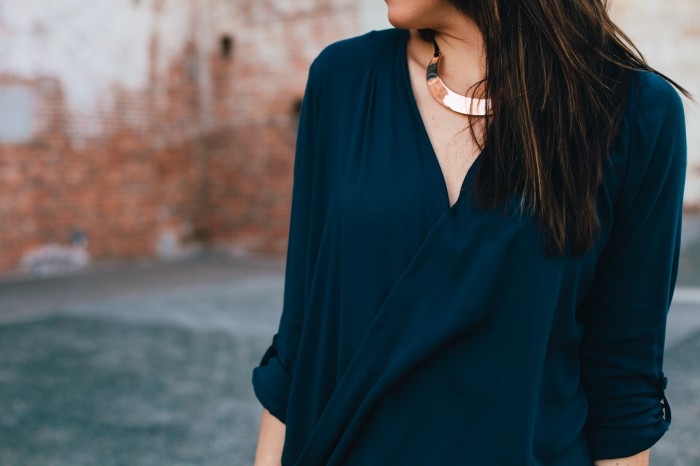
 Now seems a good time to address the pink elephant in the room: how is that front section staying shut?! Well, it’s not really and even standing relatively still on a not windy day, my photographer copped a few eyefulls. So, short of wearing a velcro bra, I’ll have to go back at attach a press stud, which I was trying to avoid but is what the pattern suggests anyway. I should also point out that even with the double yoke fussing, it was possible to French seam the whole thing, which makes this one of my most meticulous and most un-hand-made looking pieces yet. Save for a few dodgy bits sewing the curved hem…
 Short and sweet for all involved, DIY leggings are the ultimate quickie project! These here were my demo pair for the Leggings Workshop I taught at the recent The Craft Sessions weekend. I chose leggings because they’re beginner friendly when you’re starting out with knit sewing and instantly satisfying. At the start of the workshop, I told the ladies they’d laugh once they realised how straightforward leggings are: one pattern piece + 4-way stretch fabric + a ball point needle + stretch stitch = DIY legging fabulousness. Anyway, they all produced beautiful leggings (some I wanted to snatch for myself) and left with new sewing confidence!
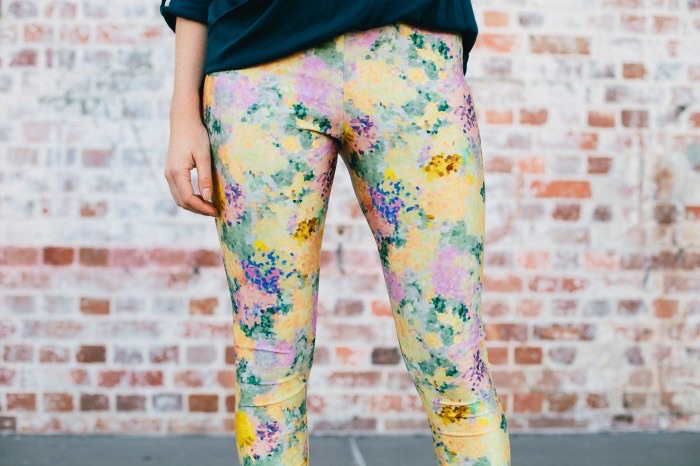 Now that leggings season is coming to an end here, these are finally making it to the blog. The fabric is swimwear lycra from here, which I really don’t mind against my skin. My favourite sources for leggings fabric are Tessuti Fabrics, Wanderlust Fabrics, Girl Charlee and random Etsy shop, Fabulace. I used the same Burdastyle pattern as this pair (now retired to pjs), which I love for the extra length in the legs and torso.
 (good butt coverage)
14/09/2014
Two-Piece Scuba Set // Ada Spragg + Britex
Oh me oh my! So I knew late August to early September would be a cracker, what with the three patterns to sew in preparation for workshops at The Craft Sessions retreat + this final two-piece + a tutorial in conjunction with Britex Fabrics. What it was supposed to look like was pulling it off with grace and flare and my-not-previously-mentioned superpowers, in the two days per week that my littlest has kindy, all the while bringing you regular posts here. What it actually looked like, during that time, was one broken arm, courtesy of my littlest, emergency surgery and a hospital stay where I must have attracted some sinus thing, timed especially for my flight which resulted in a mass-pattern tracing right up until an hour before I left. Life stuff and lots of it. Whereas last year I pushed and pushed, this year I’m trying to practice the art of letting things go in the interests of self-love and its resulting good mental health. Which I guess makes me two weeks not-so-fashionably late to my own Two-Piece Set-Acular. Ugh. Thank you for waiting. AND for your two-piece sets, which I cannot wait to share. There’ll be a mass two-piece round-up hitting the blog soon, sooner than this set but I won’t set a date in case someone breaks a femur.
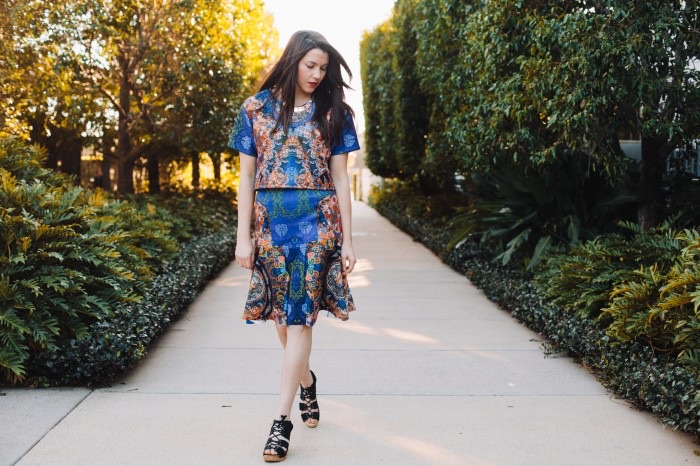
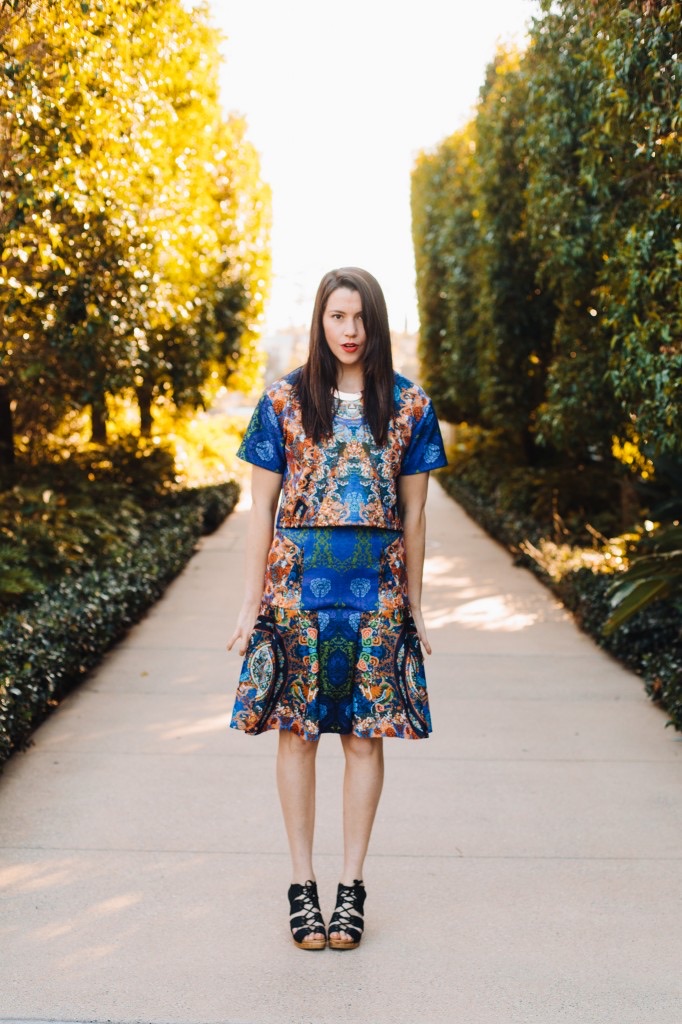
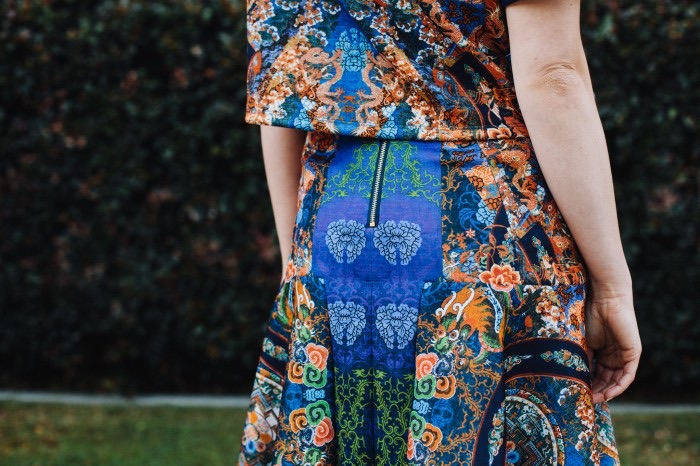
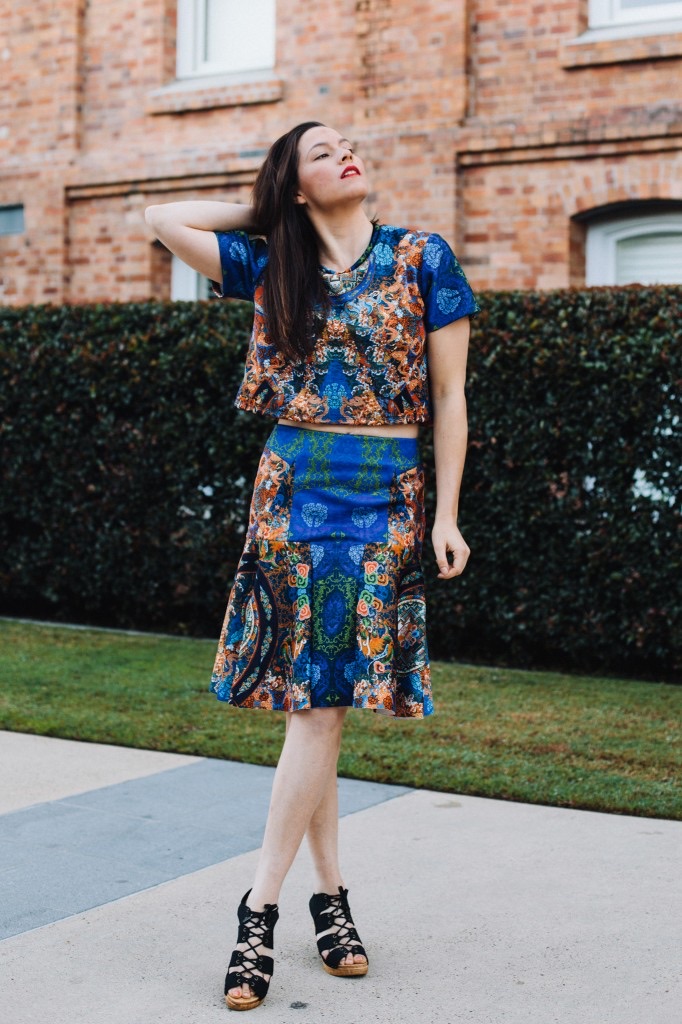
It’s hard to pick favourites with your hand-made closet, but this here, is my favourite make this year! One, it’s a two-piece, two, it’s made from SCUBA (amphibious makes are all the rage) and three, both Simplicity 1366 (top) and Vogue 9031 (skirt) just worked. This is my second go at Simplicity 1366 (previously sewn here) and first attempt at this freshly released Vogue pattern. Just from the pattern cover, I thought it had potential. Okay, I lie…I knew it was going to be AMAZING! Hellooo?! This shape + my shape + this shape + scuba = heaVEN! It works in the other direction too, equally there are pattern covers I look at and know will be terrible on me. But this fitted through the hips, flared out below silhouette is really fun! Kind of like a hybrid pencil / A-line I think it creates the perfect balance between clingy and, well, not clingy. There are four side panels made up of quarter circle skirt pieces that lend themselves to fabrics with volume, like scuba or ponte. I love it so very much I’m now dreaming up a second version in some solid fuschia ponte from the stash and / or a leather version, since the pattern is actually designed for a woven and includes some tips for using leather.
 A fun sew on both accounts and I want to stress the fun part because, if you’re like me and you harbour a lingering association between beautiful hand-makes and a certain amount of hard-labour / cussing, it’s always exciting to be proven wrong! What made these pieces both so fun were several things: firstly, scuba (or neoprene) is, quite literally, wetsuit material and a dream to sew with. It is stable and meaty (yes I did just say meaty) and orgasmic to cut into. Cannot tell you how good it felt to man-handle a fabric on the back of several flimsy fabric projects. And speaking of man-handling, the other perk is scuba loves the serger. Now I for one have never sewn an entire knit project on the serger. Didn’t entirely trust the stitching would hold together. But with a fresh new serger to play around on ( a birthday up-grade) and being completely time poor I had a go…HALF AN HOUR, my friends, from start to finish. Even the skirt, which couldn’t be sewn on the serger alone (lots of seams to be left open), slapped together in half the cutting time.
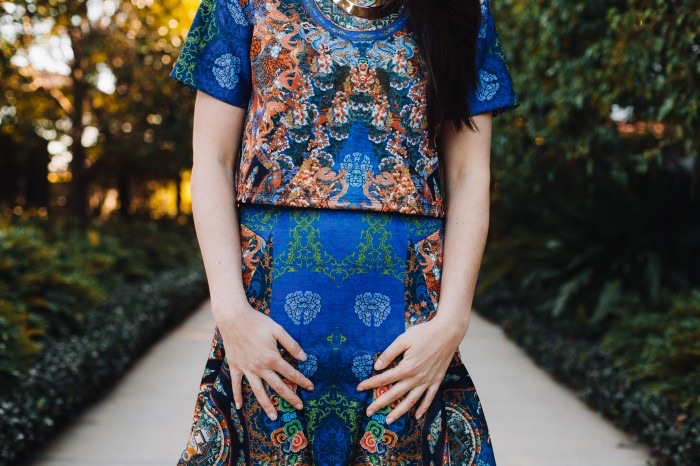
Ahhhh the cutting time…deserving of it’s own paragraph! This beautiful intricate ‘Chinese Dragon and Lotus‘ print scuba was supplied by Britex for whatever I deemed suitable. A two-piece set…DER! What I didn’t pay attention to in the ‘ideas stage’ was the perfectly symmetrical nature of the print. If we include the time spent staring at the fabric and nudging pattern pieces around on it with my toes, in the cutting time then it took 12 hours. I got so frustrated the first night I tried to cut, I had to walk away, watch some consolation Sex And The City and return to it in the morning. Which turned out to be the best call ever! Okay so the cutting time turned out to be three hours and the challenge was not only getting individual pattern pieces to match their opposite but trying to get a total of five top pieces and twelve skirt pattern pieces out of one full repeat and two 3/4 repeats of the design. The only way I could make sure things were symmetrical was to lay the fabric out flat (as opposed to doubled over) and cut each piece separately. For pieces marked ‘on the fold’ this meant, cutting one half, flipping the pattern piece over and matching up points in the design before cutting the other half….hence the three hours!
 One of the other nice things about scuba is you can be really lazy with hemming. You know, make your unfinished hems a design feature! Vogue 9031 calls for the hem to be left raw. Considering the pattern is meant for wovens, I thought this was a curious “”feauture””, what with fraying and longevity and all. But for now I think the unfinished hem looks pretty appropriate with the Scuba although I may take to it with a coverstitch eventually. There are so many things to love about this pattern: the front and back are made up of intersecting pieces, which make for a super sweet feature and flattering lines. The waistband has a schmick facing finish, which I lurve! Size: I made my usual Vogue size, a 12. Mods: The 12 was good, but I ended up taking it in at side seams from waist to hips. Sew-tricky: At the risk of sounding totally masochistic I loved the challenge of getting those corner semi-perfectly square, where the side panels meet the front and back. The first one was great, the second was a little dodge, but by the fourth one I was sad there weren’t any more. You can see at the front the fabric is pulling across this area a bit which I’m sure is to do with using a stretch here.

 Simplicity 1366 is a great pattern on its own, but I wanted to modify a few things to make it more like a super comfy RTW boxy crop I have. I took the shoulders in a fraction, shortened the sleeves, raised and scooped the neck and added a binding / ribbing. Because it’s a knit, it didn’t need any sort of closure but I thought an exposed zipper would make a banging feature on both the top and the skirt. I started with the skirt, and followed this tutorial up to a point, which covers inserting an exposed zipper when there is a seam running through the middle. For the top, to insert an expose zipper, literally in the middle of no-where, I had a play around and am so very proud to come up with this working tutorial for inserting an exposed zipper into scuba. Maybe the Sewing Greats would cringe at my errr ‘technique’ but hey it’s simple to follow and the result is pretty darn fine.
 So there it is, the last of the two-pieces! It’s been fun. If you’re thinking about dabbling in some scuba sewing of your own then you should jump in! I’ve been collecting scuba sewing inspiration here and have included some links to Scuba fabric resources too.
16/08/2014
DIY Birthday Dress + Furry Bonus
 Just so you know, you’re in the presence of a ‘big deal’ dress here. Possibly even bigger deal than my actual birthday and being a Leo and all, that’s kind of a big deal. But I’m a chivalrous beast at heart, so I will step aside and let the dress sing…’It’s my partyyyy, I’ll DIY if I wannnnt tooo’. I’m sorry, it has terrible taste in music. Grab your maracas…this here is my first official hand-made birthday outfit in the history of ever! Momentous on it’s own, but now I feel I’ve arrived at some kind of winners circle where the seasoned Birthday Dress Makers reside…
 Which is cause for celebration! I mean Birthday outfits are a pretty important business. And maybe I chose the wrong outfit, maybe it was a bad astro crossing but last year I had a definite case of the birthday blues and if you’ve ever felt sub-par on your birthday, you’d know that it is truly suckfull. So this birthday, 28 by the way, was gonna be fabulous! It HAD to be fabulous! For a few years now I’ve been observing this really lovely tradition amongst the sewing community of DIY-ing your own birthday outfit. And each year I’ve toyed with the idea and each time gone the ready-to-wear option. Unlike sewing a swimsuit or jeans or lingerie, making a birthday-worthy outfit is a sewing milestone I didn’t even know I had. But when you voluntarily choose a hand-made option over something store-bought for your big day, it’s a big f$%*ing fabulous deal!
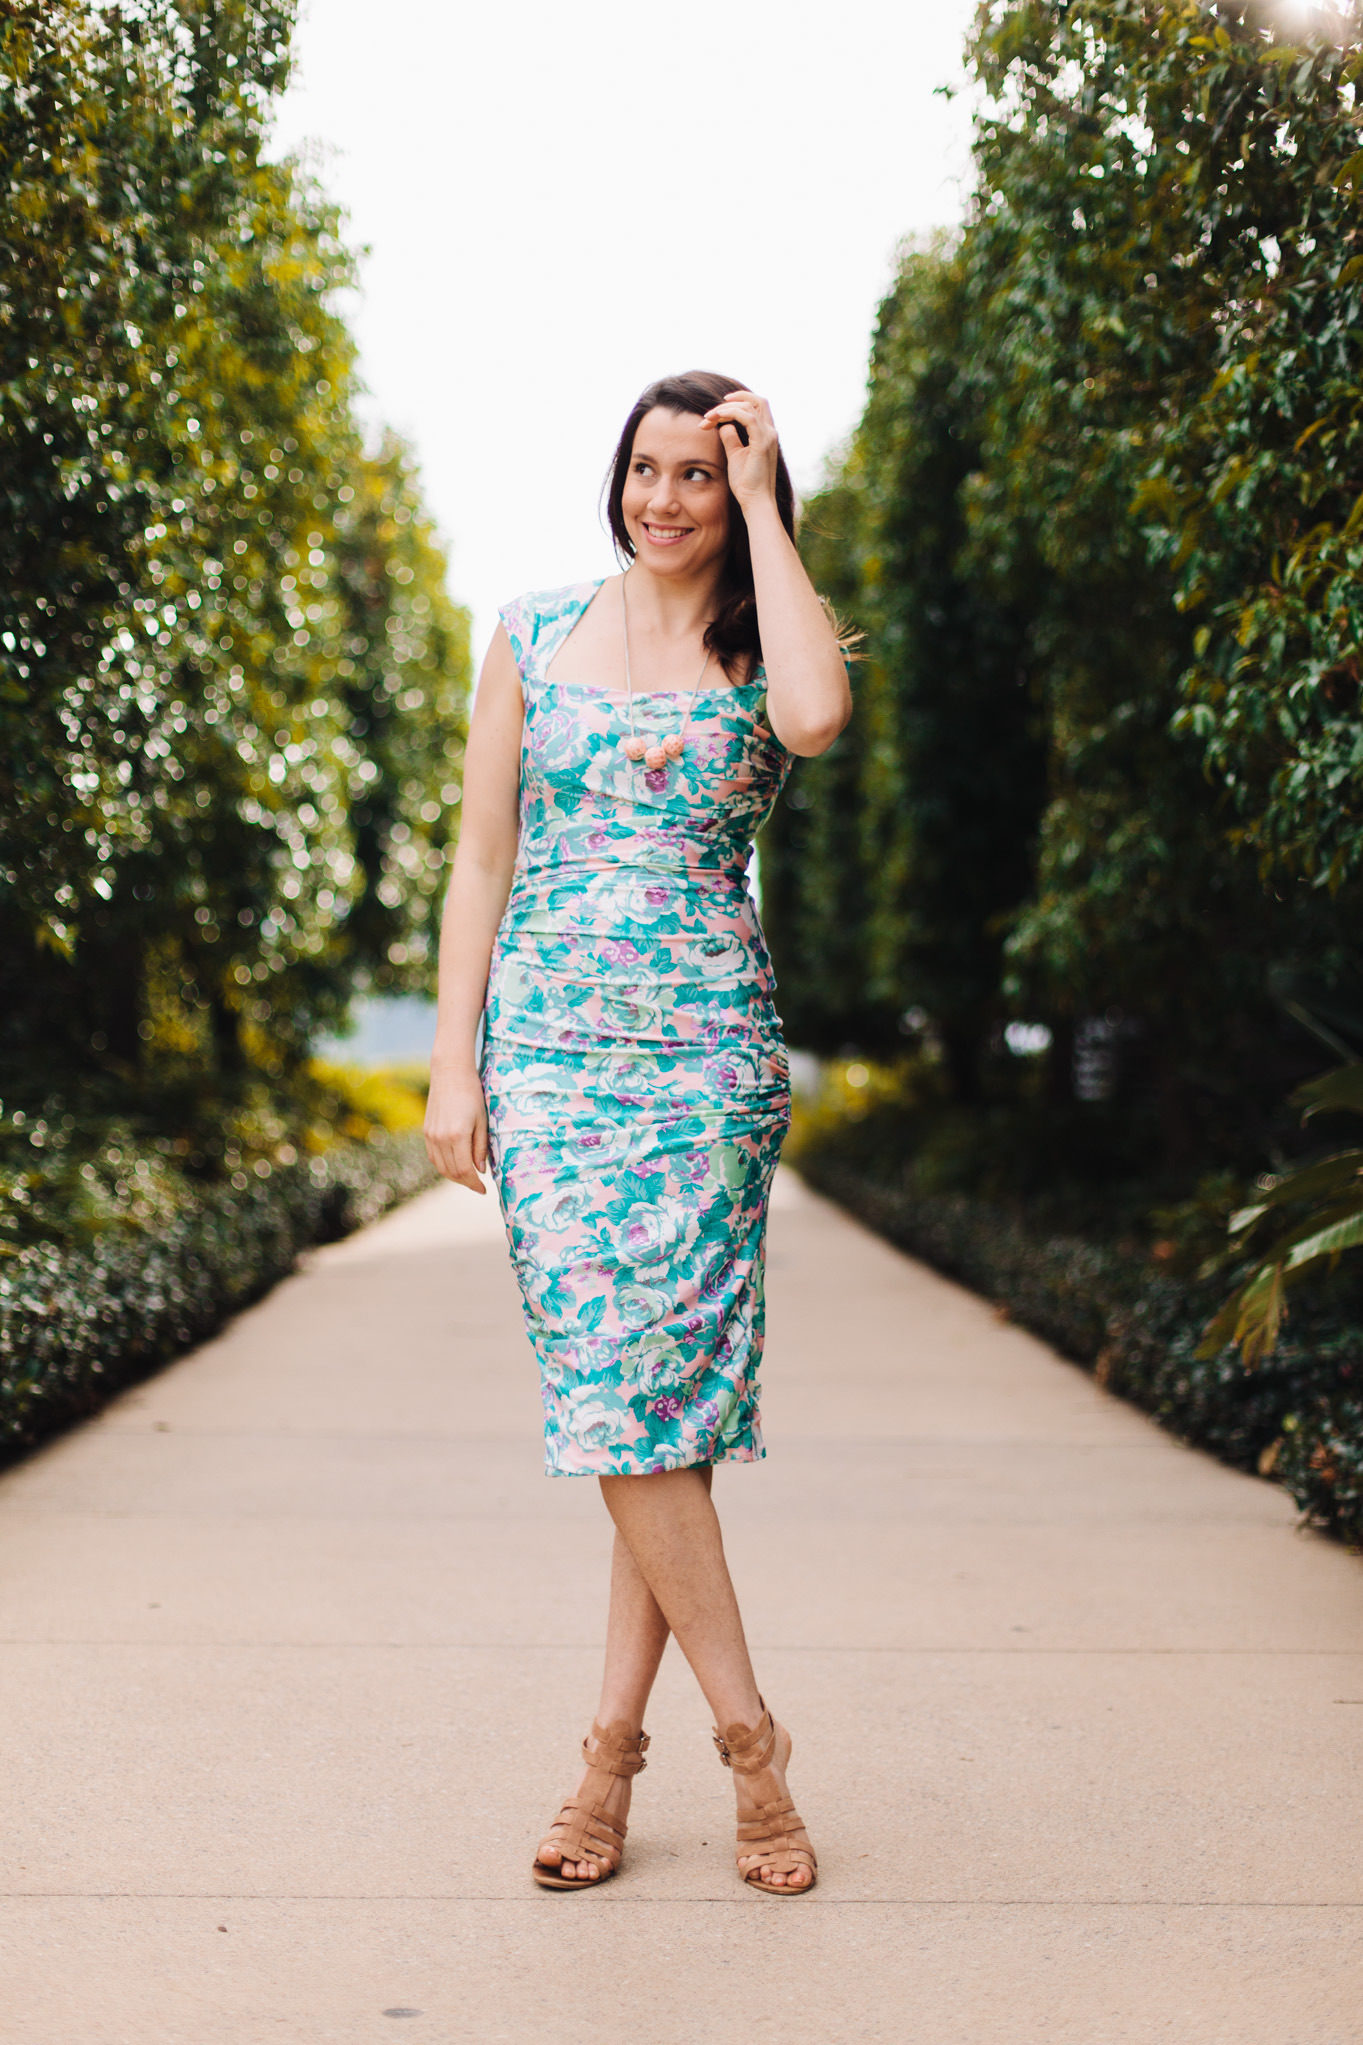
 Like all good birthday frocks, this one has a story. A tale of sewing triumph! But first, the deets. The fabric: a swimsuit lycra by one of my fav Aussie swimwear / fashion labels Zimmerman, and pretty much the only way I now have a piece of ‘Zimmerman’ hanging in my closet. The Fabric Store ended up with a few end-of-rolls of their swimwear fabric this year and I picked up a couple of special pieces, as you do when you unearth a trove of amazing lycra knits, but got slightly more of this one, with no particular plans in mind. Update: This fabric can also be found online at Tessuti right here! The pattern: Burdastyle Gathered Dress. Aka, my favourite broad-shouldered girl’s neckline and pencil silhouette in one pattern. With the addition of just a few harmless gathers, not so different from a Bombshell, right? RIGHT?!

 Errmm, not quite. This is probably the part where I tell you that this is actually my second attempt at this pattern. It may have something to do with the 60 pattern pieces you need to tape together. Wait, did you say SIXTY?!!!!! The first time I printed it out, over a year ago, I thought I must have made some mistake and printed it twice. Nuh-uhhh girlfraand, those sixty pages are all very much meant to be there and they’re waiting for you with your kinder scissors, sticky tape and sad face. And it may have had something to do with the 15 pattern pieces (that’s before you cut two of most), within those 60 pages, half of which are for the main fabric and half of which are for the lining. I’m sorry, did you say LINING?! Isn’t this a knit dress?! I didn’t sign up for lining. Next you’ll probably tell me it has DARTS! Oh, I see, it has darts. And it may also have something to do with the picture-less instructions, which is standard for Burdastyle, but all of which meant that last year I got as far as taping the 60 pages together. As for the “”instructions””, I could not even begin to get my head around WHY there were two layers of fabric, let alone how they merged together into one dress and what was all this talk of draping?! I actually wondered if maybe the pattern included two separate dresses and one of them was the one I was supposed to make. All in all, a total head you-know-what. So I did the thing that annoyed me almost as much as the pattern itself: I gave up. And donated the 60 pages, to Archie’s paper aeroplane factory.
 So, if you’re wondering what was so different the second time around, this is the truly exciting part. A year on, and obviously in a different sewing head space altogether, the thing that got me started again and past the taping stage was this glorious vision of that pattern with this fabric. I could not let it go to the point that I was just like ‘NO! This is going to work DAMMIT!’. Between this dress and these pants it has felt like a huge sewing confidence boosting month. Call it determination, stubbornness, whatever; a pain in the ass in everyone else but an absolute asset in the sewing room. And just personally, I think that sewists makes for better lovers: when you’ve just conquered a pattern the size of the Serengeti and ended up with a svelte hand-made birthday dress, you don’t need someone else to tell you how great you are. You KNOW how great you are! You just became your own hero. Which sounds lame as I type it now but pretty sure it’s healthy. Sewing = life skills!
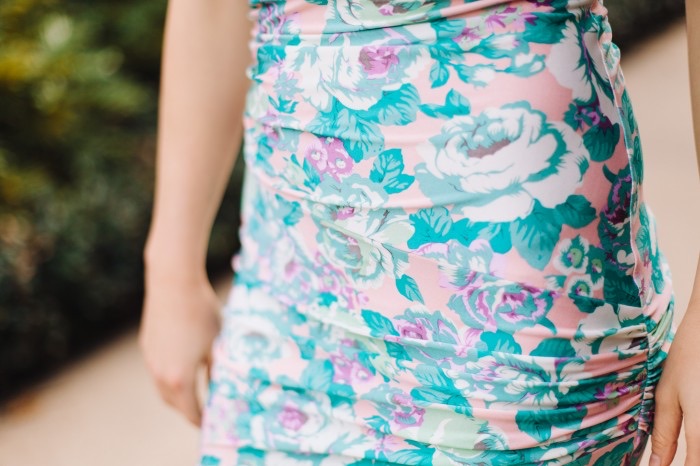
 Dramatics aside, the instructions were o.k. and the construction was complicated but interesting. I eventually figured out that you have two dresses worth of fabric for a reason. The whole dress is made up of triangular pieces, which are gathered in different sections. Every gathered outside piece has a corresponding lining piece and the job of the lining layer is to sit flat against your skin (hence the darts, though I’m still not convinced they were necessary) and act as a base for the draping outside layer. So before you sew the triangles together into something resembling a dress, first you have to gather every individual outside piece to a particular length, which would then match perfectly in size with it’s lining piece, and you sew them together. Each little bit that worked out gave me confidence to move onto the next section!
 This is the first time I’ve made what Burdastyle categorize as a ‘tall’ pattern. Just looked it up and all it means is it’s drafted for a height of 176cm (69 1/4″) and up. I’m about 174cm, so it’s a pretty good length but could easily be shortened too. I cut a size 76, then deviated a little from the rules after that. The pattern requires you to add seam allowances but after comparing the width of the pieces to the width of my finished Nettie bodysuits (awaiting blogging) I made a judgement call and decided to only add seam allowances to the top and bottom edges of the pieces, therefore adding height but not width. A gamble that totally paid off…the fit is so good its not funny.
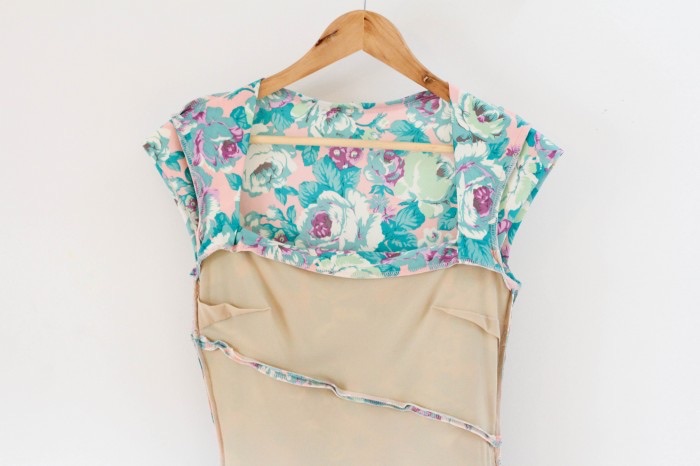
 Technically this dress is also a swimsuit! I used swimsuit lining for the inside layer as it was really the thinnest fabric I could think of that would still make this dress wearable in Queensland spring / summers. I really like the original winter version on the pattern cover and was going to keep the long sleeves, until I realised it’s wearability would be reduced to about 2 months of the year. Instead I traced these little half-cap sleeves of a favourite t-shirt of mine and just love them! I think as miniscule as they are, they create more width at the shoulders which adds more to the illusion of curves. One thing to note, is the original sleeves on the pattern, are extra long, about 20cm, and they’re also kind of poofy at the top, which you may like but I was not in love with. If I was going to make a long sleeve version I’d be pinching the sleeves of the Nettie bodysuit or similar. I was really impressed that the pattern included a facing for the back neckline. Well, you had to draft it yourself, but it was just a rectangle, folded into a smaller tube and sewn in. It made the whole area super neat and pretty and possibly more so after I got to COVERSTITCH it in place, thanks to the lovely Lizzy lending me her baby for the weekend. Oh and while we’re checking out the insides, help yourself to a laugh at my one-up one-down darts. You’re welcome!
 As you can see, things were going pretty swell. And then the Birthday Cat arrived…
 And I was all like ‘awwww’. And he was like ‘should have taken a left back at the park’.
 Still we bonded real good and at the risk of being banished from the entire sewing blogging community forever more…I’m not even a cat person! More a chicken person. Not sure what that says about me. But the rules say if the Birthday Cat comes to visit, you will get three birthday wishes. But first you must rub his belly! And because I can’t tell you what they are, I will just say that one of them sounds like Maybe Sock…
So how about you: would you consider sewing / have you ever sewn yourself a special outfit?


 Bloglovin
 Feedburner
 Feedly
 Kollabora
 In Your Inbox